All Activity
- Past hour
-
You're fortunate to own a lathe, Lemur. I wish I had one. Ran one for Boeing for 20+ years before retiring. I would probably do something like you did as well if I had a lathe, mill. and etc.. Would try to add lube grooves to the i.d. as we did frequently for bushings I made, to allow grease to flow in....... Now, Im not trying to be argumentive, disagreeable, or anything like that here. Just trying to learn, and then make a decision. But I have to think that if the Yamaha engineers (who don't always know "everything", nor are always right about stuff......) went to the trouble to add a grease fitting to the swingarm, then cross-drill a tube full of holes for the grease to travel through, they probably intended for the grease to lubricate something rather than simply take up space to keep water out??? My owner's manual states to put grease in there until it squirts out of the seals on either side of the swingarm pivot, which seems to point to a necessary periodic maintenance requirement. I could see how keeping out the water is "a bonus", but I personally wish the previous owners had squirted some grease in there occasionally. Would've possibly made my bushing removal chore a tad easier. Again, I'm not trying to argue engineering philosophies, or anything like that. I hope I don't come across as doing so. I'm more in the camp of "a confused senior wanting to figure out what's best for my bike and me". I'm trying not to resort to standing somewhere shaking, while wetting my pants....... 😂 Here's a picture of my recently removed swingarm pivot bushing that shows the cross drilling. Are all TY250's inner bushing cross drilled like mine is?
-
Considering you haven't even specified the model or year 😕 might be far more productive if you post a photo of what you have. ... or refer to the parts diagrams and service manuals available online.
-
 Beta250dnd joined the community
 -
I have a beta 250 trails bike no spark changed every part no spark now someone is saying that the stator is in the wrong place has any got a photo showing the right place it needs to be
- Today
-
Titanium header
-

Em 5.7 green light on clutch side switch gear
hmmmnz replied to hmmmnz's topic in EM (Electric Motion)
Ok. Managed to sort it. The wire from the led was crimped to the red wire instead of the switched red/black wire. It looked like a factory crimp inside the loom. Also found a resistor in the same handle bar loom. 🤷 Not sure what that's about. But I'll leave well enough alone. It's working sweet as now -
hmmmnz joined the community
-
Hi guys. I've got a new to me em 5.7 around 2012 (no idea how to figure out the year) Basically the green light is always on. No matter if the battery is switched off or the switch gear is off. The only way I can turn off the green light is to disconnect the wiring at the 2 amp fuse . The handle bar switch appears to work for killing the bike. But the green light remains on regardless. I'm guessing this isn't right. I'll pull the switch apart and have a look. But any advice appreciated. Cheers
-
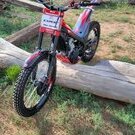
That is a nice picture. It looks like it has less ground clearance than standard trials bikes. Is the correct? The ground clearance looks a bit like a TL250 which I think is one or 1.5 inches less that most bikes.
-
Take a close look at the magnets on the flywheel. They would come loose over time. They would break when the mains became worn.
-
Stock bushings are plastic, I always replaced the stock TY plastics with sintered bronze but that's because I own a lathe. Keep in mind with the bushings made from sintered bronze or self lubricating plastics and properly fitted, the job of the grease filling the tube is primarily to preclude water from entering and creating rust on the steel parts.
-
New piston, engine bolts, seals. Ergal swingarm axle from 95>99 Techno (original 1994 : very heavy steel one)
-
YAAAYYYY!!!! Success!!!!!!! A combination of soaking the inside of the pivot area overnight with WD-40, my goofy all-thread "press", and Feetupfun's suggestion of some heat got things movin' outta there! Thanks so much for your help, Feetupfun! I'm grateful! Truth be told, your posts and comments in other threads have been a help to me even when ya didn't know it. Again, Thanks!!! Now, has anyone here ever used Speed and Sports' bushing kit for a TY250? I ask because it comes with the tube the swingarm bolt goes through (the tube I just had a tough time getting out........ ), as well as the bushings and seals. But in the picture they show, it doesn't appear to be cross drilled for grease to get through like the OEM tube. Can't see how grease from the fitting is supposed to get to the pivot bolt....... Maybe I'll call them tomorrow and see what they say......... I know I could cross drill it myself, or possibly re use my tube, or........
-
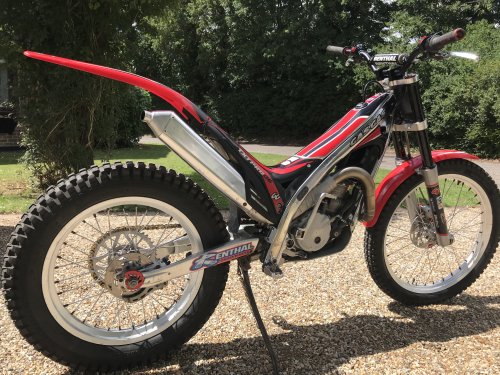
The small (trials style) tank that came with this bike does not fit very well as it extends deeper into the chassis and hits the solenoid and also pushes the cables tight underneath. So I just live with it in its intended config as a Long Ride. It's ultra quiet and perfect for idling around practicing balance!
-
 Washington1 joined the community
 - Yesterday
-
Well, Big Lumpy Poopy Pants! It's lookin' like your idea to heat up stuff might be how it gets done, feetupfun........ My efforts with my all thread puller didn't work out at all. Can't get that inner steel tube to even budge a tiny amount. It's the first time I can recall stripping nuts and all threaded rod without being able to get something to move. I have the swingarm lightly clamped in a vise while soaking in penetrating oil for now, hoping that enough liquid can get through all those holes that grease is supposed to travel through to do some good for me. Judging by how tight this long steel bushing is in the plastic bushings, and how tight those plastic bushings are pressed in the swingarm, I'm beginning to wonder if I should've not even bothered to remove them. It also makes me curious about how reassembly will go as well........ Any tips, words of encouragement, and facts pointing out what a Goober I am are welcomed! Jimmie
-
I found a used Climber CDI on eBay. It should be here by Friday. When get a chance I’ll check the stator/trigger coil for resistance. Hope I figure this out before Sunday, I have a trials then. If not I’ll be on my old reliable SWM!
-
Another great project…can’t wait to see more.
-
I bought this bike 5 years ago maybe 6. First Owner bike. Used stickers and plastics but this bike was in very good condition. It's time to work on this bike ... one of my dream bike.
-
It's true, capacitors can degrade over time and alter the components performance. Only way I was ever able to 100% trouble-shoot a CDI module was to have a second machine and start swapping parts until the problems appeared on the other machine.
-
 Simone_Magrini joined the community
 -
Sono curioso di sapere come procede perche' sono anche io a fare il restauro....
-
Hand made dial mount
-
I'm sure that your puller idea will work. In case this is your next question, the plastic bushes can be hard to get out but they will shrink and fall out if you heat them up with a flame hot enough to burn the paint off the pivot tube.
-
-
Yes I gapped a new spark plug to the specs in the manual. I can adjust the timing a little bit. I’ll try that next, thanks. I did read the CDI will degrade over time and cause it to stay in an advanced timing curve, causing this issue. Was hoping someone else ran into this and fixed it.
-
Okay, I guess I "panic-posted", THEN decided to think........ I recall having done something similar with a length of all-thread rod, some washers, some nuts, a sleeve or two, and used all this stuff similar to how a wrist pin puller/pusher works (gudgeon pin????). Will let ya know how it works out tomorrow. Thanks, Jimmie
- Last week
-
Hi, All! Working on making my recently purchased 1974 TY250 rideable. I'm doing repairs from probably decades of neglect, abuse, and a bit of "Hillbilly Engineering" from the previous owner(s). At the same time, I'm making a few minor "upgrades"; like the Sammy Miller wide footpegs that lower and move the pegs slightly rearwards. This requires removal of the swingarm bolt. While that bolt is out, I thought I'd look into replacing the grease nipple and the pivot bushings. I got the swingarm bolt out after somewhat of an epic battle. Now I'd like to get the long inner bushing out; the one sorta shaped like a long dog bone that goes completely through the swing arm pivot and the plastic bushings. After that, I'd like to replace the plastic bushings, seals, and such. But that long steel bushing I tried to describe above is really, REALLY stuck in there. I don't want to bugger it up as I need to reuse it. How is the best way to rmove this, without doing any harm? If I had a lathe, I'd turn some barstock with a step in it to use as a driver, and maybe try pounding/pushing it out that way??? Any tips from those that have done this before? Thanks, Jimmie
-
That's how it works with any engine that has an ignition pickup coil, yes. ... did you gap the spark plug?


-
Recent Topics
-
-
Classifieds
-
-
TC News Feed