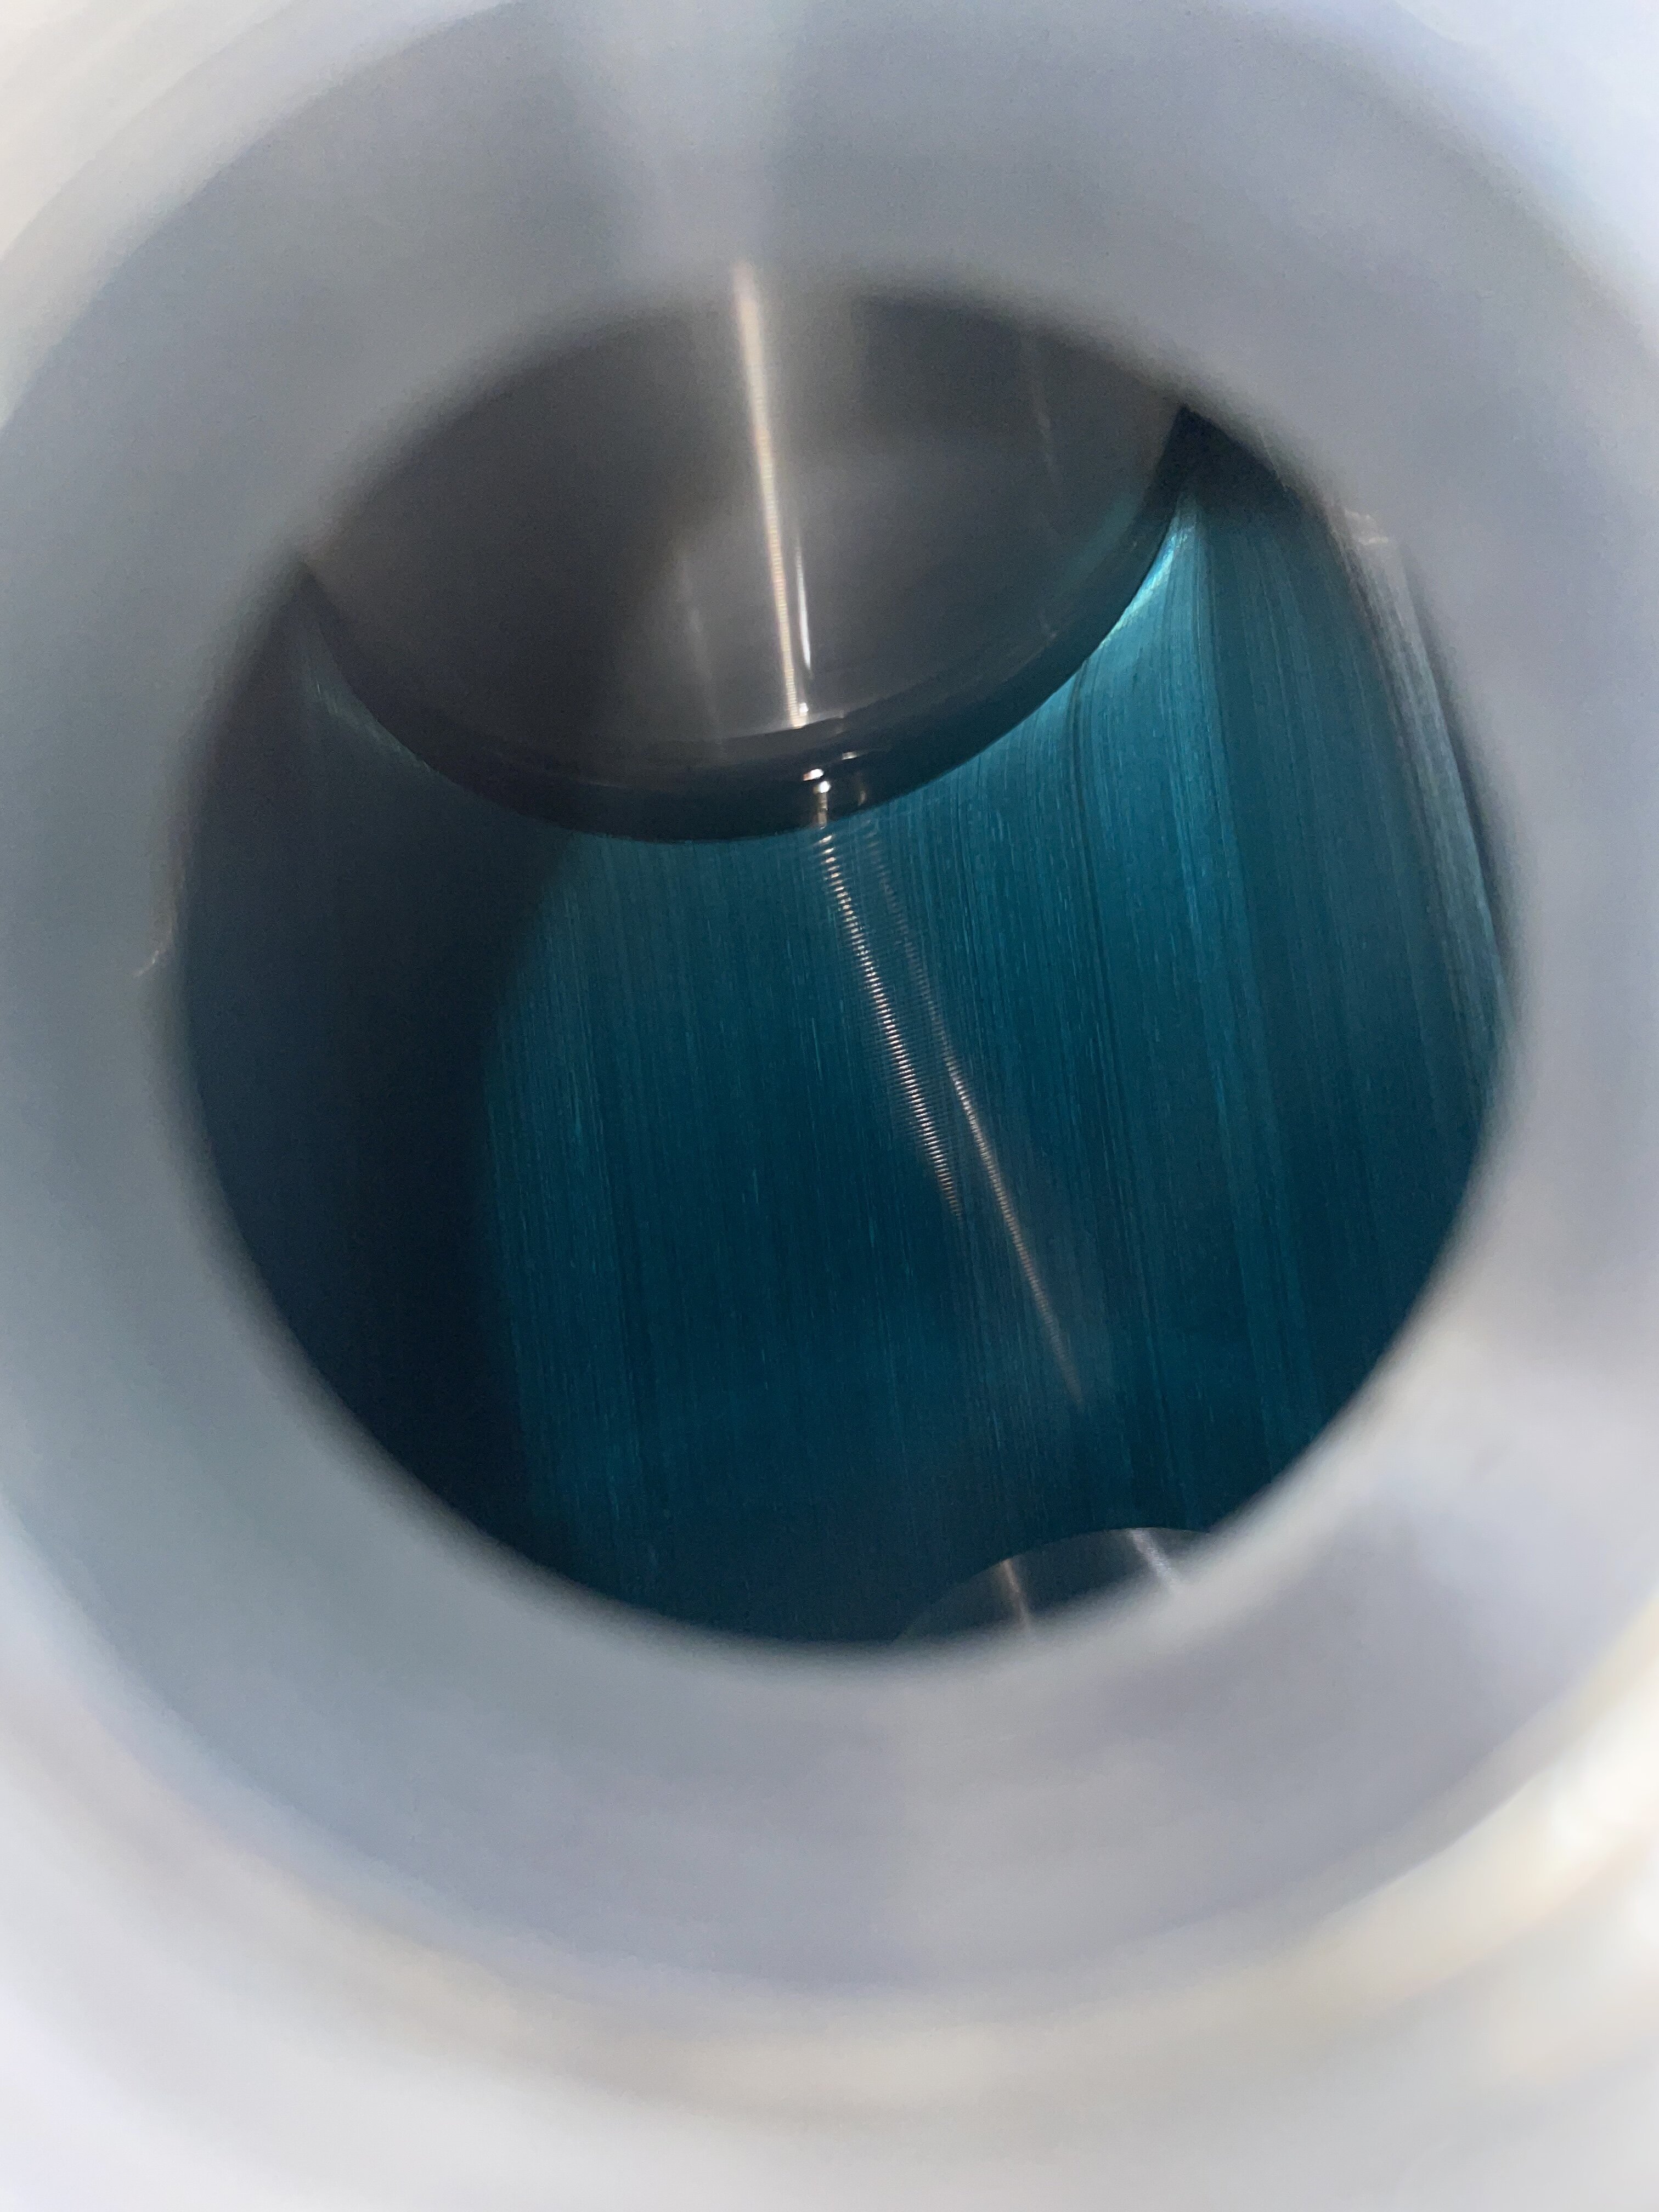
Hi all, just taken the carb apart for the first time on my 2010 Evo 4T. Couple of questions.
1. this small part fell out from somewhere, however I no idea where! Any ideas?
2. Pages on this forum talk about the correct tuning of this carb. The jet sizes and mixture screw are now setup. However they also talk about a spacer and needle position. The needle position is supposed to go from 2deg to 3rd and the spacer is to be removed. Anyone know how to set the needle position and spacer? I don’t know what these parts refer to…?
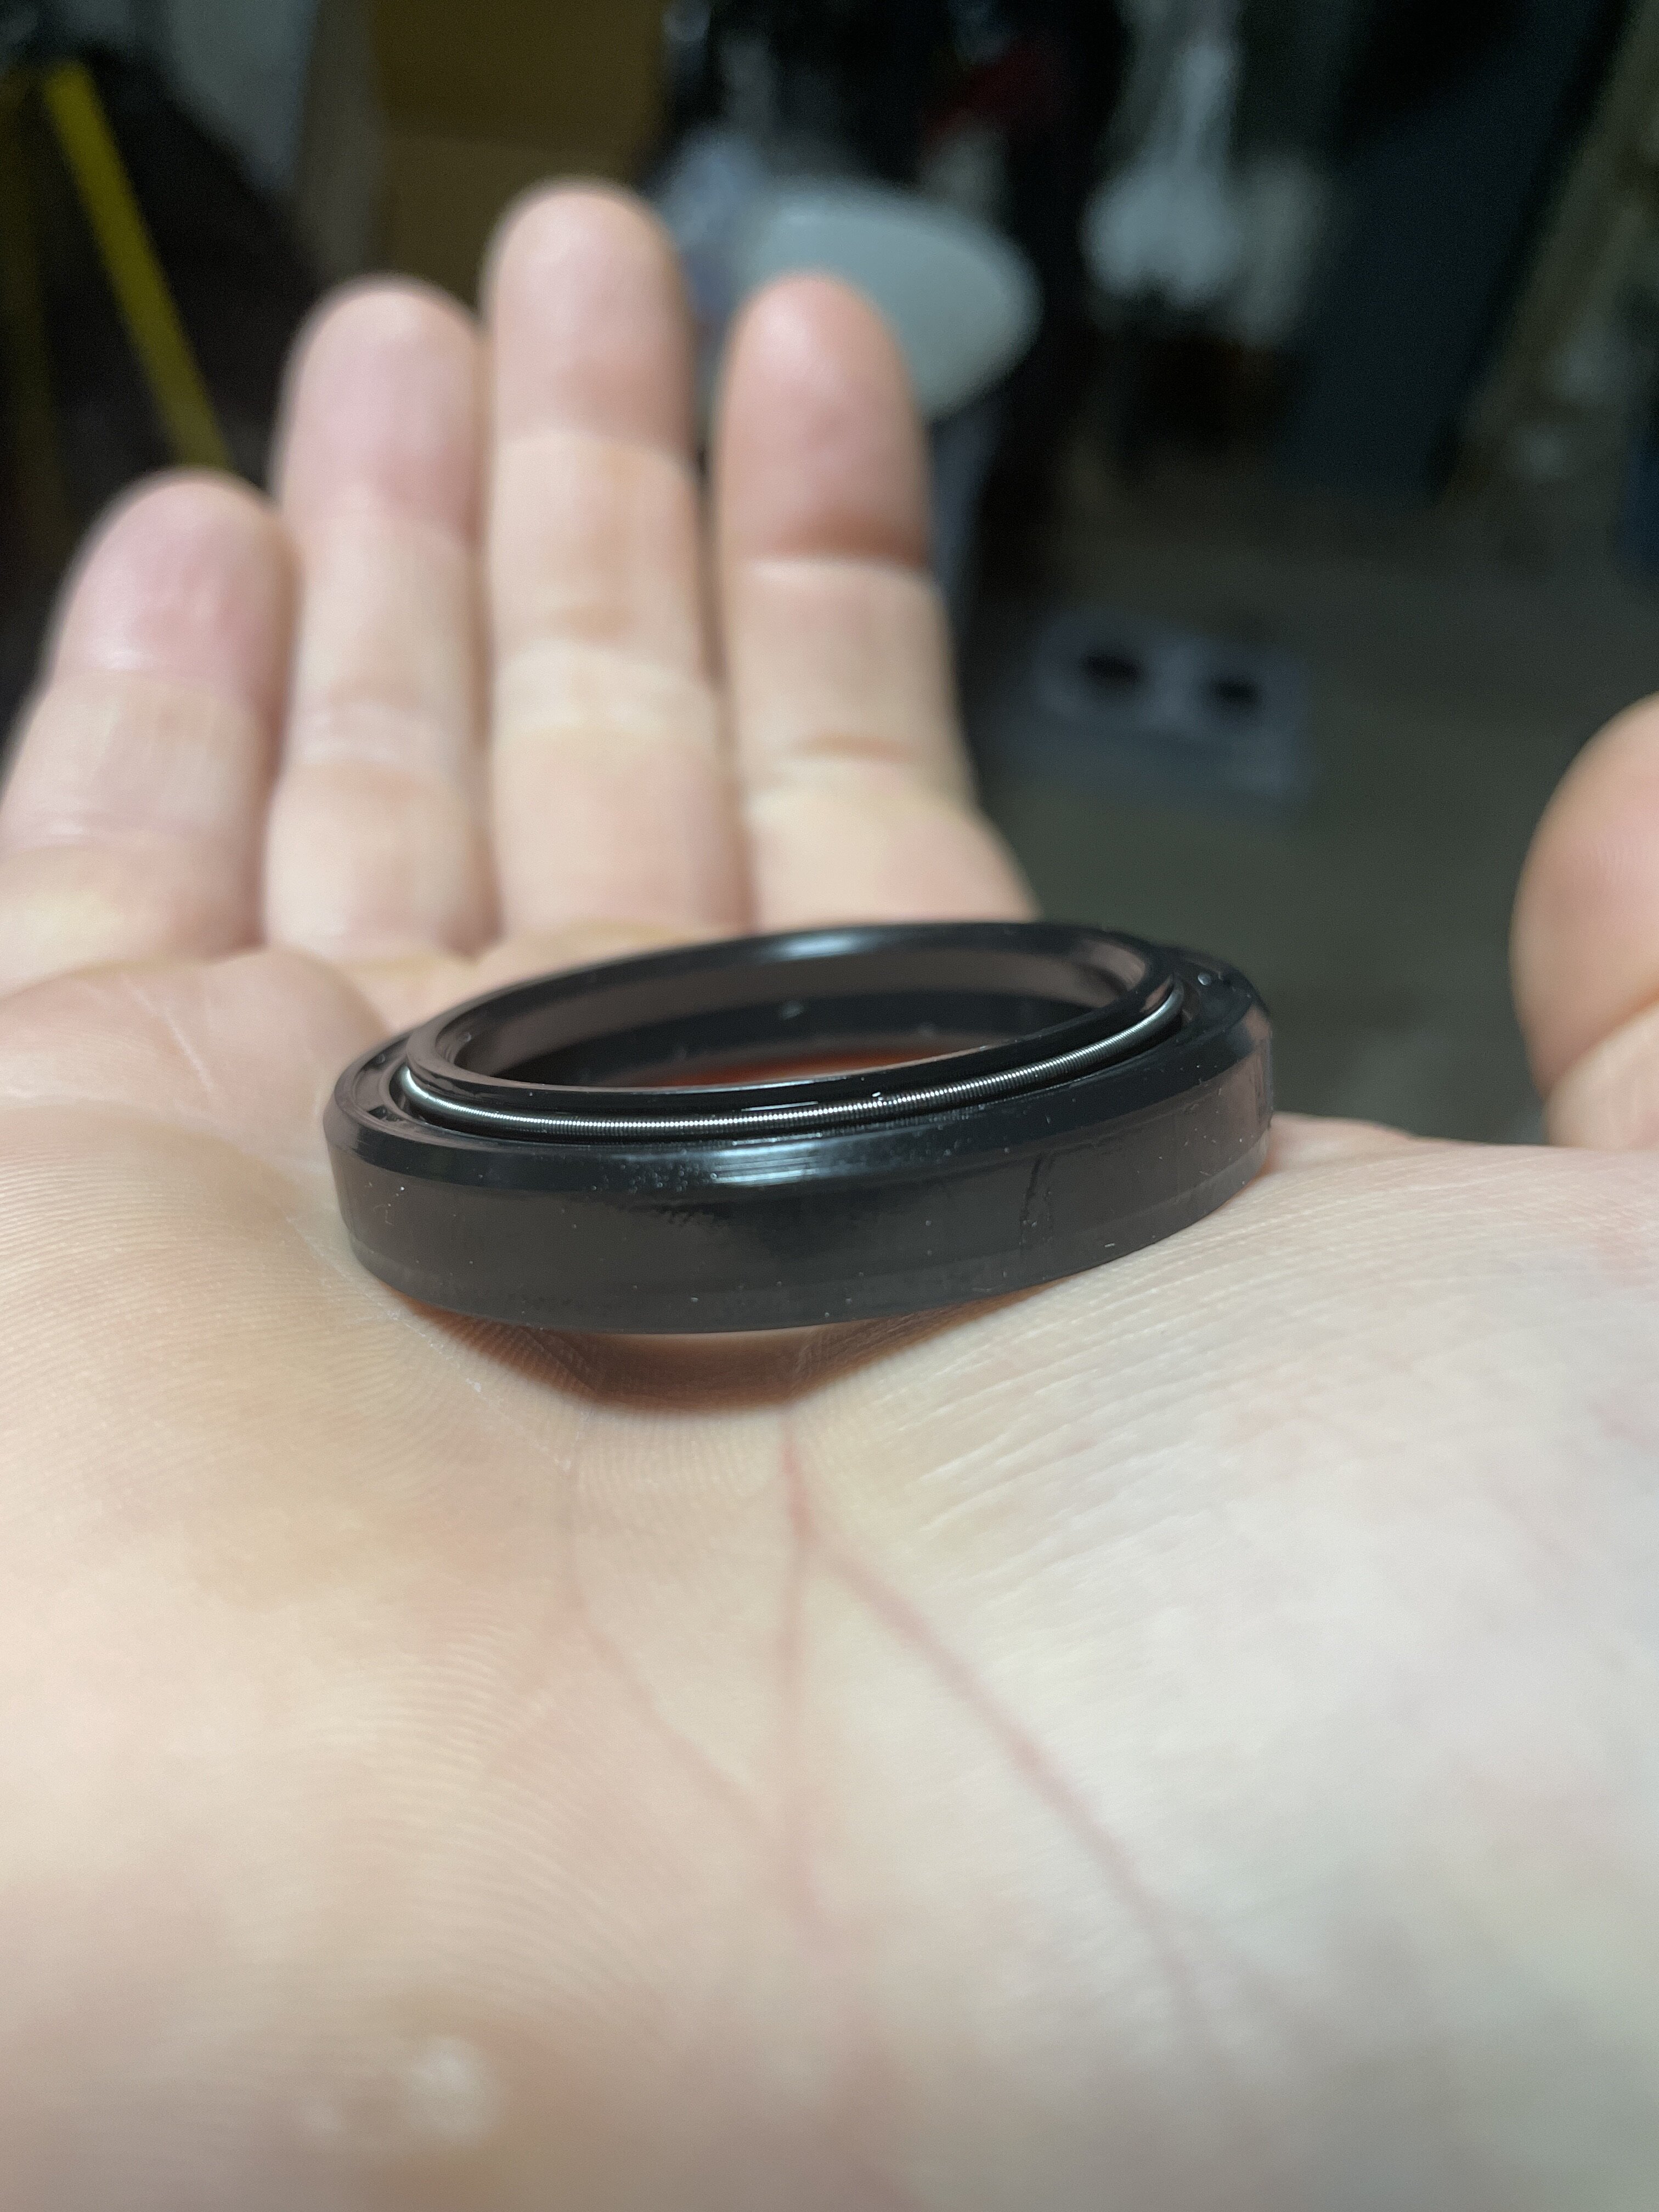
Thanks all for your advice. I completed the seal change this weekend, built back up, tested, all went well.
Wanted to post here my finding in case anyone is reading this in the future.
Before proceeding I doubled check by contacting the seal manufacturers direct.
Referring to my very original post, the seals were in fact the wrong way around, as most people on this forum advised me (thanks again for your help!)
I learnt:
- the writing on the seal always is on the non-oil side, so you can see it once installed (under the dust seal). Makes sense.
- the protruding lip is a wiper lip for the non-oil side (as other people mentioned).
- didn’t get on the pyramid parts seals (as found on eBay), got odd balls (I think they were called) instead. Seemed much better quality.
- the video I posted above is really helpful.
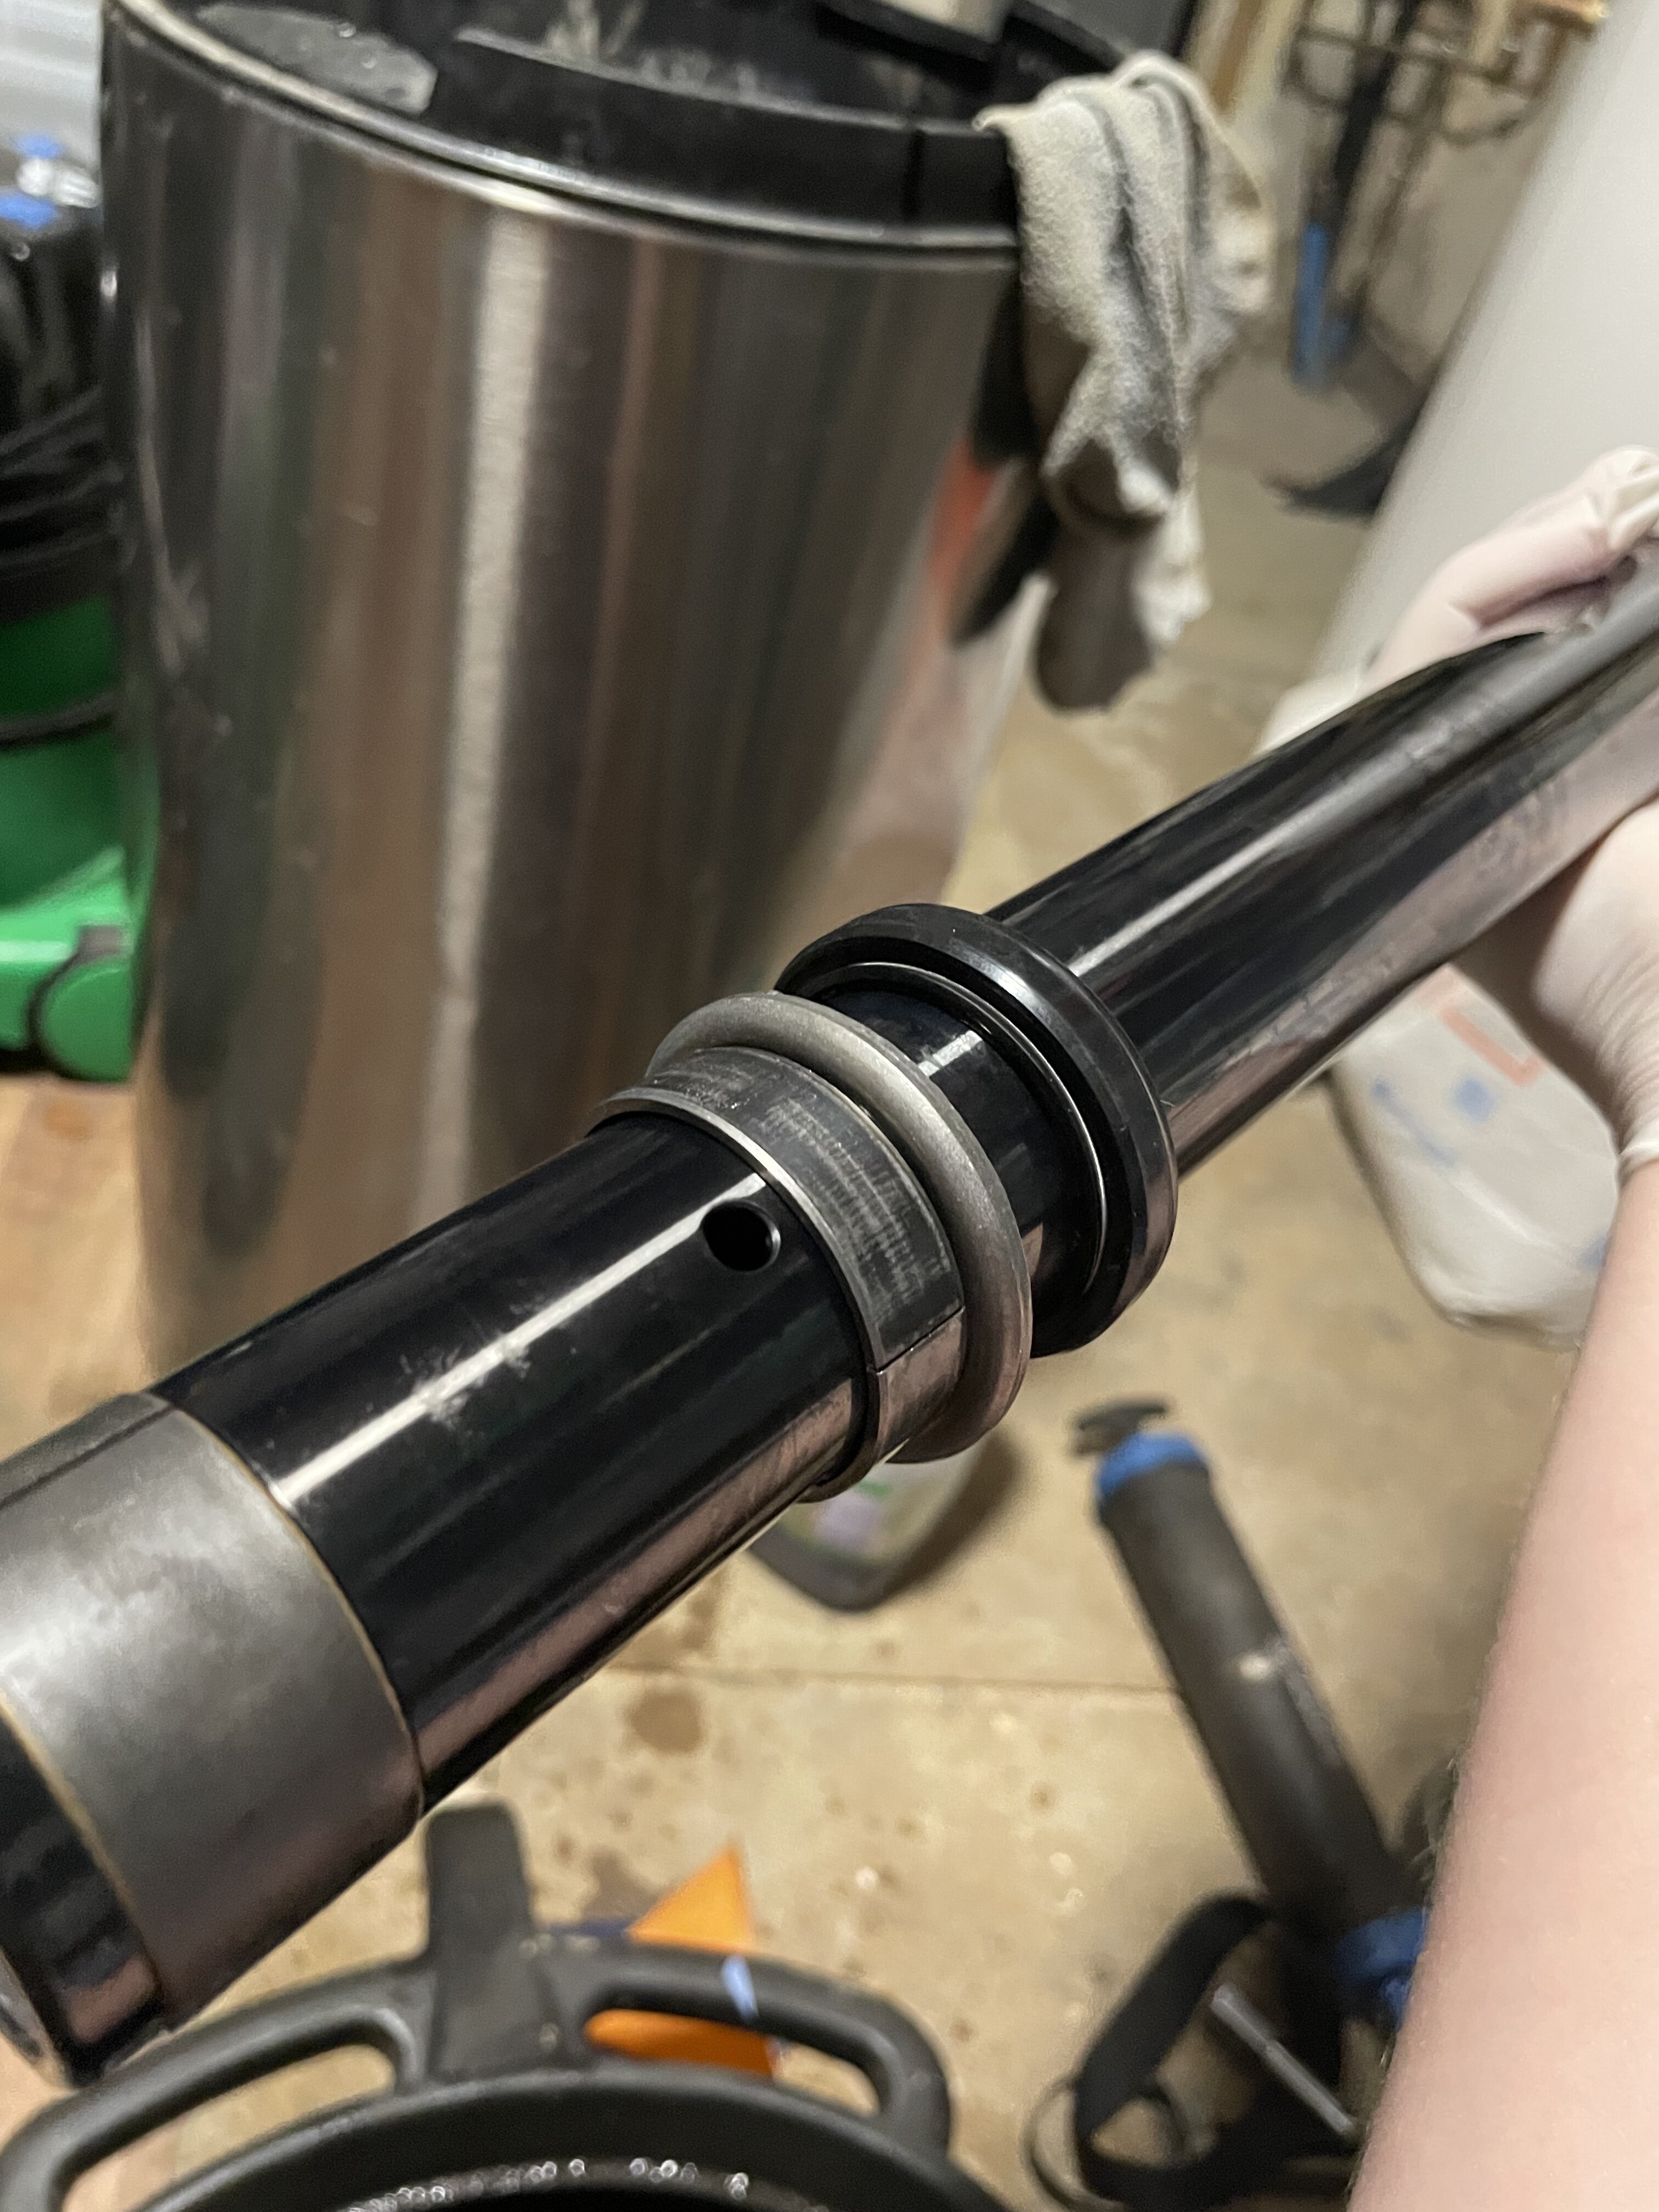
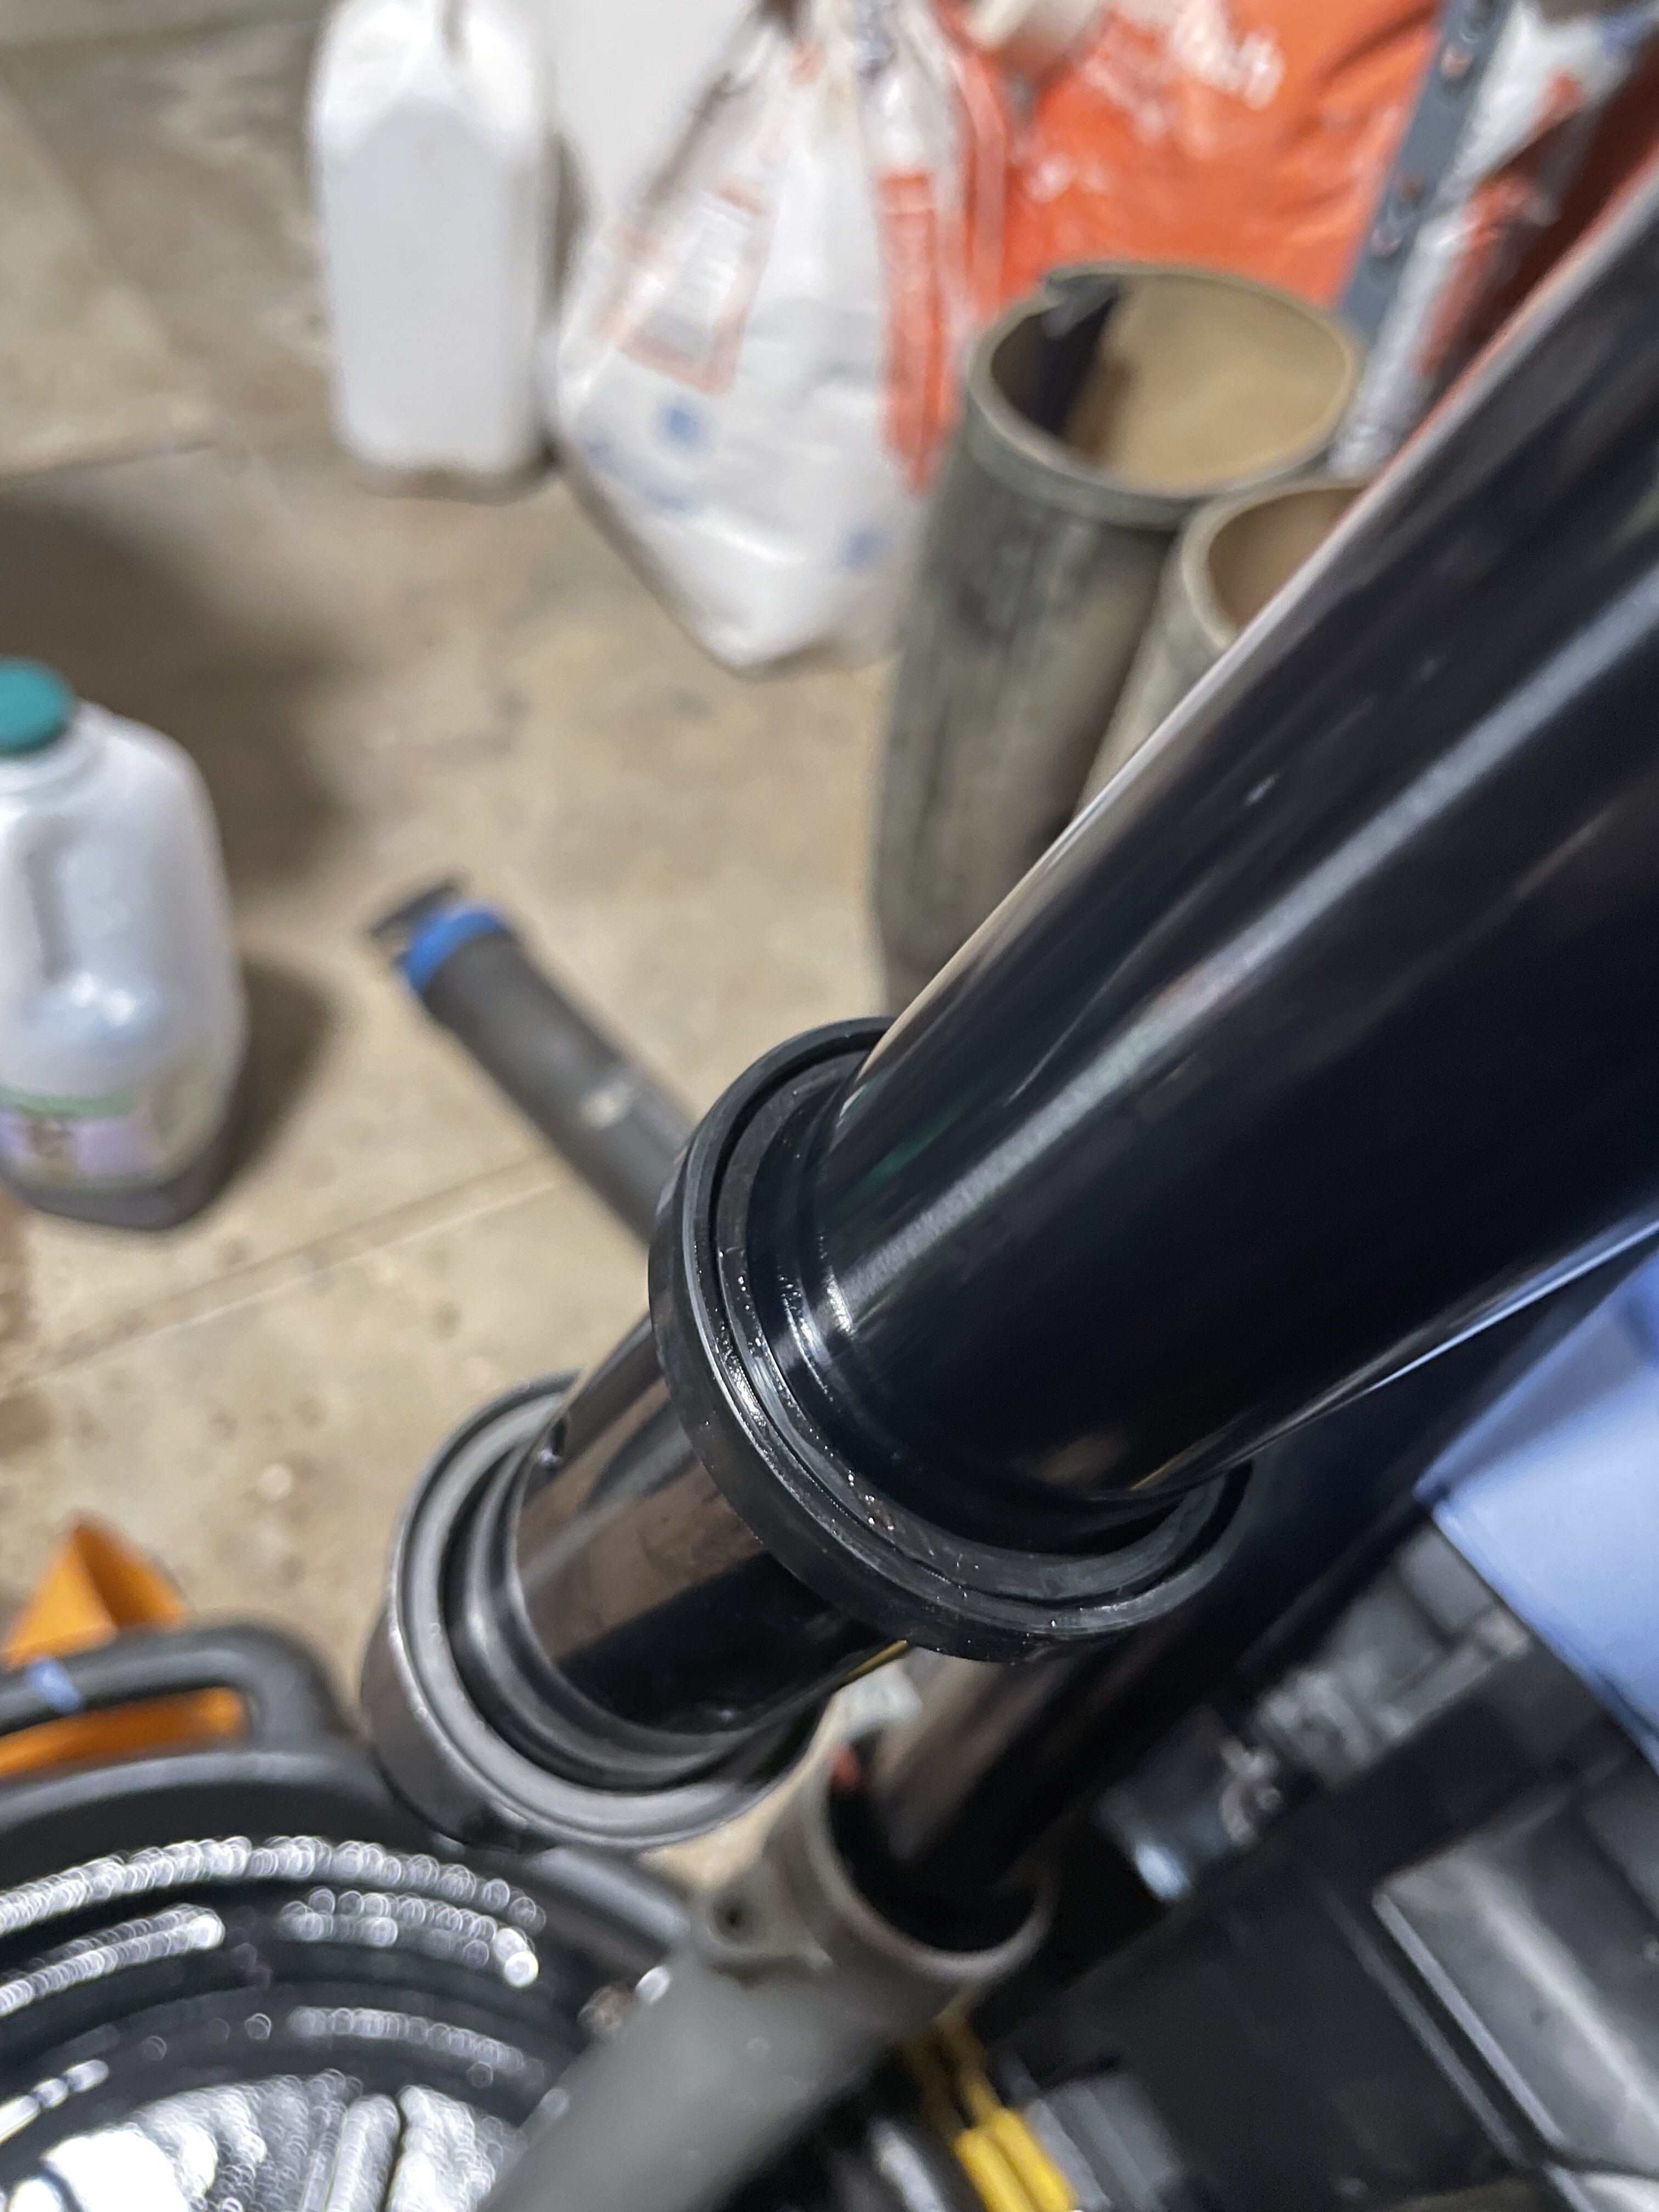
- it’s fiddly to get the bushes in before the seals, however I ensured the bushes were all the way in and flush before lowering the seal. I think this helped.
- as lots of people say, really check for any damage, scratches, nicks etc and fix before proceeding.
- I made a seal driver from some 50mm blue water pipe. Had to file down the inner and outer edge to make it fit perfectly (I allowed the wiper lip to sit inside the pipe so it wasn’t damaged). In the end it worked great. The nice thing is that you have have a longer length extending above the fork so you can tap it with a hammer. Makes it much easier in my opinion and actually better than a normal seal driver.
Seems to be lots of conflicting advice on the internet about this topic….
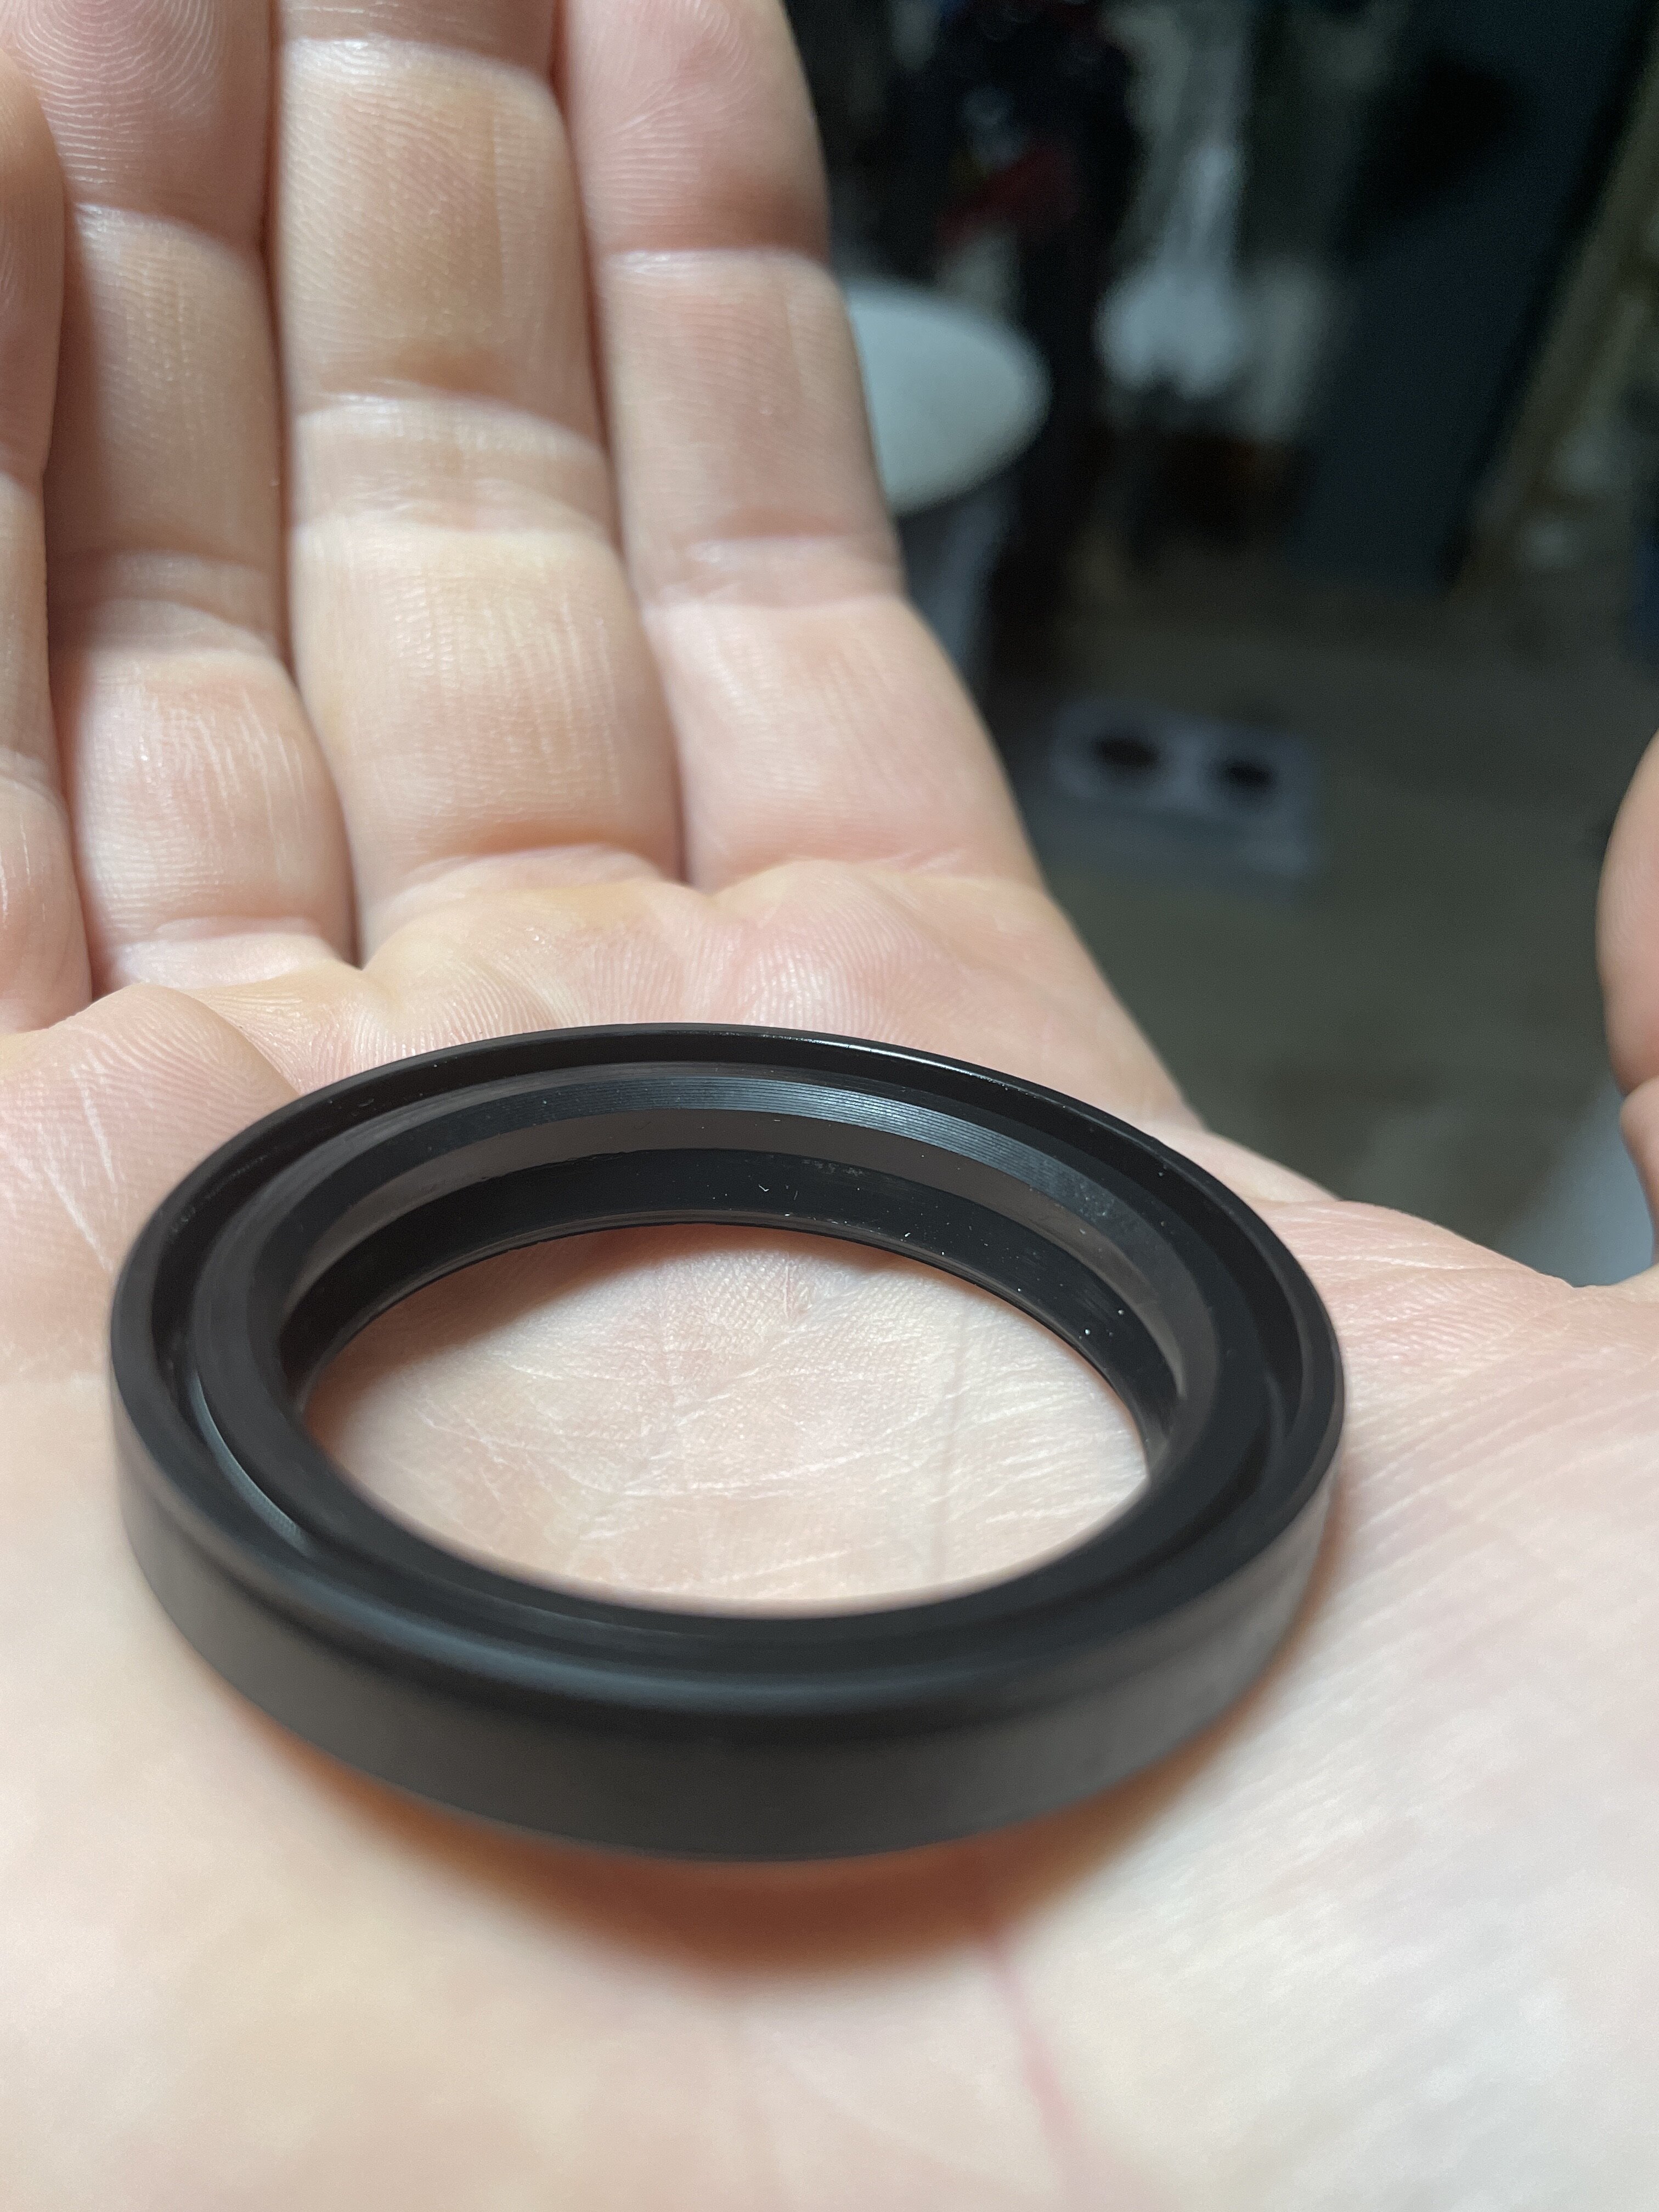
Not sure if the above photos help? I’ve got the first photos facing the oil side. It has a bigger softer lip that stick out and I assume will be pressurised tight from oil pressure.
However, the writing is on this side and some people say writing should be facing the non oil side, where is can be seen.
If I put the other way, when installing id also be hitting that bigger softer lip with the driver….sure that would damage it.
I’m starting to feel like it’s correct in the original post….
if I look at the way the seal works, oil needs to get up behind the seal to compress it tighter…it looks to me like the low tapered side (with the more visual steel band) should then face the oil (face down).
it would also make sense as to why there is a cup shaped part below the seal, to protect this lip?
been a bit of a nightmare but got it sorted and back running.
To get the tank completely dry (after leaving the bike drying it in a hot room over night) I used a heat gun (like a hair dryer) to blow hot air into the tank, but also had to lift the rear wheel near vertical get get the water to move to the other end of the tank. This is because there is a sort of baffle at the bottom of the tank which water was getting stuck behind, and not drying naturally. This might actually be there to trap water at the bottom of the tank instead of putting it through the engine. However I wanted the whole thing bone dry before I put fuel in again.
I then filled it to the brim with petrol, no leaks, all was good.
So now sorted however I’d still love to know what caused this in the first place…. And also for the future if anyone else has any experience trying to flush a beta evo fuel tank (being inbuilt into the frame).
Haha yes on this side of the pond we call a flashlight a torch
I managed to give it a bit of a clean, not perfect but better. Letting the tank dry out and then going to full it with petrol (gas) and see how I get on.
On a serious note, some of the early Evos developed frame (weld?) cracks. Beta replaced many frames. Perhaps water - moisture could be seeping in through a crack in the frame when you wash it etc. Check the area very carefully with a torch and perhaps even a magnifying glass.
Many thanks for this - I’ll take a look!! Out of interest, given it’s now 11 years old, do you think they’d still replace it if I found a crack?
Hi, recently purchased a beta evo 4t 2010. Went out on it once and really enjoyed riding it.
however before going out a second time, decided to check the fuel and noticed a strange build up of sort of white sludge, at the top of the fuel tank….very strange! I have a 2011 2t evo (so similar age) and the inside of the tank is like brand new…
anyone got any idea what this stuff is? Crystallised petrol from being stood maybe? And then, how do I get rid of it?!?
not idea on a beta given the tank is build into the frame…!!
Probably worth adding that when the bike starts to rev high unexpectedly and shoot off, I think my reactions have been to grip harder and also sit down, which is probably making it worse….but surely it shouldn’t be reving unexpectedly in the first place!
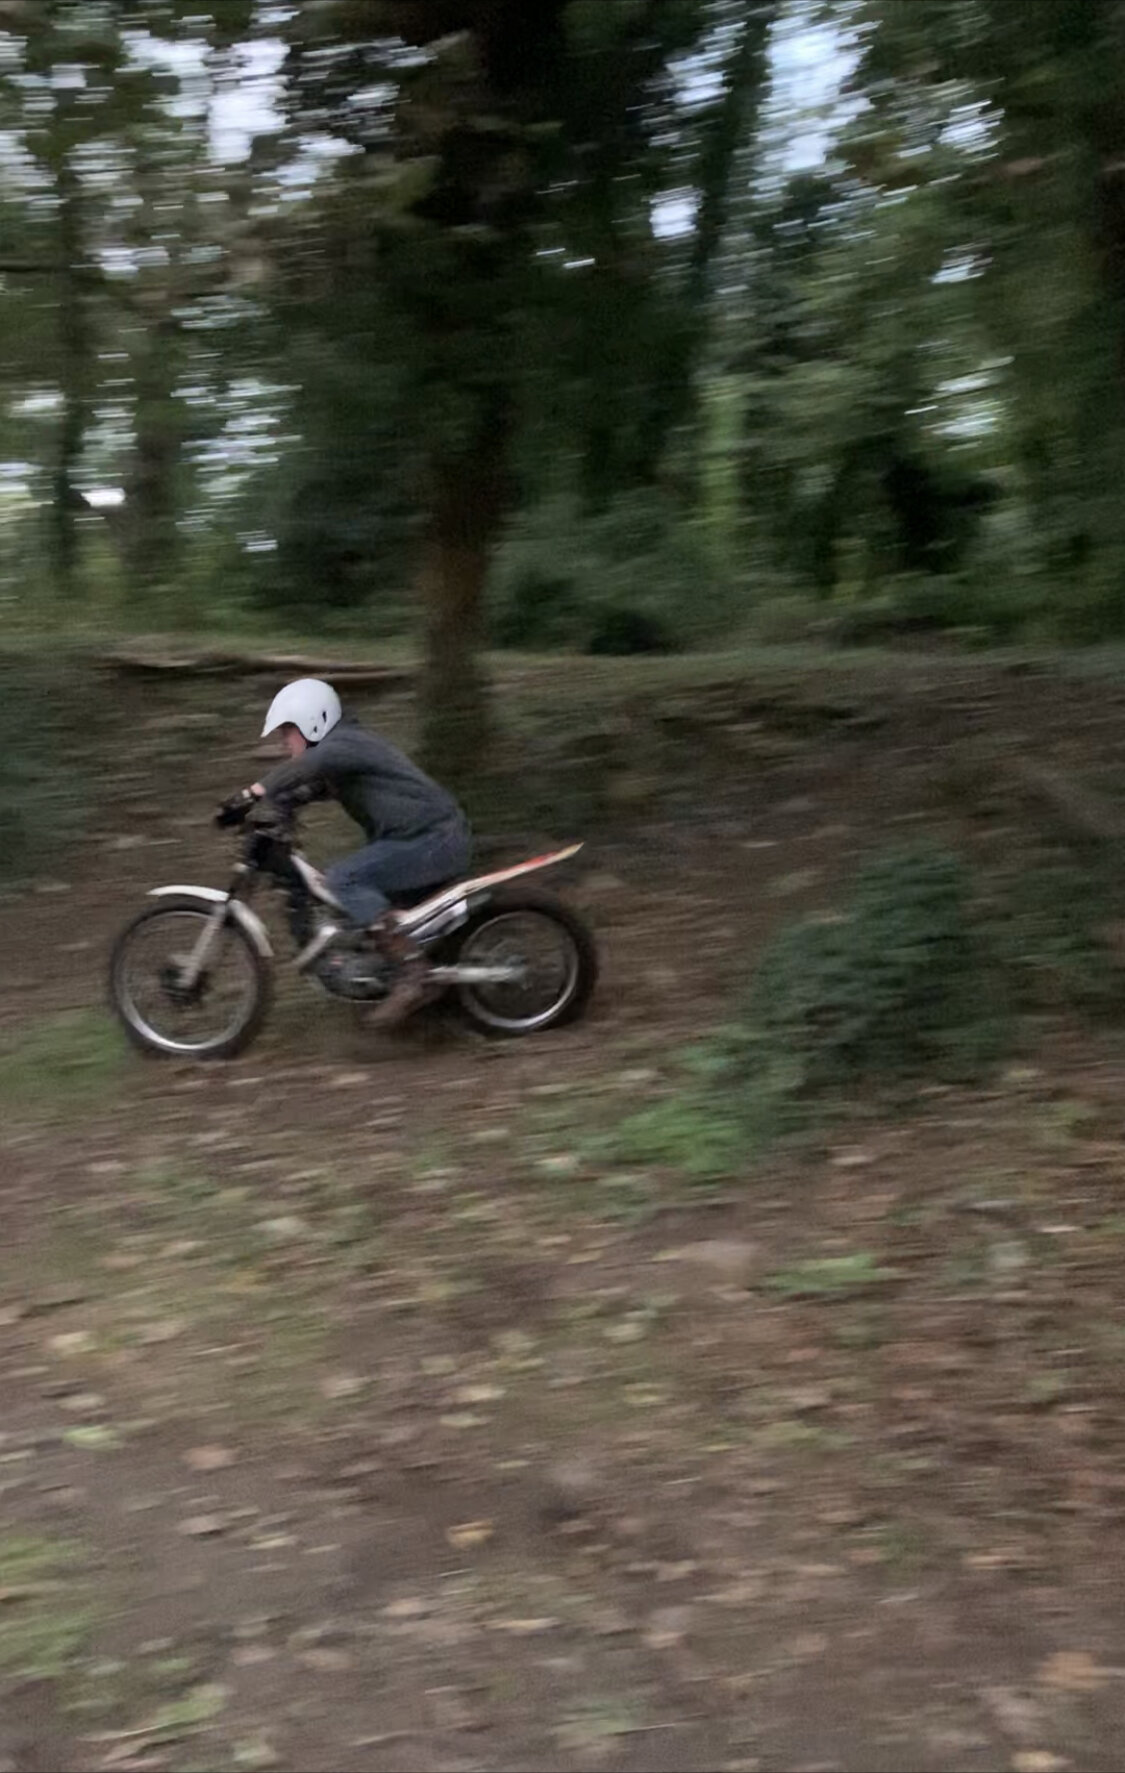
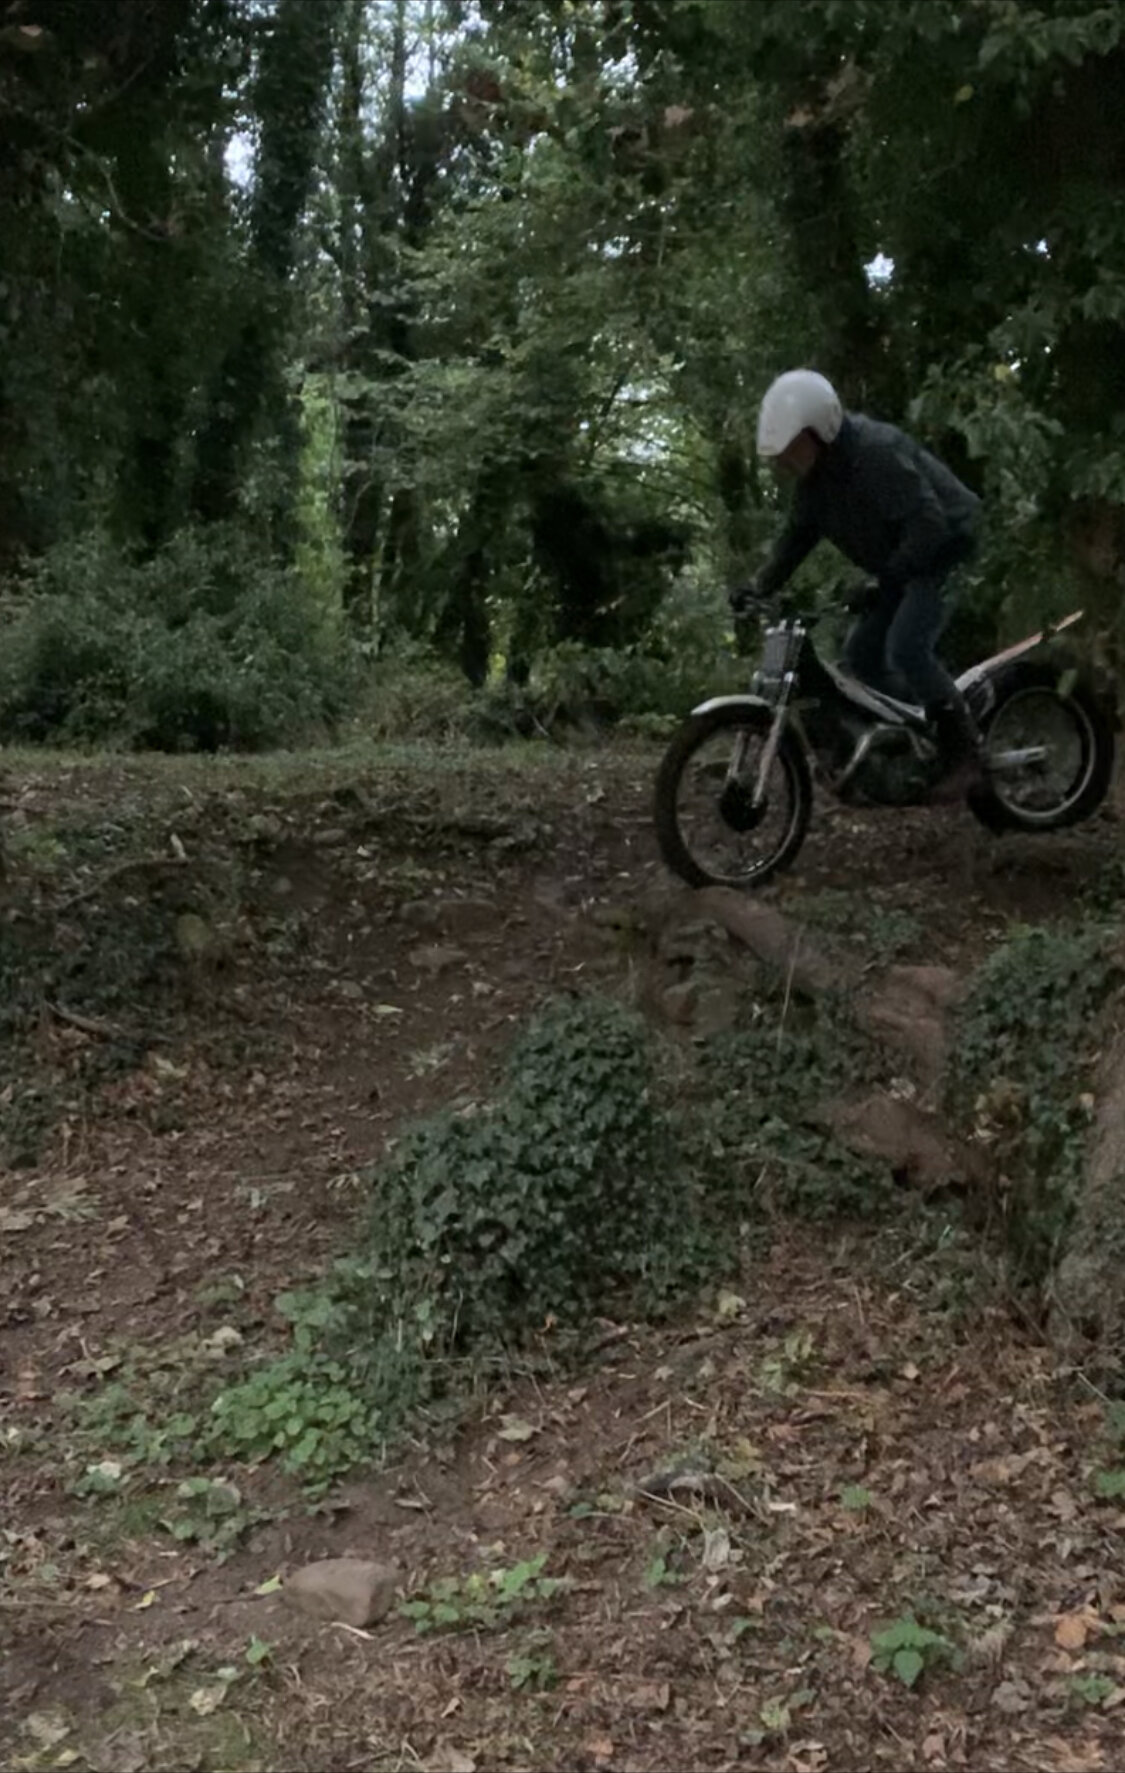
Just starting out in trials and was hoping for some advice with an issue I’m having.
I’m now reasonably confident with basic balance and control on flat stuff and going over small stuff (up to say 50cm).
Ive also starting rolling down banks reasonable confidentially, even steeper ones say getting on for 45deg+.
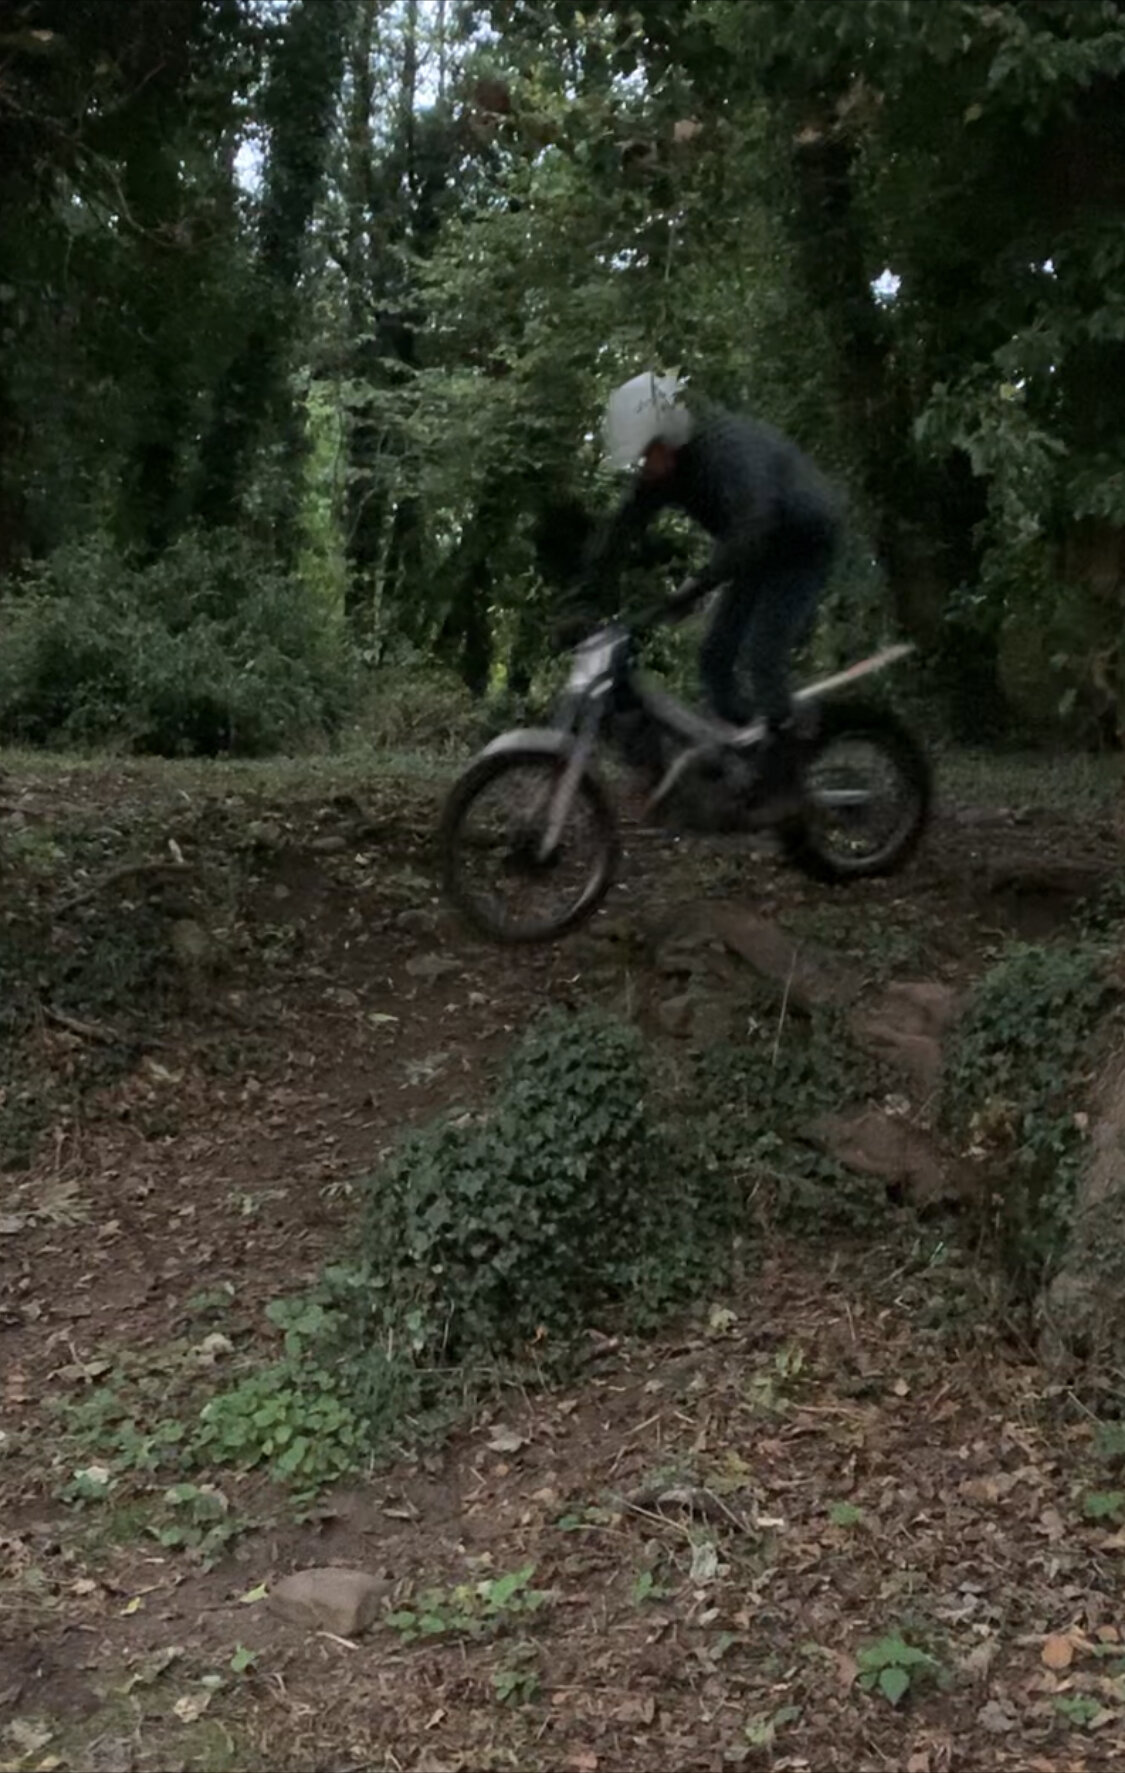
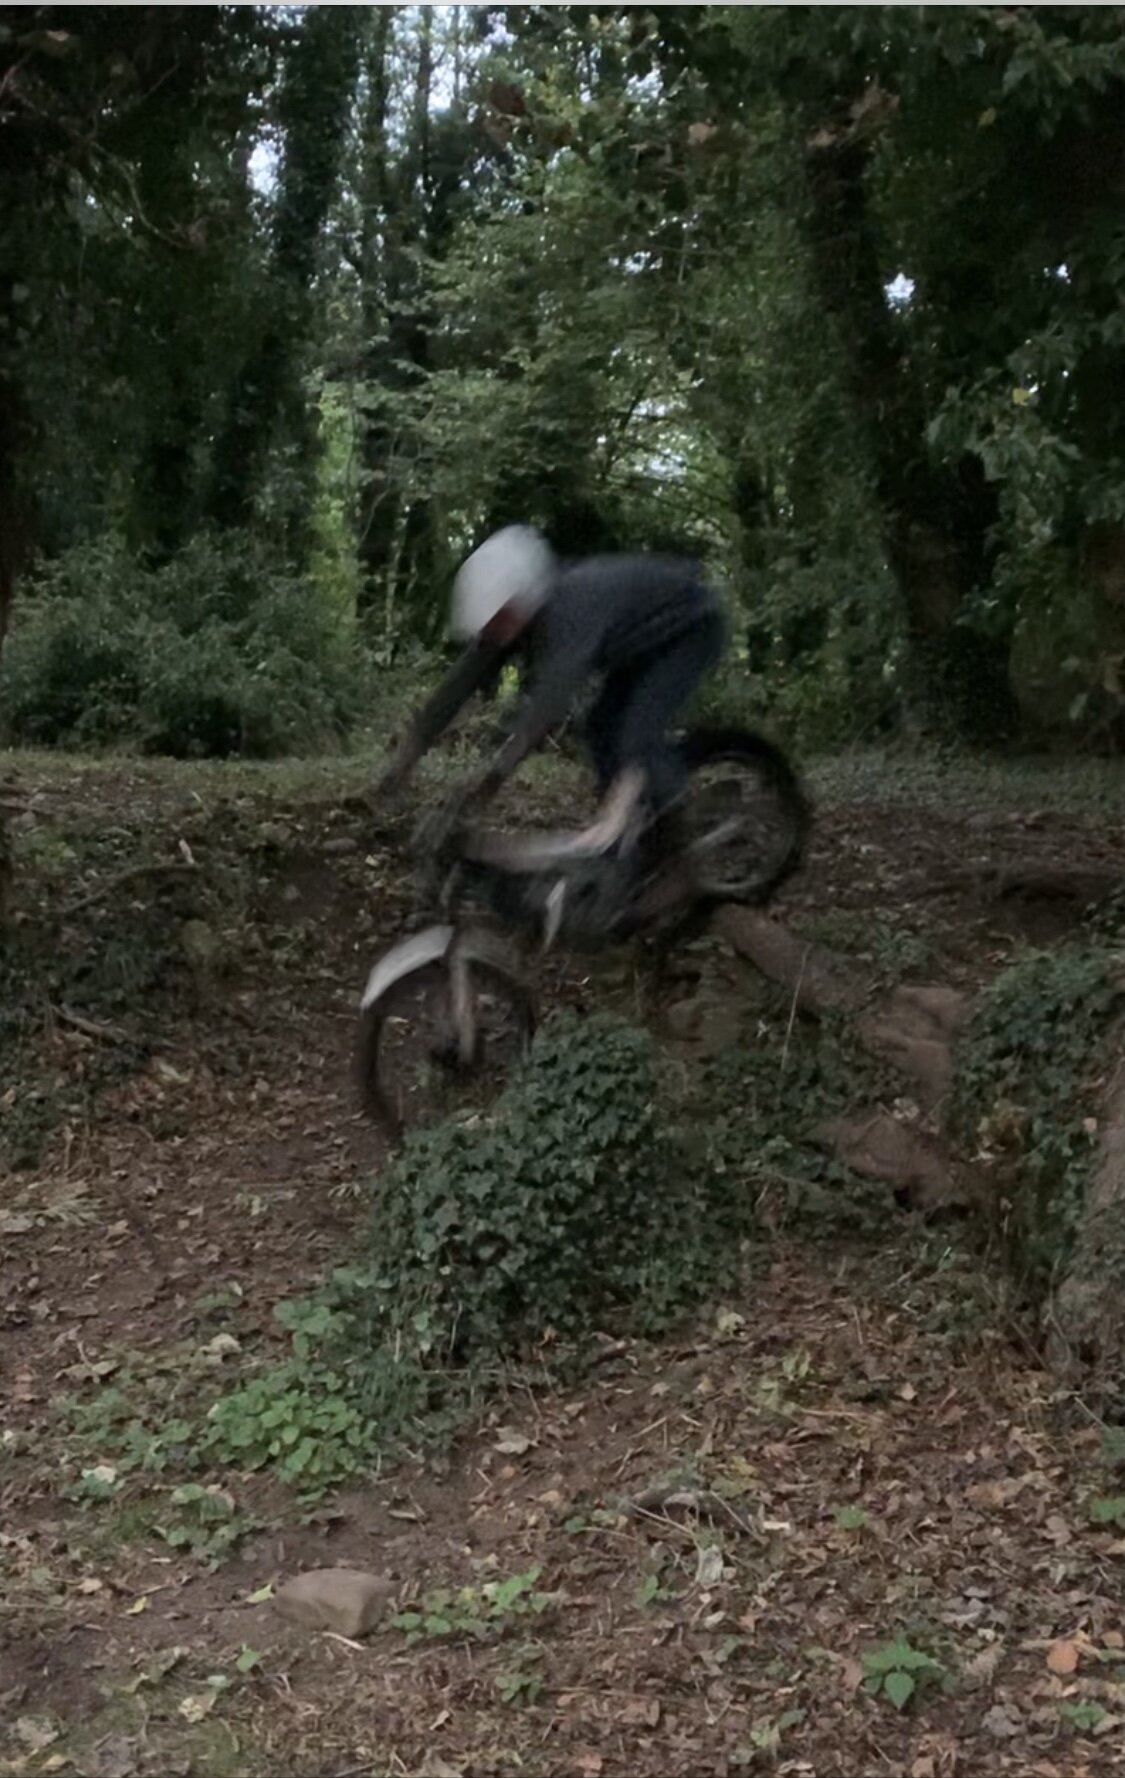
I’m having an issue that I’ve experienced twice now when trying a drop off. When I practice a drop off on a token ledge (30cm onto flat ground), it all goes fine. But when I try something bigger or a drop off that’s onto a hill, I’ve had this issue that the bike starts to rapidly accelerate around when my front wheel touches the ground, it flys away and I fall off! I’m convinced this is my fault and not the bike (as is usually the case)!
I managed to get some rough footage of when this last happened to me, and my assumption is this; when I approach a roll off, I position my body weight to the back of the bike at the top of the hill/step and roll down fine. When I try drop off initially I’m stood up to compress and initiate a small wheelie, when the front wheel goes over and the bike drops changing it’s angle my body position changes causing me to inadvertently twist the throttle….I think!
If this is the case, I guess it’s about getting the body position correct before the bike starts to fall…
If I’m correct in my assumption, surely this is a common rookie mistake that people make? Has anyone else experienced this?
Hi guys, about to do my first trial (wish me luck!) doing an easy clubman level, as I understood that was the entry level for adult. At least at Richmond MC…
I’m unsure how much fuel I’ll need to take. Was planning whatever is in my tank + a full gallon can….will that be enough?


4T Carb
in Beta
Posted
Many thanks, that’s really helpful!
On another topic, any idea where I can get a replacement fuel mixture screw in the UK for this carb? Ideally one which is easy adjustment….