Seems like my XYD-14A 750W motor (16" 26V 2012mod) has ended it's life... and I need to get a new one. OSET sells them but way too expensive. Anyone know how to source/where to buy?
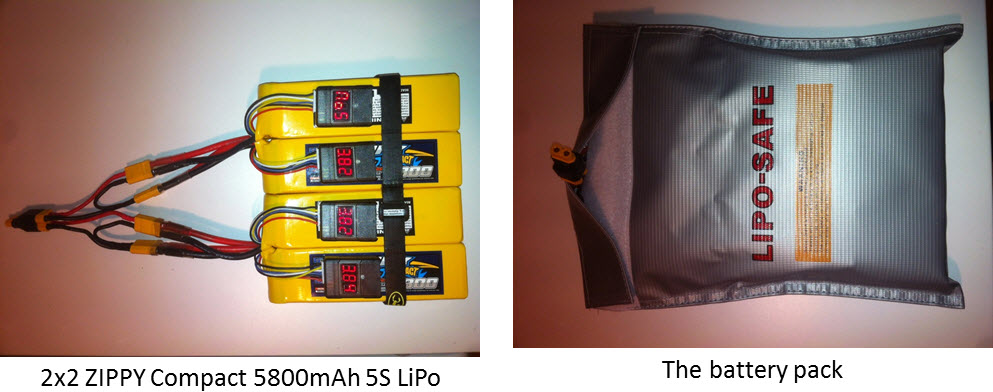
Thinking of getting some more range and maybe also top speed. I have 2x2 5S 5800mah today which gives me 37V (~42V fully charged) and 11600mah.
Would the OSET 16" 36V engine (750 or 800W) manage 2x2 6S batteries?
I have the Kelly controller KDS48200 so believe that with the adjustment possibilities I could use 2x2 6S or 2x12s batteries? This will be 44,4V (and 50,2V fully charged).
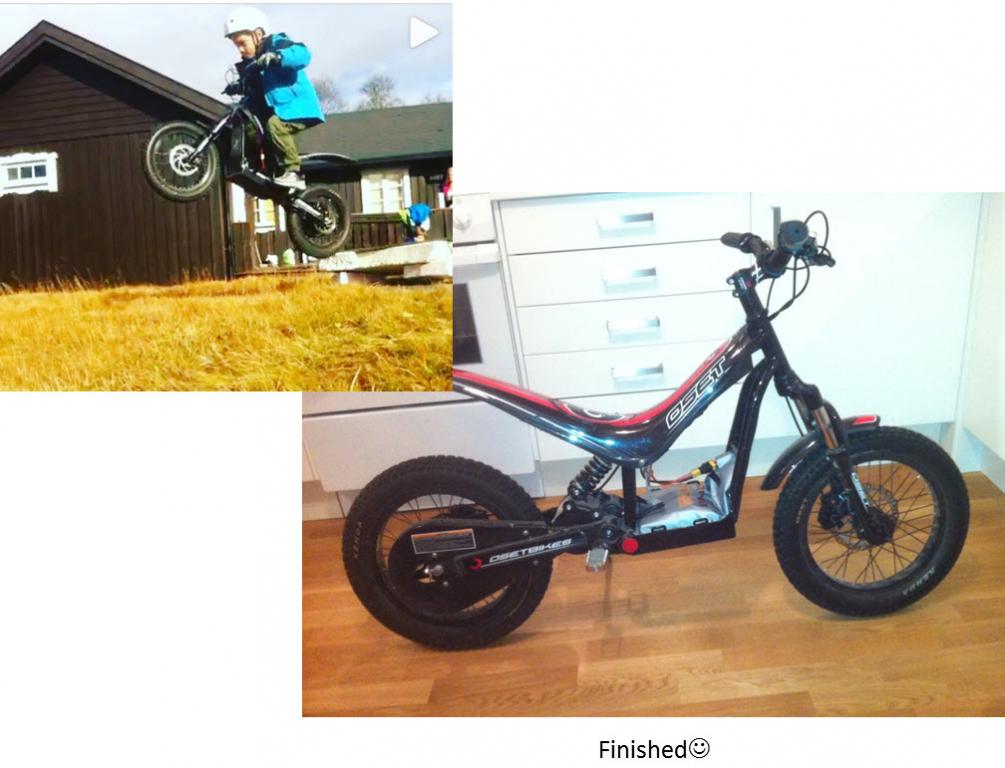
Finished the upgrade to Kelly Controller and LiPo couple of weeks ago- and what an upgrade it is!!
Better than I imagined and in my opinion how it should have been from the factory.
I read some posts saying "it's all about learning throttle controll", but I don't believe so. The original controller setup is just too sensitive.
Anyway, the KDS gives you so many possibilities to customize the bike to your preferences.
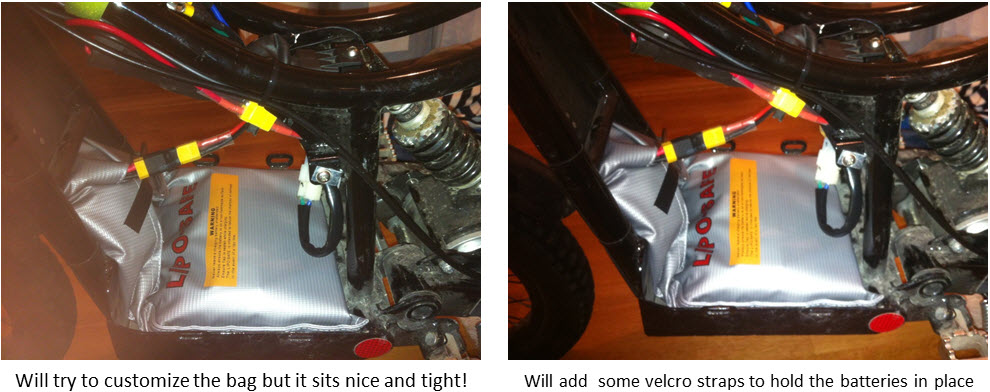
My battery pack gives me about 42V when fully charged and 11600mAh. A lot more power than the original!! Avoiding wheelies is the "problem" now...
Thanks Rich for all the help!!
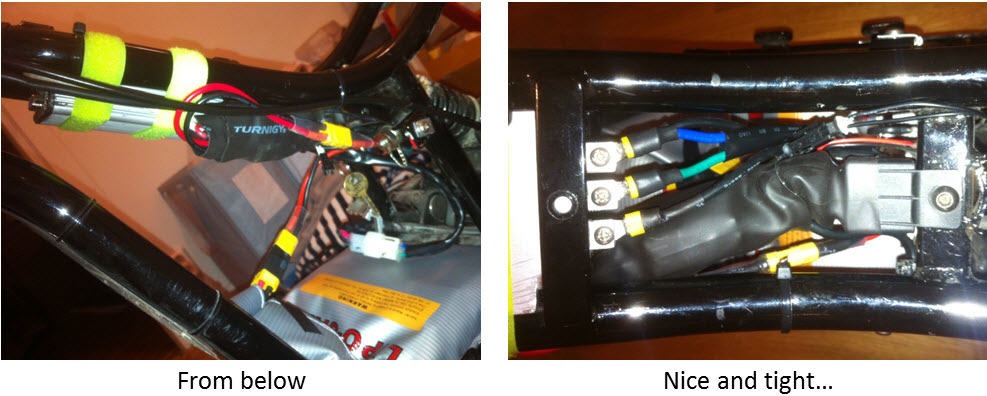
Here are some pictures from my upgrade. I believe they could be helpfull together with Rich's description.
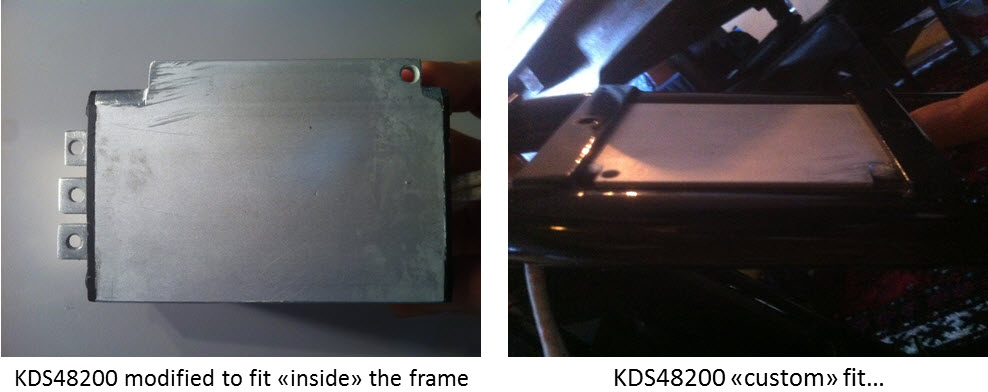
PS! I have bought 2 Right Angle RS232 Male to Female Adapter so that I'm able to connect the KDS with the laptop without having to unstrap the KDS. The way I have mounted the KDS "inside" the frame didn't allow me to connect the RS232 connector without loosening the velcros because of the tight fit. I'll post a picture soon...
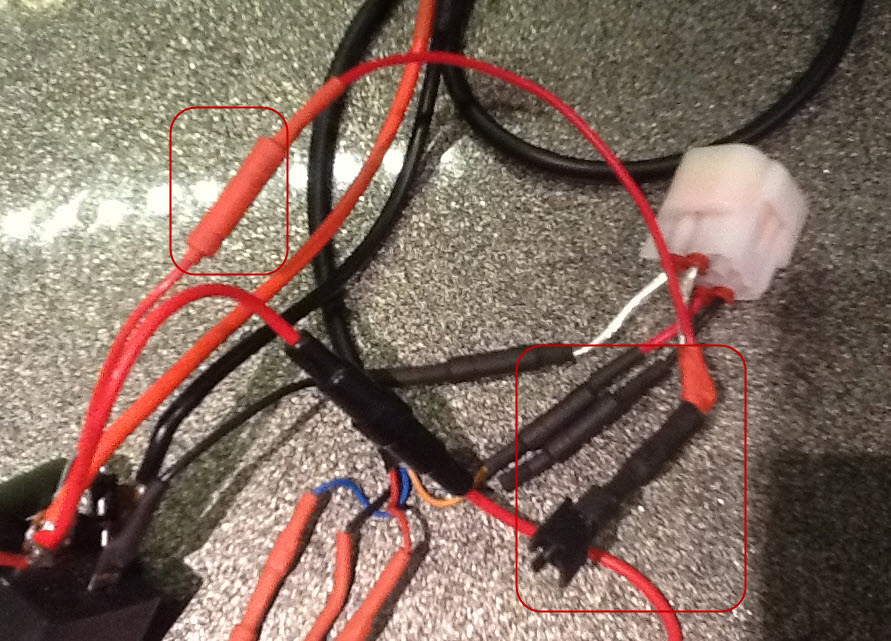
It was when I saw the differences between your pictures and the wire diagram I started having doubts.
But the explanation you gave earlier with the terminal and the key switch sorted it out.
I have decided to follow the wire diagram.
So I have now soldered a connector for the key switch on the cable going from terminal (left) to Kelly red (9).
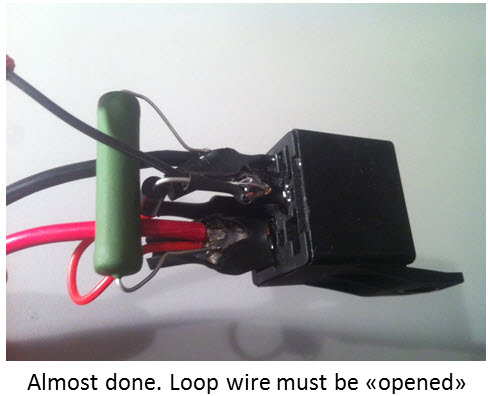
And I disconnected the loop wire and this now goes from terminal (right) to Kelly green (4)
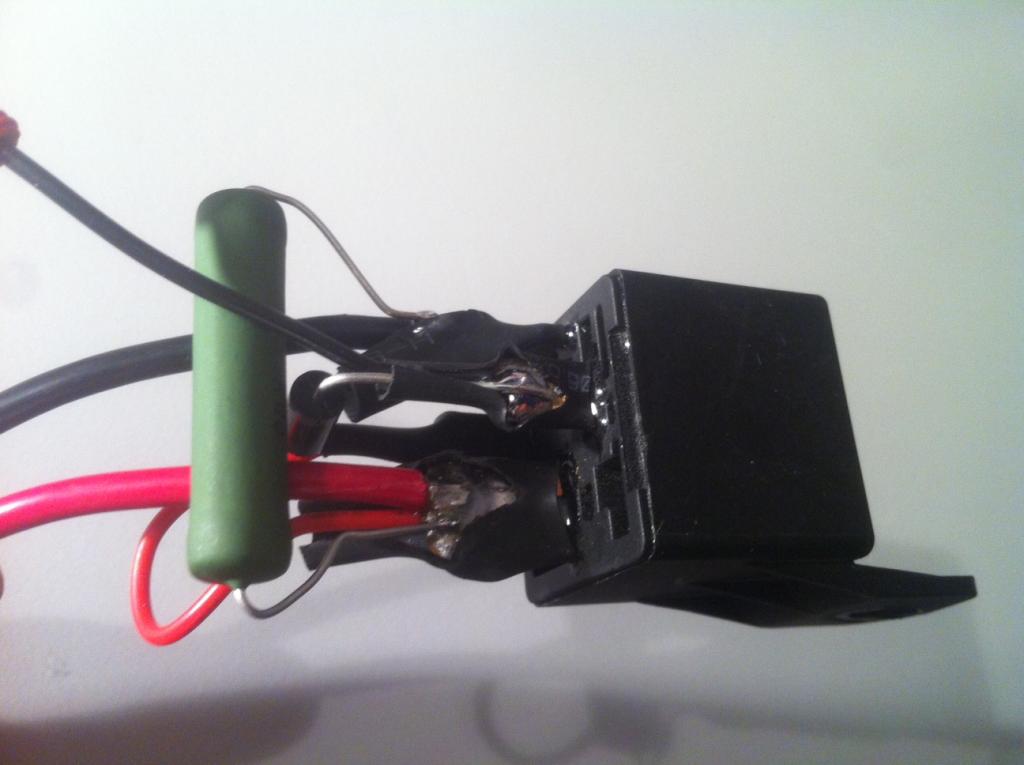
The diode grey band will then be facing towards terminal left where cable goes to Kelly red (9).
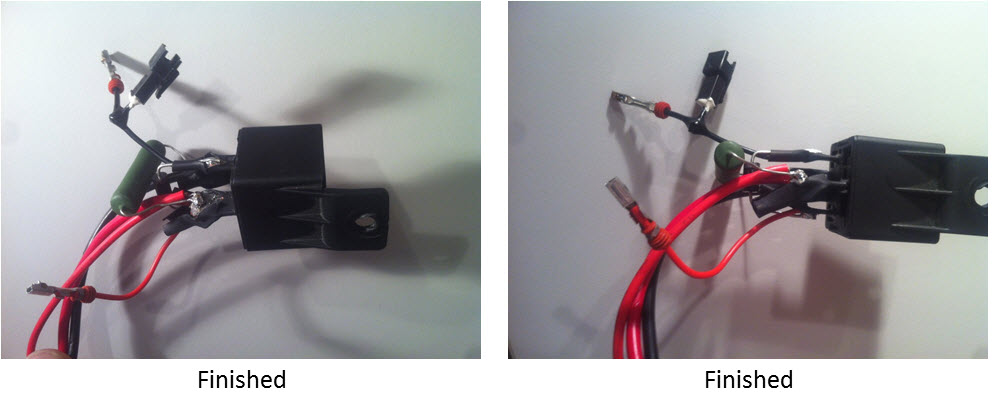
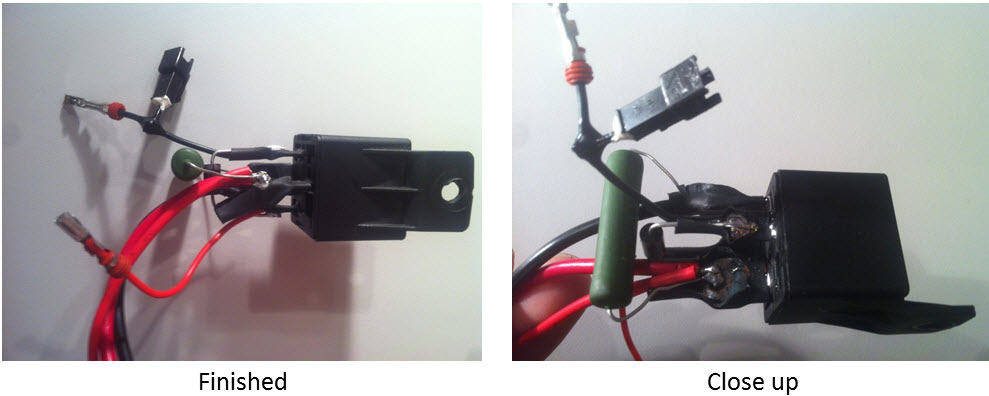
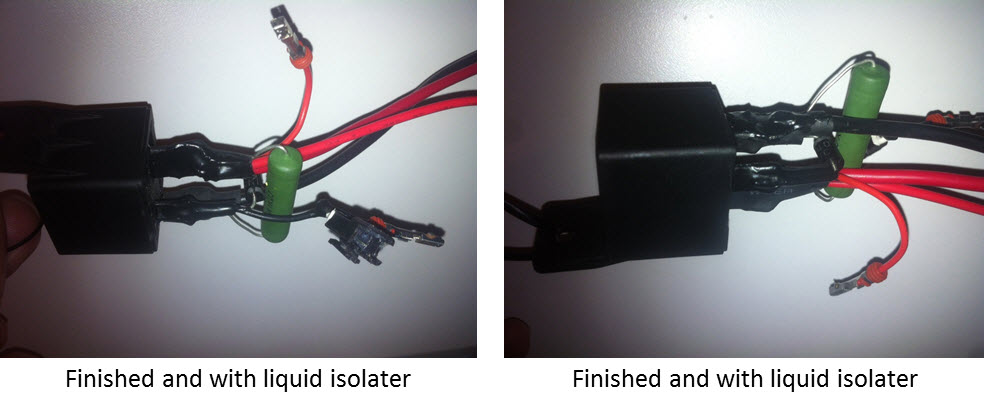
Have started to put liquid isolator (plastidip.com) on the terminal connections and will shrink a large transparent shrink tube covering the whole terminal/resistor/diode.
I am close to finishing the wireing but have some doubt about a couple of things.
I can't quite get the pictures and the wirediagram to match.
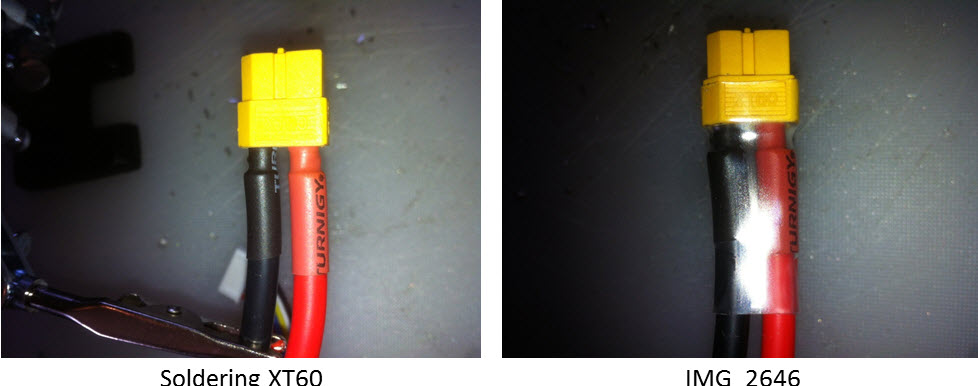
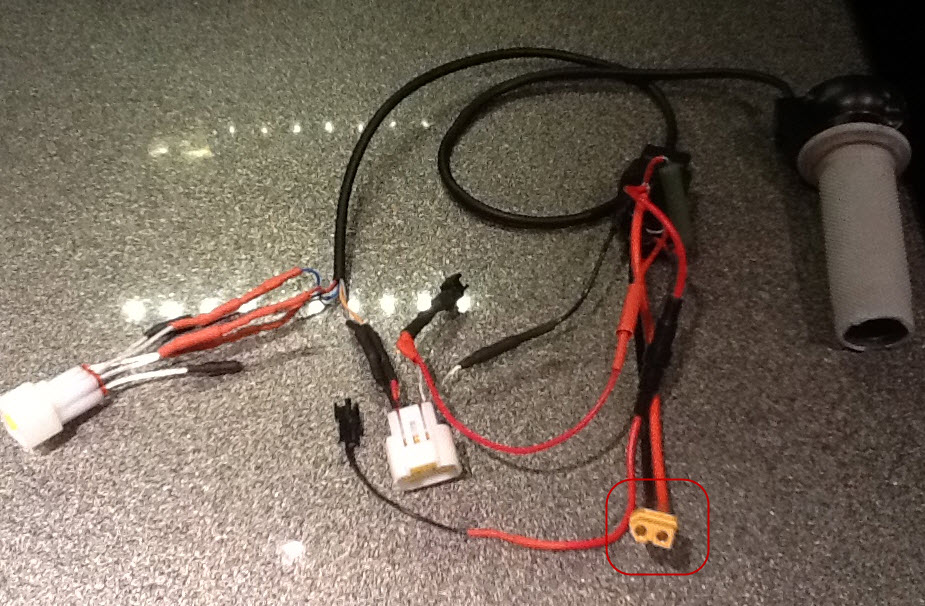
You have soldered a XT60 connector (she) on the top and bottom cable from the relay. After that XT60- have you wired according to the diagram? I.e top (red) to positive on the battery and bottom (black) to B+ on the KDS?
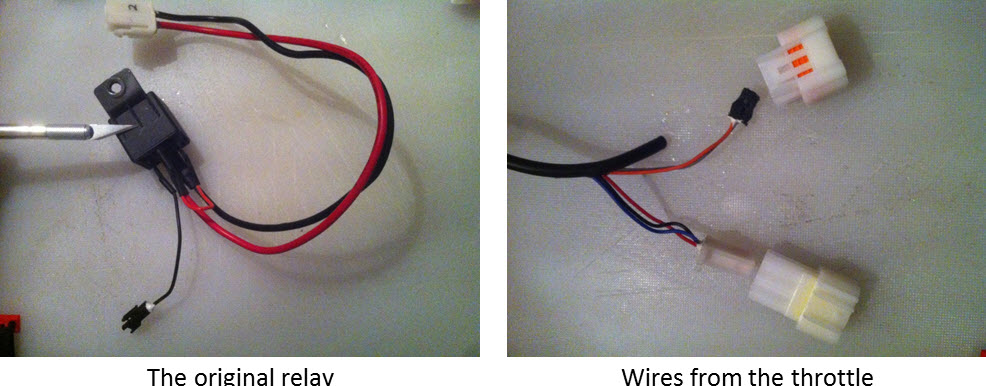
From the relay's right there is a cable that goes to green on the KDS. Does this have a fuse on it? (see pic) And does it have a connector that goes to the key switch?
From the wire diagram I thought that the connectors to the key switch came from left and top on the relay?
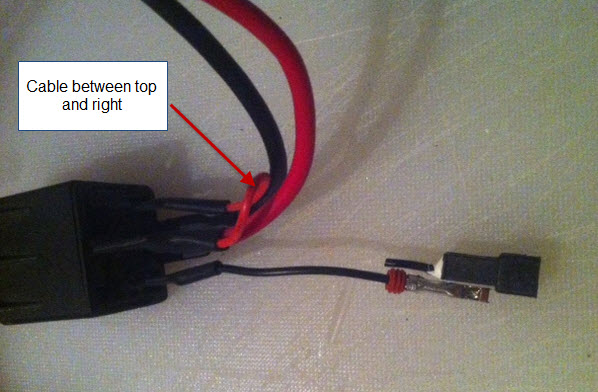
And finally: My relay has originally a small cable that goes between top and right (see pic). Should I remove that one?
Appreciate if you can answer these questions.
Thanks!
Eirik
*** updated.. I had the diode upside down. use this version 16/08/13 ***
Eirik, here's the wiring diagram. Sorry the Relay part is a bit fussy!
if you can save the connectors for the key switch and reuse them on this new loom you are on to a winner.
** I also forgot the stock 45A fuse on the diagram *** It is still there between the +'tive on the battery and the connection into the relay. **
Thanks for all the guidance and well documented installation of the Kelly controller.
I have just received my KDS48200 and am ready to start upgrading my sons Oset 16" 36V.
I do have a couple of questions I was hoping to get your answers on before I start.
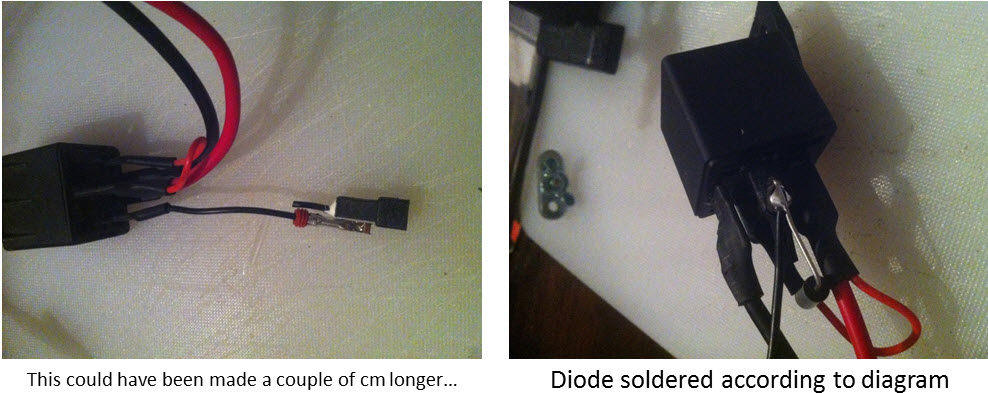
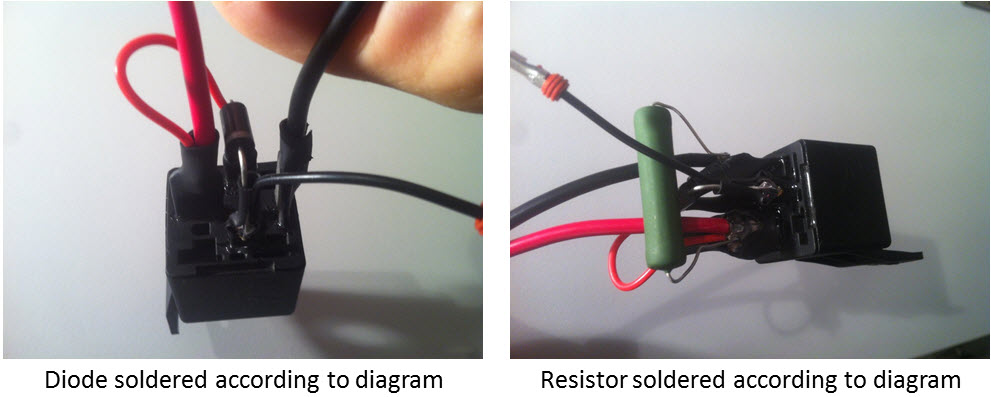
If you want to do the install make sure you have the resistor and diode that came with the controller. More on wiring in a min..
and
Wiring: pay attention to the resistor and diode wiring on the pictures that show how they are soldered on to the relay. These pictures do not show the controller wiring so I can take pics of these if needed.
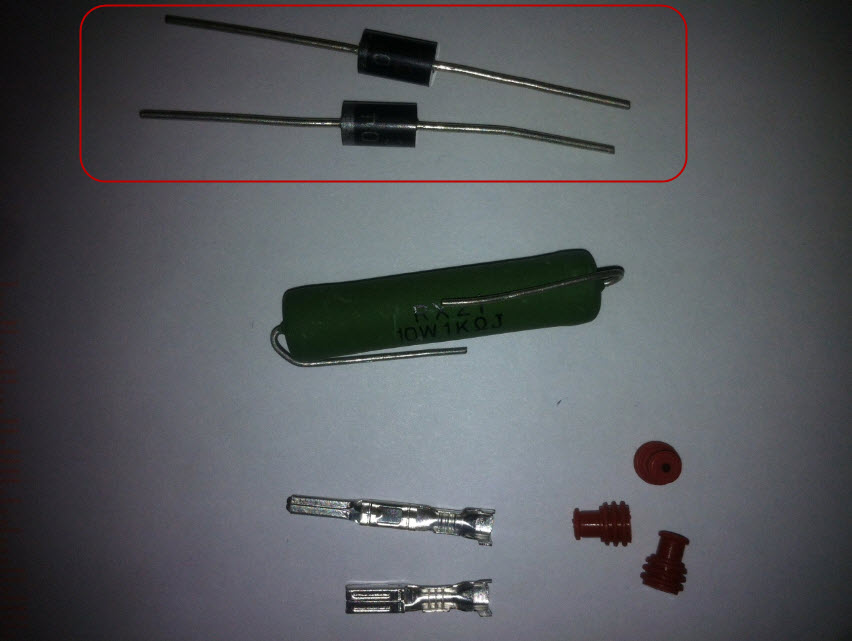
When I opened up the package from KellyControllers there were 2 items I did not manage to see on your pictures (red square on the attached pic). Are these the diodes? Did you use them both? and do you have a picturee showing where you put them?
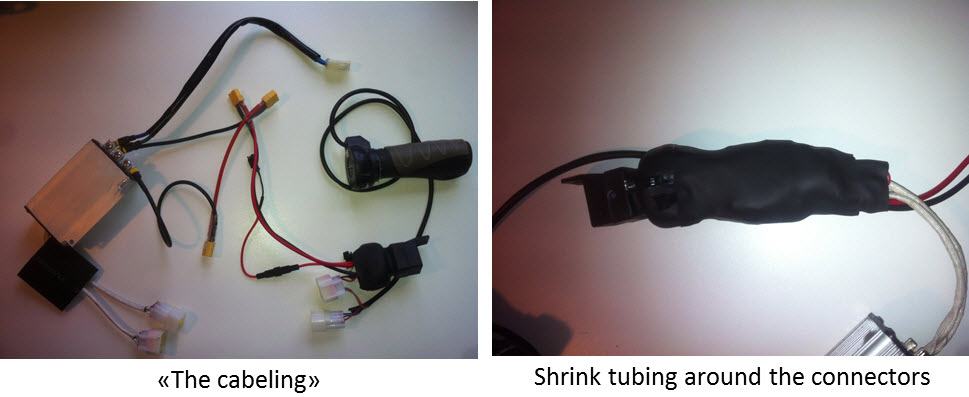
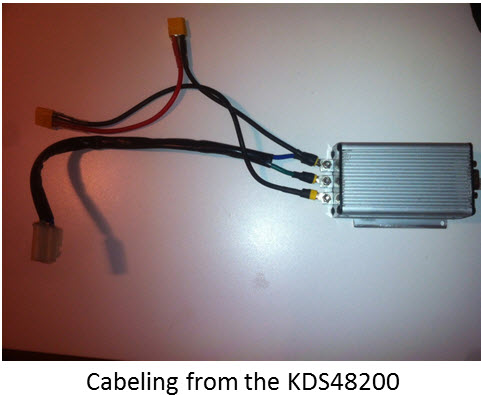
Greatful if you could post some more pictures of your upgrade. Pics of the controller wiring? Any pics of the controller installed on the bike?
Are you satisfied with your upgrade??
Thanks!
Regards
Eirik
BTW I'm going for 2x2 ZIPPY Compact 5800mAh 5S LIPOs in series.


Oset 16.0 24V - Kelly Controller Installation Wiring
in OSET Electric Trials Bikes
Posted
Did anyone change/upgrade their electric motor?
Seems like my XYD-14A 750W motor (16" 26V 2012mod) has ended it's life... and I need to get a new one. OSET sells them but way too expensive. Anyone know how to source/where to buy?
Any compatible models I can use?
Thanks!