Yep I use an ali polish called Belgom - it leaves a wax residue to help protect.
I initially used my drill and a polish kit (different wheels and compound) then keep it fresh with Belgom. It's not the cheapest but on the other hand you don't need to use a huge amount.
Thanks for the tips re the chain tensioner - I'll check that out this weekend.
Some great info, thanks all. I've certainly learnt something new - carbon steel inserts look like a great future solution.
In the end I took the tank and tap to a local indy bike shop, asked for some advice and he fitted a heli-coil while I waited, all for a tenner - how about that!!
Now need to re-flush the tank for any last fragments of swarf.
Of course the petrol tap tightens up exactly 180degress from where it should so will need a thin washer to sort.
I think that's about it - will post some pics of the finished bike soon.
Typical - last hurdle, putting the ali tank back on and the petrol tap threads on the tank seem shot almost to the point where the tap pushes into the tank missing the threads altogether. Last few threads do bite but not enough to hold the tap to the tank.
Any advice anyone?
Heli coils any good, I've never used them so open to advice (pros and cons).
Tank is very dry inside and paint in v good condition so don't really want to weld up the hole and re-drill.
Nearing completion of the re-build and just fitted electronic ignition, cut out switch - interested to see where you've all fixed the coil/HT packs and routed all the wires?
All done, used the Dremel to weaken the ball race, then a couple of well placed light blows to the base and bingo - and managed to save the original lower cup - result.
Next job to fit the new lower bronze bushes into the swing arm - think I'll use a local garage's press for that.
Many thanks all - will more than likely have further questions as the re-build continues.
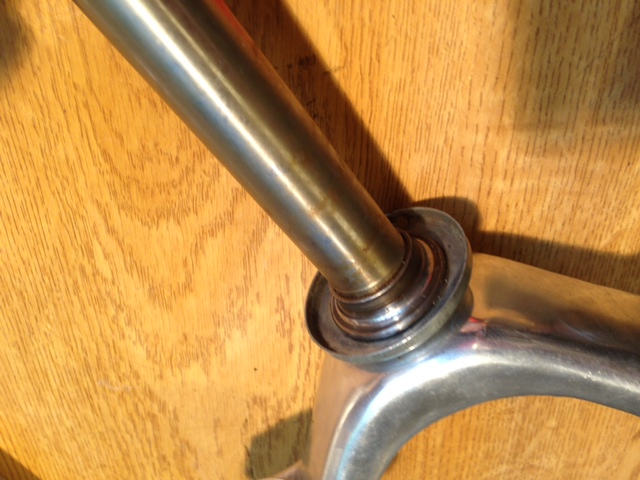
I'm replacing my steering bearings on my 78 Sherpa, removed the old bearings from frame as I'm fitting the new tapered bearings type. Then realised I have to remove the old lower bearing race holder from the lower front fork brace (see attached pic)
Any advice as to how to remove? Assume you need a press to push out the steering shaft from the brace to get the bottom race holder off?
Ideally I want to retain the old original dust plate if possible.
Thanks in advance and hope the above is a good enough description of the problem?
I've owned an 79 Sherpa 350T for many years, both my boys learnt to ride on it and now decided it needs some further refurbishment and attention than my time and capabilities allow.
It runs fine, but has an annoying oil leak/drip
Engine is currently out of the bike whilst the frame is being refurbished..
Can anyone of you point me in the right direction of a decent professional mechanic/bike workshop capable of stripping and giving the engine a 'once over', fixing the leak and fitting electronic ignition?
Thanks for replies - spoke with Aprilia UK and they have ordered a brand new one for me - won't arrive from Italy for another 4 - 6 weeks. I'll believe it when I see it, so will keep you posted.
let me know if you have any takers, I'm after similar info.
Just stripped my front forks on my 93 Aprilia - rubber seals fell apart as I extracted the top inner leg!!! No parts anywhere so resorted to buying a set from a breakers - which in turn were larger than my top yoke. Inner parts were totally different with nothing interchangable whatsoever.
Anyway sorted in the end - a couple of O rings seemed to replace the knackered seal and all working fine.
So let me know if you need some spare parts, just be warned the forks seem very model specific around the 92/93 model year.


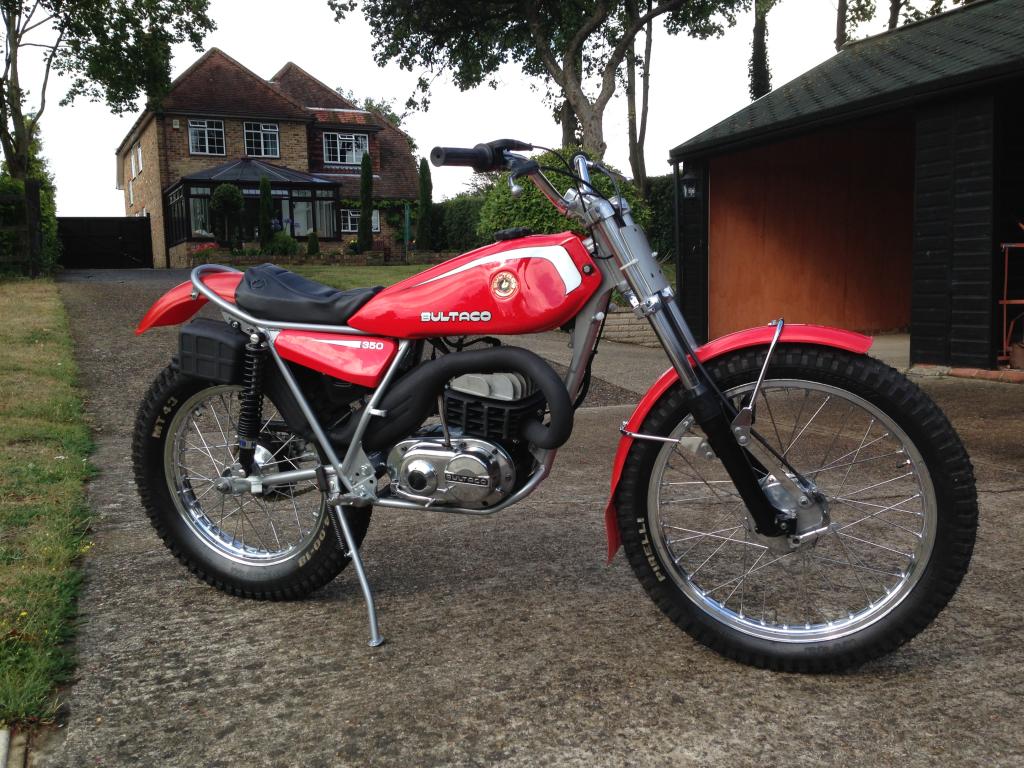
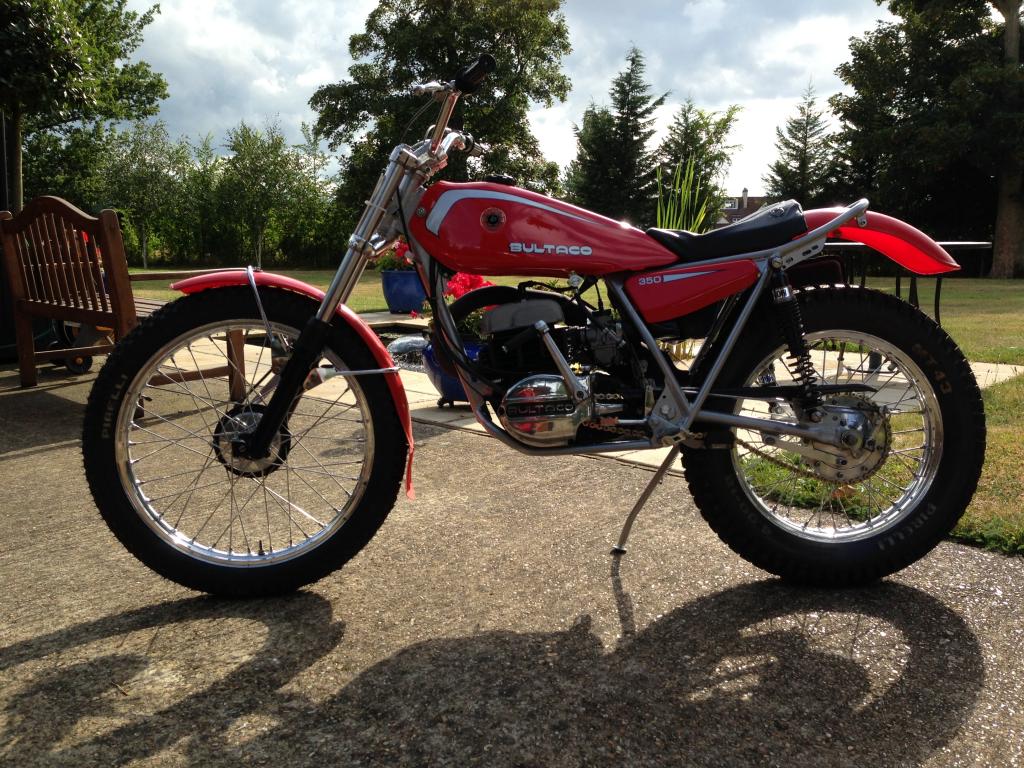
Rebuild Is Finished
in Bultaco
Posted
Yep I use an ali polish called Belgom - it leaves a wax residue to help protect.
I initially used my drill and a polish kit (different wheels and compound) then keep it fresh with Belgom. It's not the cheapest but on the other hand you don't need to use a huge amount.
Thanks for the tips re the chain tensioner - I'll check that out this weekend.
Happy buffing
D