| |
-
Thanks guys, that's interesting to know about the part numbers Woody. The photocopies are from a model 80 catalogue but I dare say there was a lot of common parts between these two models. I still don't really understand why it indicates quantity 1 in a model 80 book if it's only used on a 49, surely the quantity column should be blank, I dunno?.
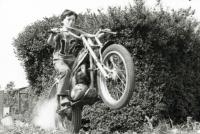
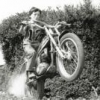
Anyway I don't remember there being any decals on it when we got it about 76-77. Looking at a handful of old black and white photos of me riding it I can't see anything, but it might well have been repainted. The tank had been split and repaired and a strip of electrical insulating tape was used for a pinstripe.
Stuart your bike looks very tidy and your tank in real great shape. Where did you get the silencer boxes from - Spain? I have one of the aluminium boxes from the '70s on mine but it's fell apart inside. I'd like to put the proper one on it.
http://www.ralphsbultaco.blogspot.co.uk
-
I'm coming close to painting the bike and I wondered if anyone knew what stickers where on the bike from new. There weren't any on it that I can remember, but the book shows a various selection. Were these perhaps available to buy if you wanted to add them yourself ? I've hunted for old photos from back in the day but am not any the wiser. Does anyone remember.
http://www.ralphsbultaco.blogspot.co.uk
-
My tank and seat doesn't sit directly on the frame tubes, there's plenty of clearance above. I've tie wrapped some flat rubber to the frame to support it. You can also get rubber rests for the front of the tank.
http://www.ralphsbultaco.blogspot.co.uk
-
It's great when the post comes ! - good you got those brake plates sorted, looks a good job.
http://www.ralphsbultaco.blogspot.co.uk
-
Thanks, I probably will go for the 360mm ones. I didn't know the alloy betors had steel bodies, that's good to know.
-
I was thinking about buying new shocks sometime as these old ones are done. I don't know where I got them from but they measure 355mm between centres.
I see that most of the Betor shocks come in either 340 or 360 mm lengths. So what do you think is most suitable for a 250cc model 80.
I quite fancy the aluminium body ones but just wondered what length would be best, if it makes much difference at all?
http://www.ralphsbultaco.blogspot.co.uk/
-
If you can't get sorted out locally, I could do that for you, but you'd need to post me over the bits.
http://www.ralphsbultaco.blogspot.co.uk
-
Superb work Bondy. Its a beautiful bike well restored, a credit to you. You keep a tidy wee shed too.
http://ralphsbultaco.blogspot.co.uk
-
I've got some really old ones to move with a good soak in plus gas then plenty of heat on the nipple with a blow lamp.
The Bultaco spokes had a 3.5mm thread according to the book. If you get new nipples they might well have a 6-40 UNF thread. However the two threads are so close to the same pitch that it's possible to just run a 6-40 UNF die down the spoke and clean it up enough so the nipple will screw on nicely. Use a good cutting paste if they're stainless spokes.
-
It looks very tidy Bondy. Always lovely to work with nice clean parts. I'm still working at fixing my frame before I can paint anything. What sort of paint did you use on yours - 2 pack?
http://www.ralphsbultaco.blogspot.co.uk
-
The pivot pin is 11mm in diameter. I used circlips with an I.D. of 10mm when I made my pins. (check a few posts back for pictures.) If your really stuck PM me and I'll post you some.
- Well having said that mine's a different model so maybe the shoes are not the same.
-
You might be able to do something with that coil. Basically that wire is enamel coated to insulate each turn from its neighbour. Looking at your photo the wires on the layer below look to have the enamel scratched off and are touching. This would mean they are shorted out at this point, so you have effectively lost turns and generated voltage.
To fix it you could try to separate them very carefully where the enamel is damaged with something blunt like a lolly pop stick. Once you have a little gap between turns paint over the scratches with a little paint. Don't worry too much about the twisted shape. If it doesn't work then go with the exchange part.
-
Great write up of your night. You'll remember that evening forever.
-
Yes the clutch consists of all steel plates - 12 in total. The first one that goes into the clutch has the tabs on the outside followed by a plate with notches on the inside, carry on in that order. But it doesn't look like you have enough.
I have a parts book for a model 80 - i think it might be similar to your engine.
http://www.ralphsbultaco.blogspot.co.uk/2014/04/12-download-parts-list.html
-
I've made the pins in A4 stainless, although I had to buy a piece of material as the only stuff I have is inch and a half and I didn't fancy turning it down that far.
Perhaps the best pins you will NEVER SEE !!
-
Hi folks, here's the answer. They press out - no splines or anything - dead simple. I'm gonna make nice new ones out of stainless.
Yes Nigel, you're right, the pivot cam wears into the backplate, if you look up at the top photo you can just see a bit of a brass bush I put in there at one time for that very reason.
But I'm not finished yet. I'm thinking also that I might skim out the brake liner, then make and fit a new one. Has anyone done that job.
http://www.ralphsbultaco.blogspot.co.uk
-
I don't think that they're cast in, that's unlikely. They are in the parts book with a part number so they must be a replaceable item. I'll try pressing one to see if it's splined. But you're right, they would do ok as they are.
www.ralphsbultaco.blogspot.com
-
Does anyone know how these pins come out? I was going to make new ones from stainless steel. I thought at first they would just unscrew but they wont. Now I'm thinking they might be pressed in on a spline like a wheel stud is pressed into a car hub.
Any ideas?
-
Try emailing Christina Soler at the moto museum in Barcelona. She might have a copy in the shop. Mind you, it will most likely be in Spanish.
http://www.museumoto.com/en/
-
Thanks for the replies. I'll keep the blog updated with plenty of photos. Hopefully if I keep doing a little bit each day it won't take forever to finish.
-
Hi Stuart, I often though about fitting a Mikuni carb. I could never get a great tick over and always blamed it on the Amal body being worn, but I might put the amal back on just for originality.
When I was with the Romero's in Spain I was hoping to get an exhaust. Unfortunately they can't make the original main box any more, (although it's on their website). I think what he was trying to tell me was the man who used to work in the shop left with the "moulds" then scrapped them. But they do still make the chrome header pipe and the triangular box. I've a Miller part on this bike, don't know what I'll do with it.
I bought alloy mudguards instead, then ended up having to buy a bigger suitcase 'cause they wouldn't fit in the one I had ! They were a little cheaper than in the UK, 220 euro, about £180 for the pair.
-
Hi folks, I've started to restore our old Bultaco (again!). I've also started a little blog to document how it's all progressing. If anyone's interested follow the link and take a look, although I'm still only at the strip down stage.
Today I've scanned in the parts list for this bike and put up a link on the blog where you can download it. It might be useful to some others. The link is entry number 12.
http://ralphsbultaco.blogspot.co.uk
I'd like to here from any other owners who've restored one.
Thanks,
Ralph.
|
|