Been on to several fiberglass places and for those who may be interested the recommendation is to use a vinylester laminating resin.
It has a maximum service temperature of 60 degree C when in contact with pure petroleum, and 50 degree C with 10% Ethanol.
Their words "As long as the overall temperature of the tank does not exceed 50 degree C, it will be fine" are the best response I got.
I know it can get 50C in my workshop in the summer, so not much safety margin even without E10.
Most of the 1970s spanish bike fibreglass tanks that have come into my possession have had extremely poor condition internals with bare glass visible in many areas. You could see areas of thin resin in the dark using a strong torch shone inside the filler hole and can see the exposed glass using a torch and a small mirror. There is no way that I was going to paint a tank in that condition. I have found that after a thorough degrease process then an internal coating of brushing epoxy resin binds perfectly to the old polyester resin and the exposed glass and the epoxy is also highly resistant to the weird stuff they put in petrol nowadays. It adds a couple of hundred grams to the tank and great peace-of-mind to me. The oldest one of mine is an Alpina tank done in the early 2000s and it has had petrol sitting in it since then. The colour of the epoxy inside has gone from light brown to mid brown in that time but otherwise looks unchanged. I've done 5 or 6 old spanish fibreglass tanks so far like this and they are all still going very well and they all have petrol left in them between rides.
Pretty much describes what I found inside mine, how did you degrease yours to be sure the resin would stick properly?
I'm now sanding/grinding the remains of tank sealer and unfinished glass inside the 2 halves. Plan is to re-glass both halves to strengthen and repair, then glass it back together.
Only other avenue I'll check out first is I have access to a small 3 litre metal fuel tank that may fit inside the fairing, just got the dimensions late tonight, so I'll check it out tomorrow.
Hi Oldaz, bit late for you now but I bought an earlier model than yours a few months ago and have been faced with just about the same set of problems as you.
My tip to everybody would be, go out and spends wads of cash on an endoscope before you do anything else.
Mine fits my android phone and a windows 7 notebook/laptop. You can look inside tanks, bores, gearboxes, you name it.
Mine came with a 90 degree mirror ad adapter, a magnet attachment and a small hook. The software allows you to take stills and make videos.
There are loads available for all sorts of end devices and the wads of cash was € 20. Well worth it as far as I'm concerned.
Phil
Great idea Phil, would also pay to expose the tank to bright light/sunshine while you look with the scope, cracks/holes show as a dark color. I've wanted to get a long scope for a long time to explore inside some pipes and also under a rock overhang on farm that may be of indiginous interest. Now might be too late for the tank, but a good time for the farm.
If it was me I'd fix the top part and put it back together
Since looking at the shedworks site, my thoughts are heading in this direction using ethanol resistant resin. I don't think the extra glass and resin will add much weight (smiles) or reduce the fuel capacity much for the extra strength and security.
I was interesting to see the amount of cracking inside and how much the fiberglass had deteriorated from uv exposure, the new lining was never going to do a good job.
Disappointed that I'll have to repaint the outside again and now have to find another set of stickers, not a cheap exercise.
Resin and glass mat are relatively cheap and I assume you are retired so you have the time to do a thorough repair job. Just remember not to use any fuel with ethanol in it.
Not officially retired as I'm still farming, but do have time to do a good job. I've decided to go fiberglass, just haven't made up my mind as to whether the repair will be like the original or whether the base of the original will be the base for a stand alone tank to fit in the original fairing. Non ethanol fuel isn't a problem here in Oz, but I'll look into ethanol resistant resin as used in the shedworks glass tanks.
What oil are you using? With modern 2 stroke oils I wouldn't go past about 40:1. That black soot also looks like it might be running really rich, so I would also check the carb setup.
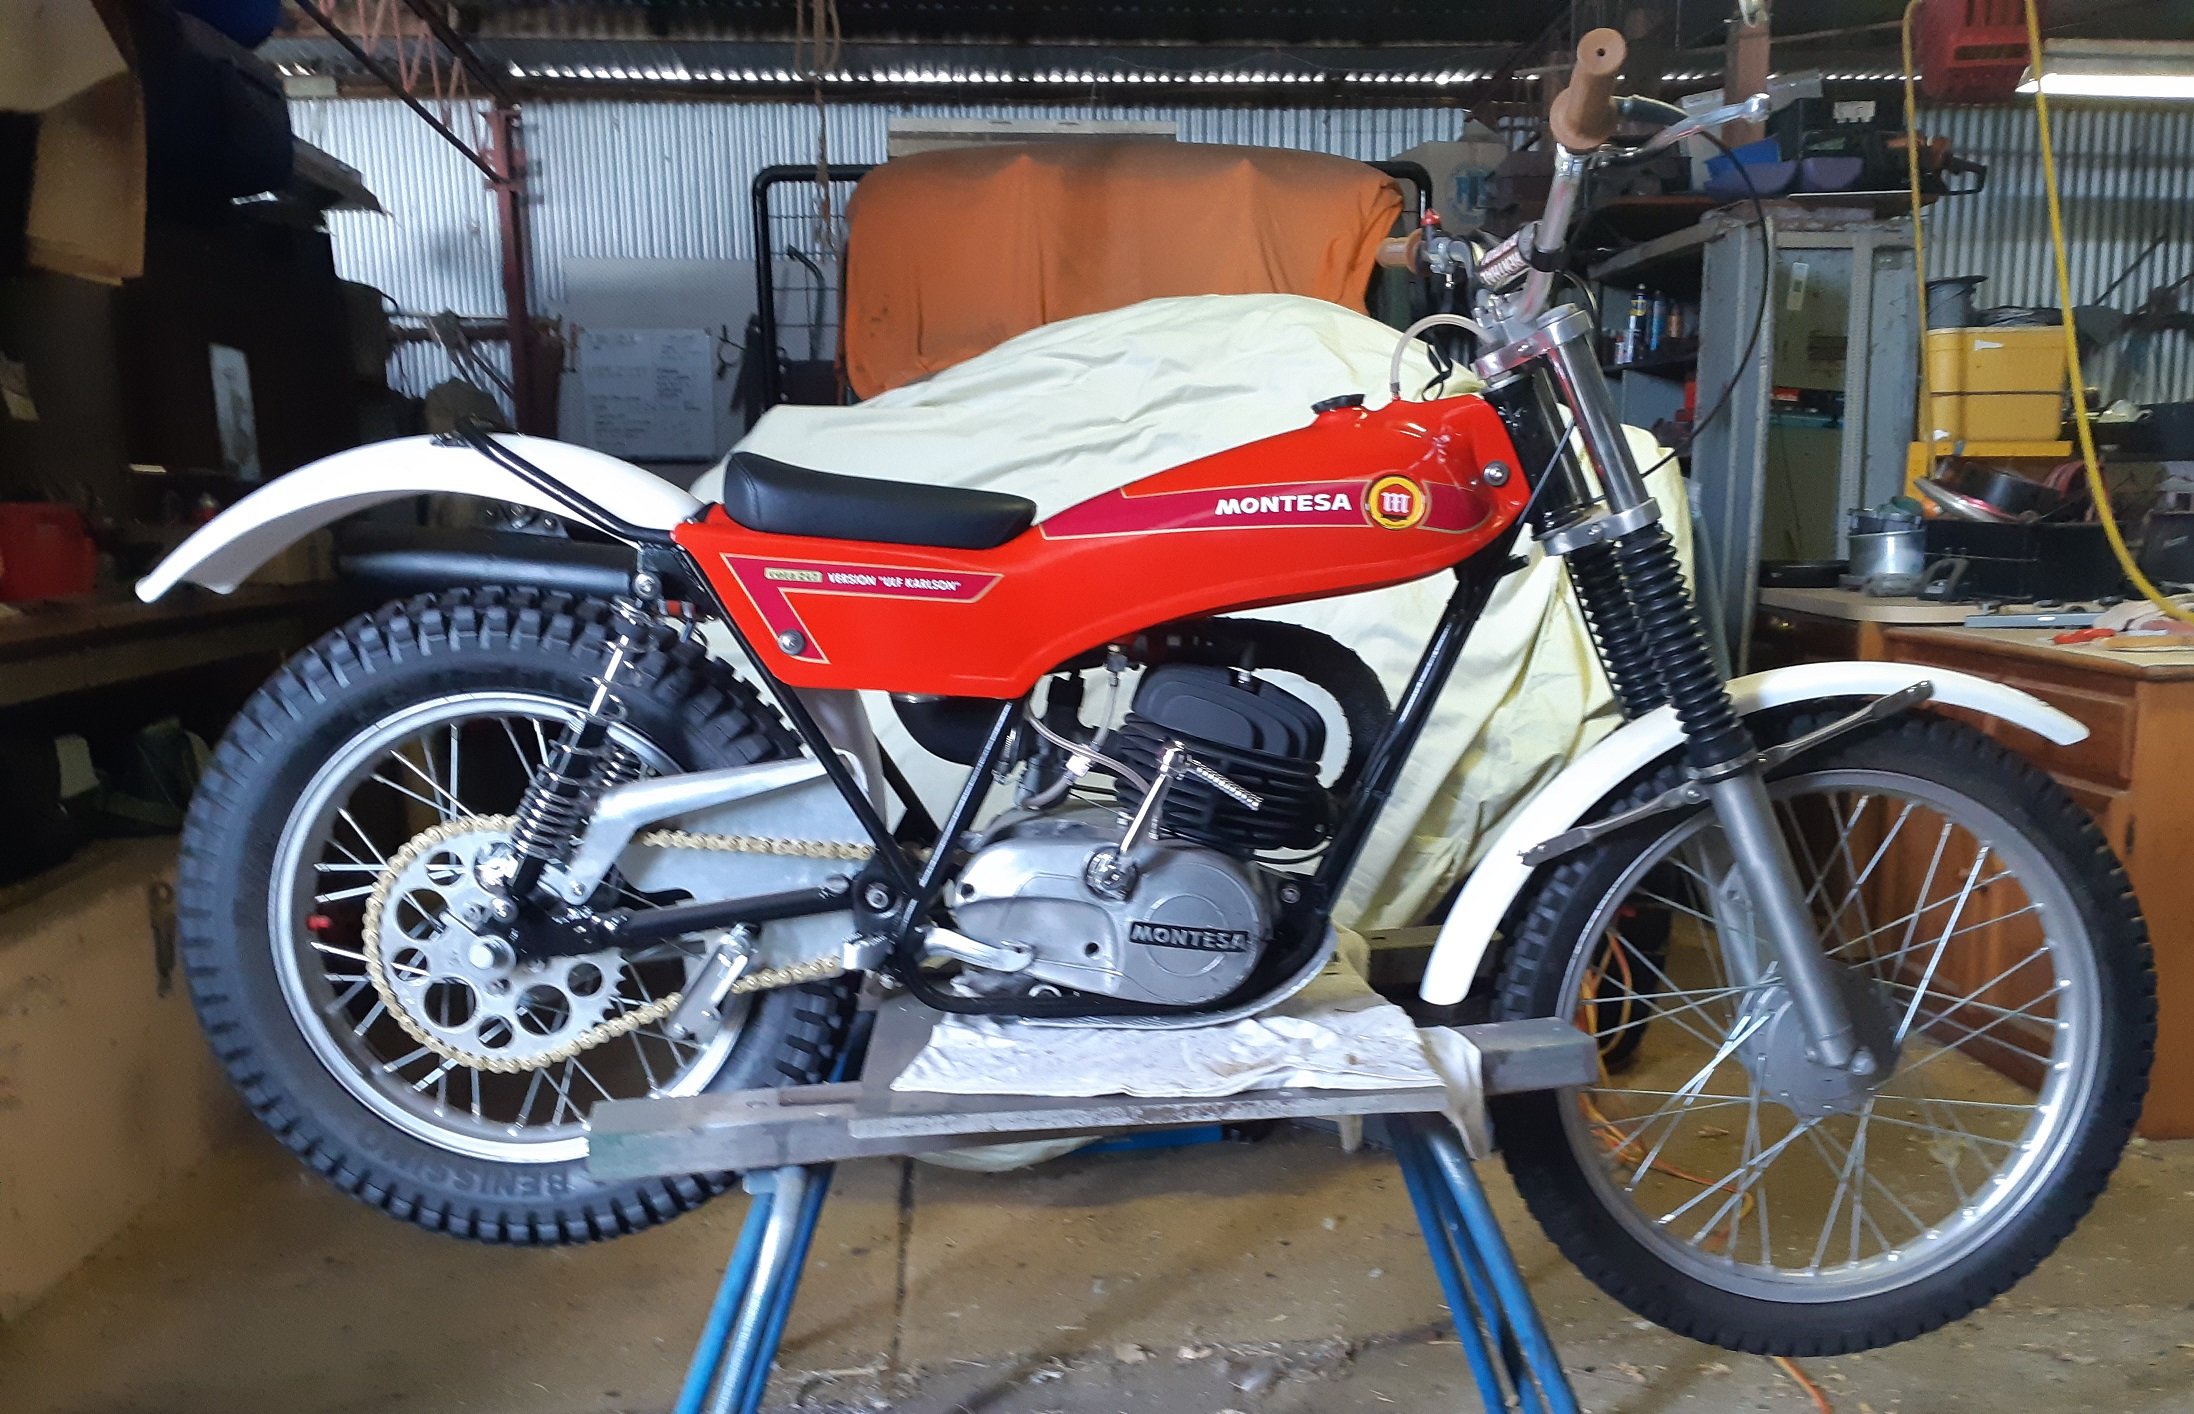
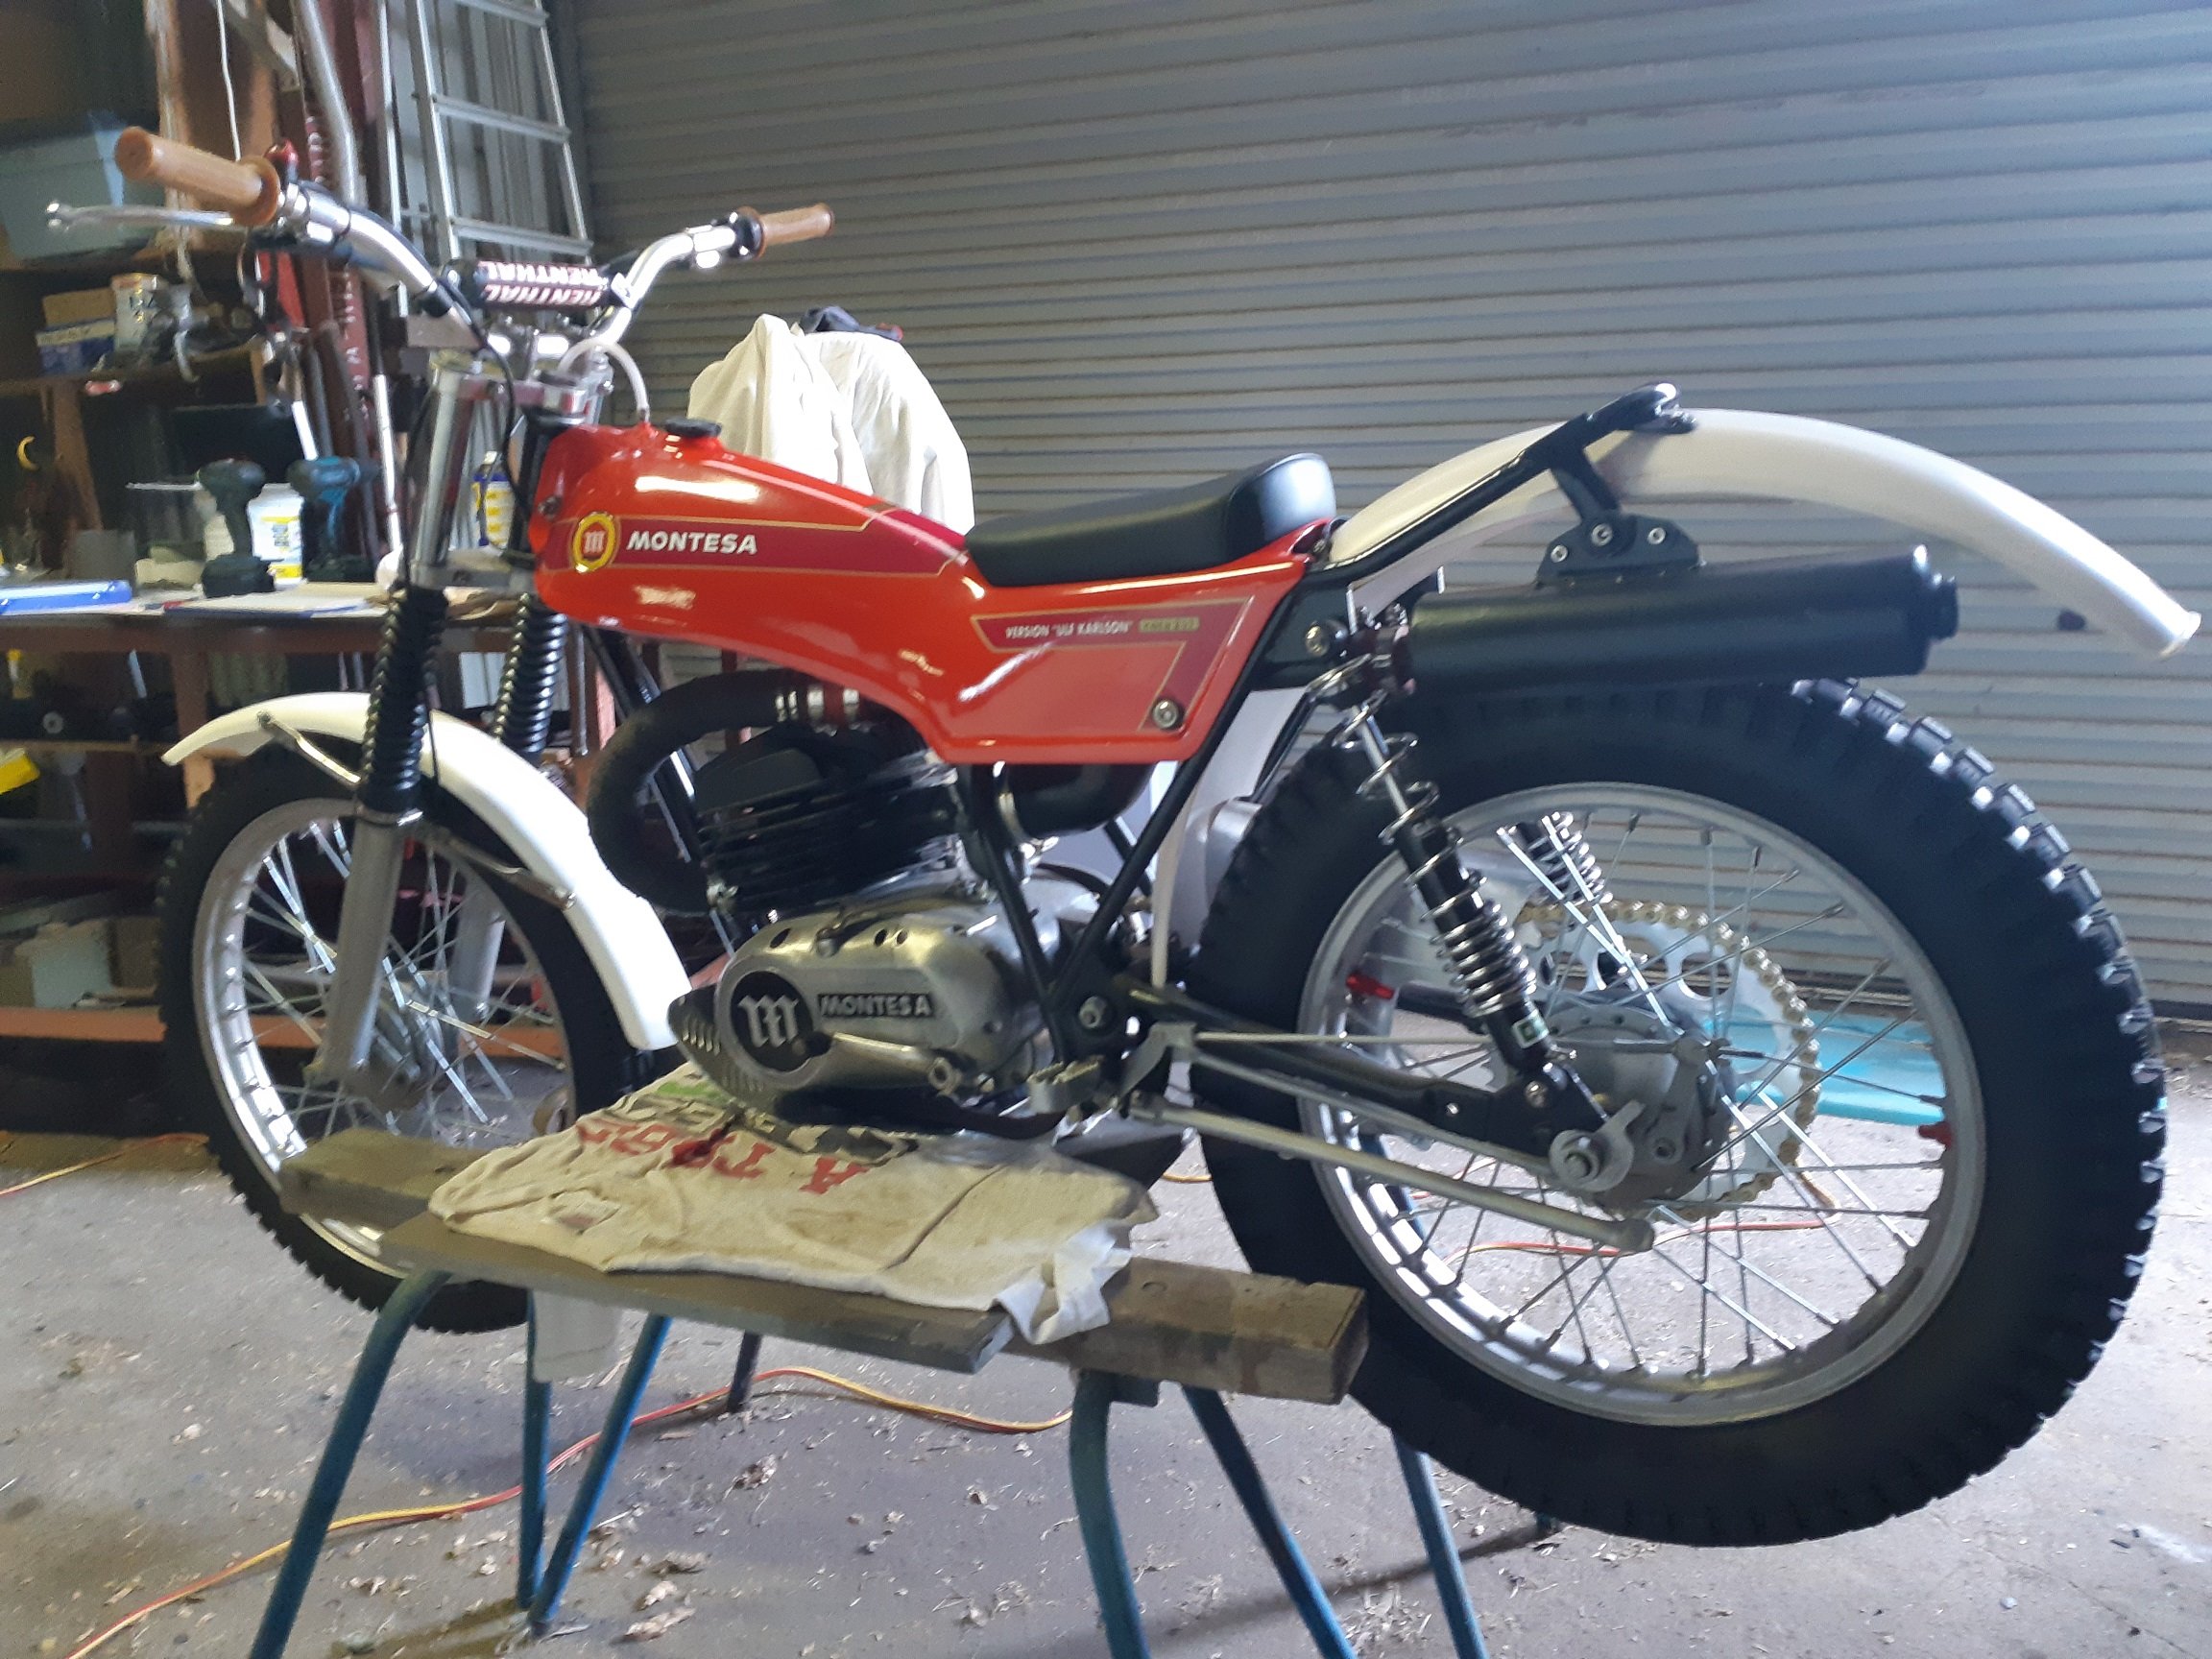
I finished the rebuild on my 247 a few months ago, dropped a bit of fuel in it and rode it around the back yard then put it away in the shop with a view to sell it. I figured one ride at my 74 years was enough for this old body.
A friend wanted to have a look at it (the bike, not the old body) and to my dismay the paint on the fuel tank had bubbled in several places. I had sealed and refinished the tank, so expected it would be good.
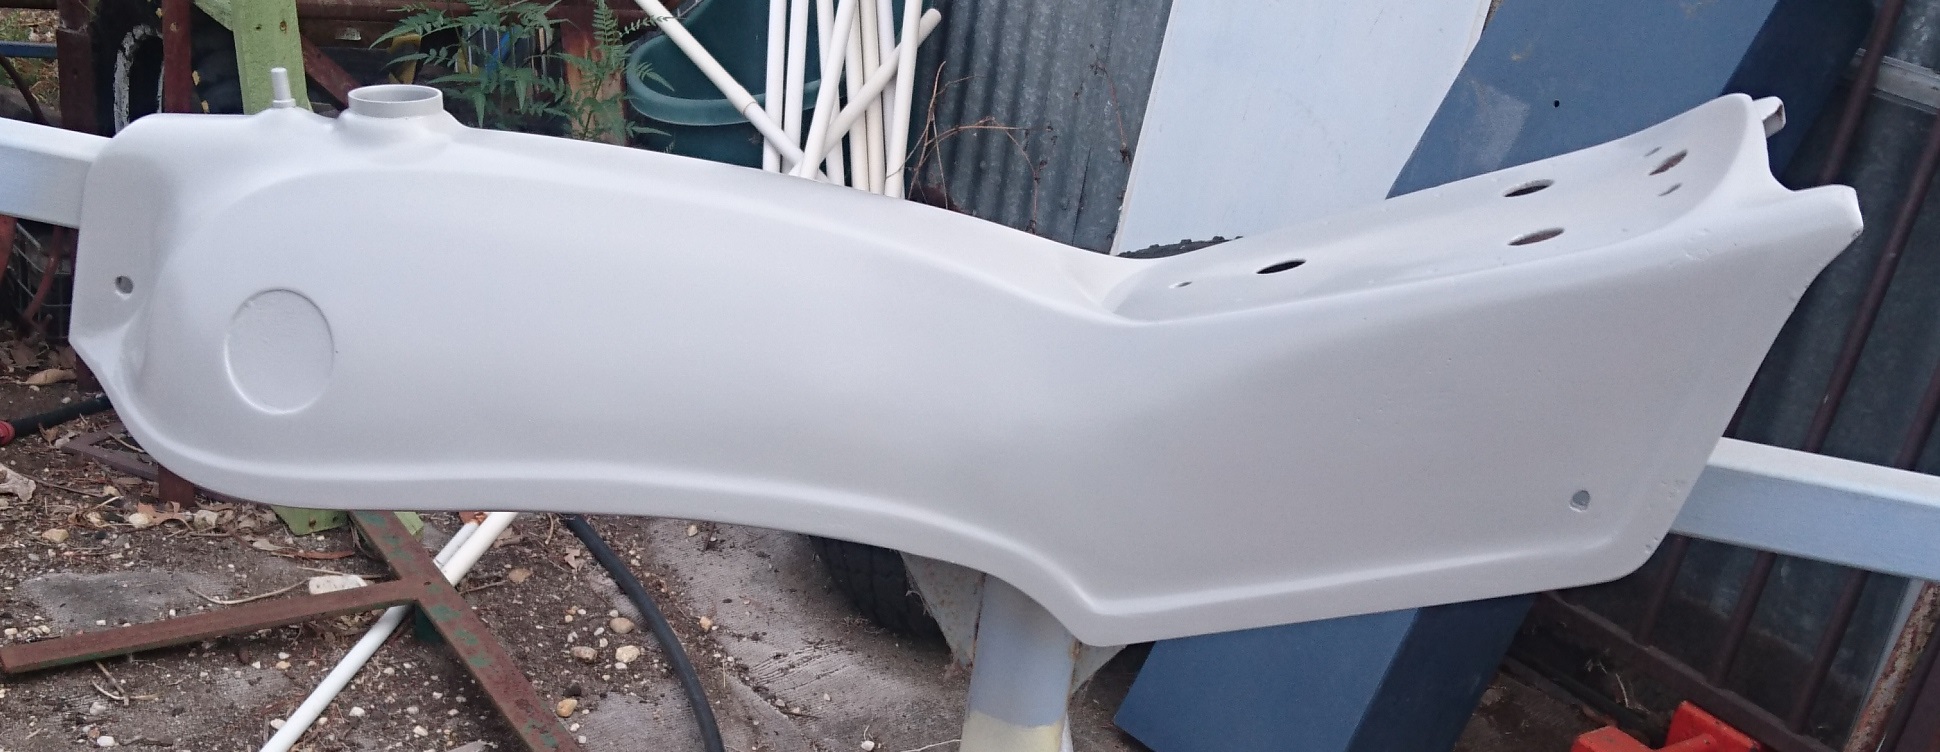
This bike had been worked hard, then sat out in the weather for 30 odd years before I got it and apparently our Australian sunshine didn't do the fiberglass any favors. After inspecting as much as I could I decided the only way to fix it properly would be to take the tank apart and fix from the inside. I used a Dremel type tool to carefully cut the base out of the tank assembly and I'm now glad I made this decision. The inside of the top section is all cracked and crazed and no way would a sealer ever have "fixed" it.
I now have the dilemma, do I use the base to make a new fiberglass tank that will fit inside the original cowling, or do I re-fiberglass the inside of the cowl section and glass the bottom back in? The bottom is much thicker and no signs of cracking, so I'll at least use it.
Finished the building stage today, just need fuel and carby tune to end project.
Put some fuel in it, primed through plug hole and it started first kick. Had a (very) short ride around back yard and put it away, getting too old for this stuff, lol.
Not yet, been out of action for a while, did the second coat of primer filler and sanded back ready for paint. Got the paint, new Ulf Karlsson stickers arrived, but done nothing since. Now hoping to get some tank sealer and maybe finish it off in the next couple weeks, then sadly it will be on the market along with some other projects.
Finished the building stage today, just need fuel and carby tune to end project.
on ours we did not and the nice new paint almost immediately blistered. Arggghhh!
Not yet, been out of action for a while, did the second coat of primer filler and sanded back ready for paint. Got the paint, new Ulf Karlsson stickers arrived, but done nothing since. Now hoping to get some tank sealer and maybe finish it off in the next couple weeks, then sadly it will be on the market along with some other projects.
removed the swing arm from my 247 after having to cut the spindle bolt. I’ve soaked it in wd40 now for 3 weeks and can’t get the bushes or bolt out.
any advice? Tried a big hammer and drift, didn’t move.
should I use an oxy to heat the swing arm and then try the big hammer again.
thanks
Glen, the bushes on my Ulf Karlsson 247 are a rubber in steel torque type. The bolt is a firm fit in there and when tightened up the rubber acts as a type of shock-absorber, although it does limit the movement of the swingarm. Heating with a torch will burn the rubber, so unless you want to replace the bushes with a different type, go carefully. I believe Inmotion sells a conversion kit, otherwise you might try drilling the bolt out. If your 247 doesn't have the rubber type, then possibly drill one end of the bolt to get a good starting point and press them out.
Looks good, very neat and tidy slider, reason I left mine wider was to protect the engine side covers, any more damage to them and it would be difficult to repair them. Thanks for sharing the pics.
Oil changed in the gearbox and it is definitely shifting better
Took it to our car clubs (Hi-Lites Motor Club) first show of the year and it was a huge hit everybody loved it
Glad the oil seems to make the box better, will be interesting to see how it goes long term.
That's great about the show, we're starting to see similar things at car shows here, where folks are bringing out their restoration/repair projects from their sheds/shops where they've been hidden away from the general public.
I still have to paint the tank on mine to finish it off.
According to the Maxima site, the oil helps prevent clutch slippage, so if true, it could possibly reduce gear slip. It doesn't take much bearing and gear wear before the gear clearance and angular alignment in these boxes starts to be affected, which can lead more to gears not wanting to stay together when selected.
Cant find anywhere where it says it is Classification GL-4 ?
I looked at their data sheets and they say it has a zinc additive, which would normally put it in GL-4 class (although it doesn't say so) - I noticed their 80/90 hypoid gear oil says GL-5 in their advertising.
It also says it is compatible with wet clutches so I may just go with the Maxima instead of atf in the clutch/primary....
One reason people go for ATF is to keep the clutch operation as light as possible. Due to the different properties of the 2 oils you mention, I would be most interested to know how it goes if you decide to use the Maxima, it may improve the component life.
Nice looking bike. You could drain the gearbox and try some 75w gear oil - needs to be a GL4 type oil as there's brass bits in there and GL5 will affect the brass over time.
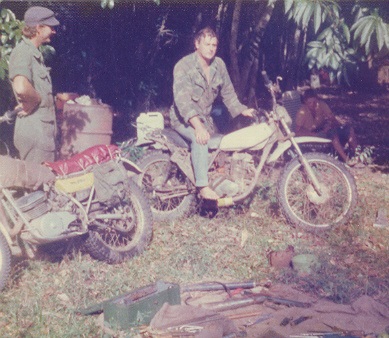
When I was exploring, I added a rear carrier from some other bike, allowed me to carry fuel, water and a few basic spares as area was quite remote - also added some blanket material to the tank so the dog would have something to grip and tied a (very) basic swag to the handlebars. I carried a bigger drive sprocket and chain extension for longer on-road travel - I could cruise about 100kph on dirt/gravel roads with the higher gearing. Mechanically the bike was standard. Attached picture taken late '74 on Cape York (Australia) - TY250b on left with scratch built longer seat over the original and the carrier and ex-army saddle-bags with mate's 175 Honda. My swag was the piece of canvas in the foreground used when repairing punctures.
No idea what oil is in the forks, and yea I have yet to ride it and see how it feels, and the mechanic is a endure rider, hope to pick up the bike this week and take it for a ride to form my own opinion
There are a lot of people out there who use trials bikes for other purposes and the set-up that suits those purposes will either be to accept how the bike is, or "adjust" the bike to suit, so the set-up will depend on how it rides and what you want to do with it.
Many years ago I used a TY250b for exploring remote areas and with a couple small additions, it was perfect for the task. I also rode a couple trials on the same bike.
One thing he said with the new rear shocks it is transferring weight to the front end, do you think a heavier oil in the forks would help?
Interesting question, where someone expresses an opinion that may or may not be correct. Did you get the shocks set for your weight? Are they the correct length? What oil is in the forks? Have you ridden it yet?
More progress, although it's slow going. Fibreglass repairs completed and first coat of primer-filler on the tank/seat unit. Have to sand it back now and probably a second coat before I get to final paint. The end is finally in sight.
Thanks for all the responses, with the help from all of you, I might get this thing finished.
Here's a picture of the nicely re-chromed kickstart now in place and working fine and theoretically that's the last of the mechanical bits. Started on fibreglass repairs to the tank/seat unit, already got the 2k paint for it and first lit of fibreglass applied. Need to get some primer filler for the little ripples/scratches next.
Got a response and pictures from Pete at Inmotion. The first thing I noticed was in one picture it shows the hook end of the spring hooked around the bottom of the kickstart lever and the hook has a slight twist to allow it to fit right in there. The end of my spring wasn't twisted like this and didn't fit right in the notch, so I modified it to fit the same way. That gave another few degrees less tension and although I believe it's still more than needed I can now get the lever on there. My original spring was broken and part of it missing, so I had nothing to go by, now it makes sense.
Thanks for all the responses, with the help from all of you, I might get this thing finished.


Cota 247 VUK fuel tank problems
in Montesa
Posted
So you're saying epoxy resin rather than vinylester? Fiberglass mob have poly, VE and epoxy, but say the VE is best for petrol?