pmk
Members
-
Joined
-
Last visited
Everything posted by pmk
-
The countersink cutters angle must match the bolt heads angle, otherwise there will be only a small ring of surface contact between the bolts head and countersunk hole in the sprocket. You mentioned using a drill to accomplish countersinking the sprocket. Most drill bits are an angle of 118 degres and some being 135 degrees, but other odd angles may exist. Countersinks come in various angles also, typically 60, 82, 90, 100, 120 degree cutting angles. Pretty certain the proper cutter angle was 90 degrees, but did not run to the toolbox and check.
-
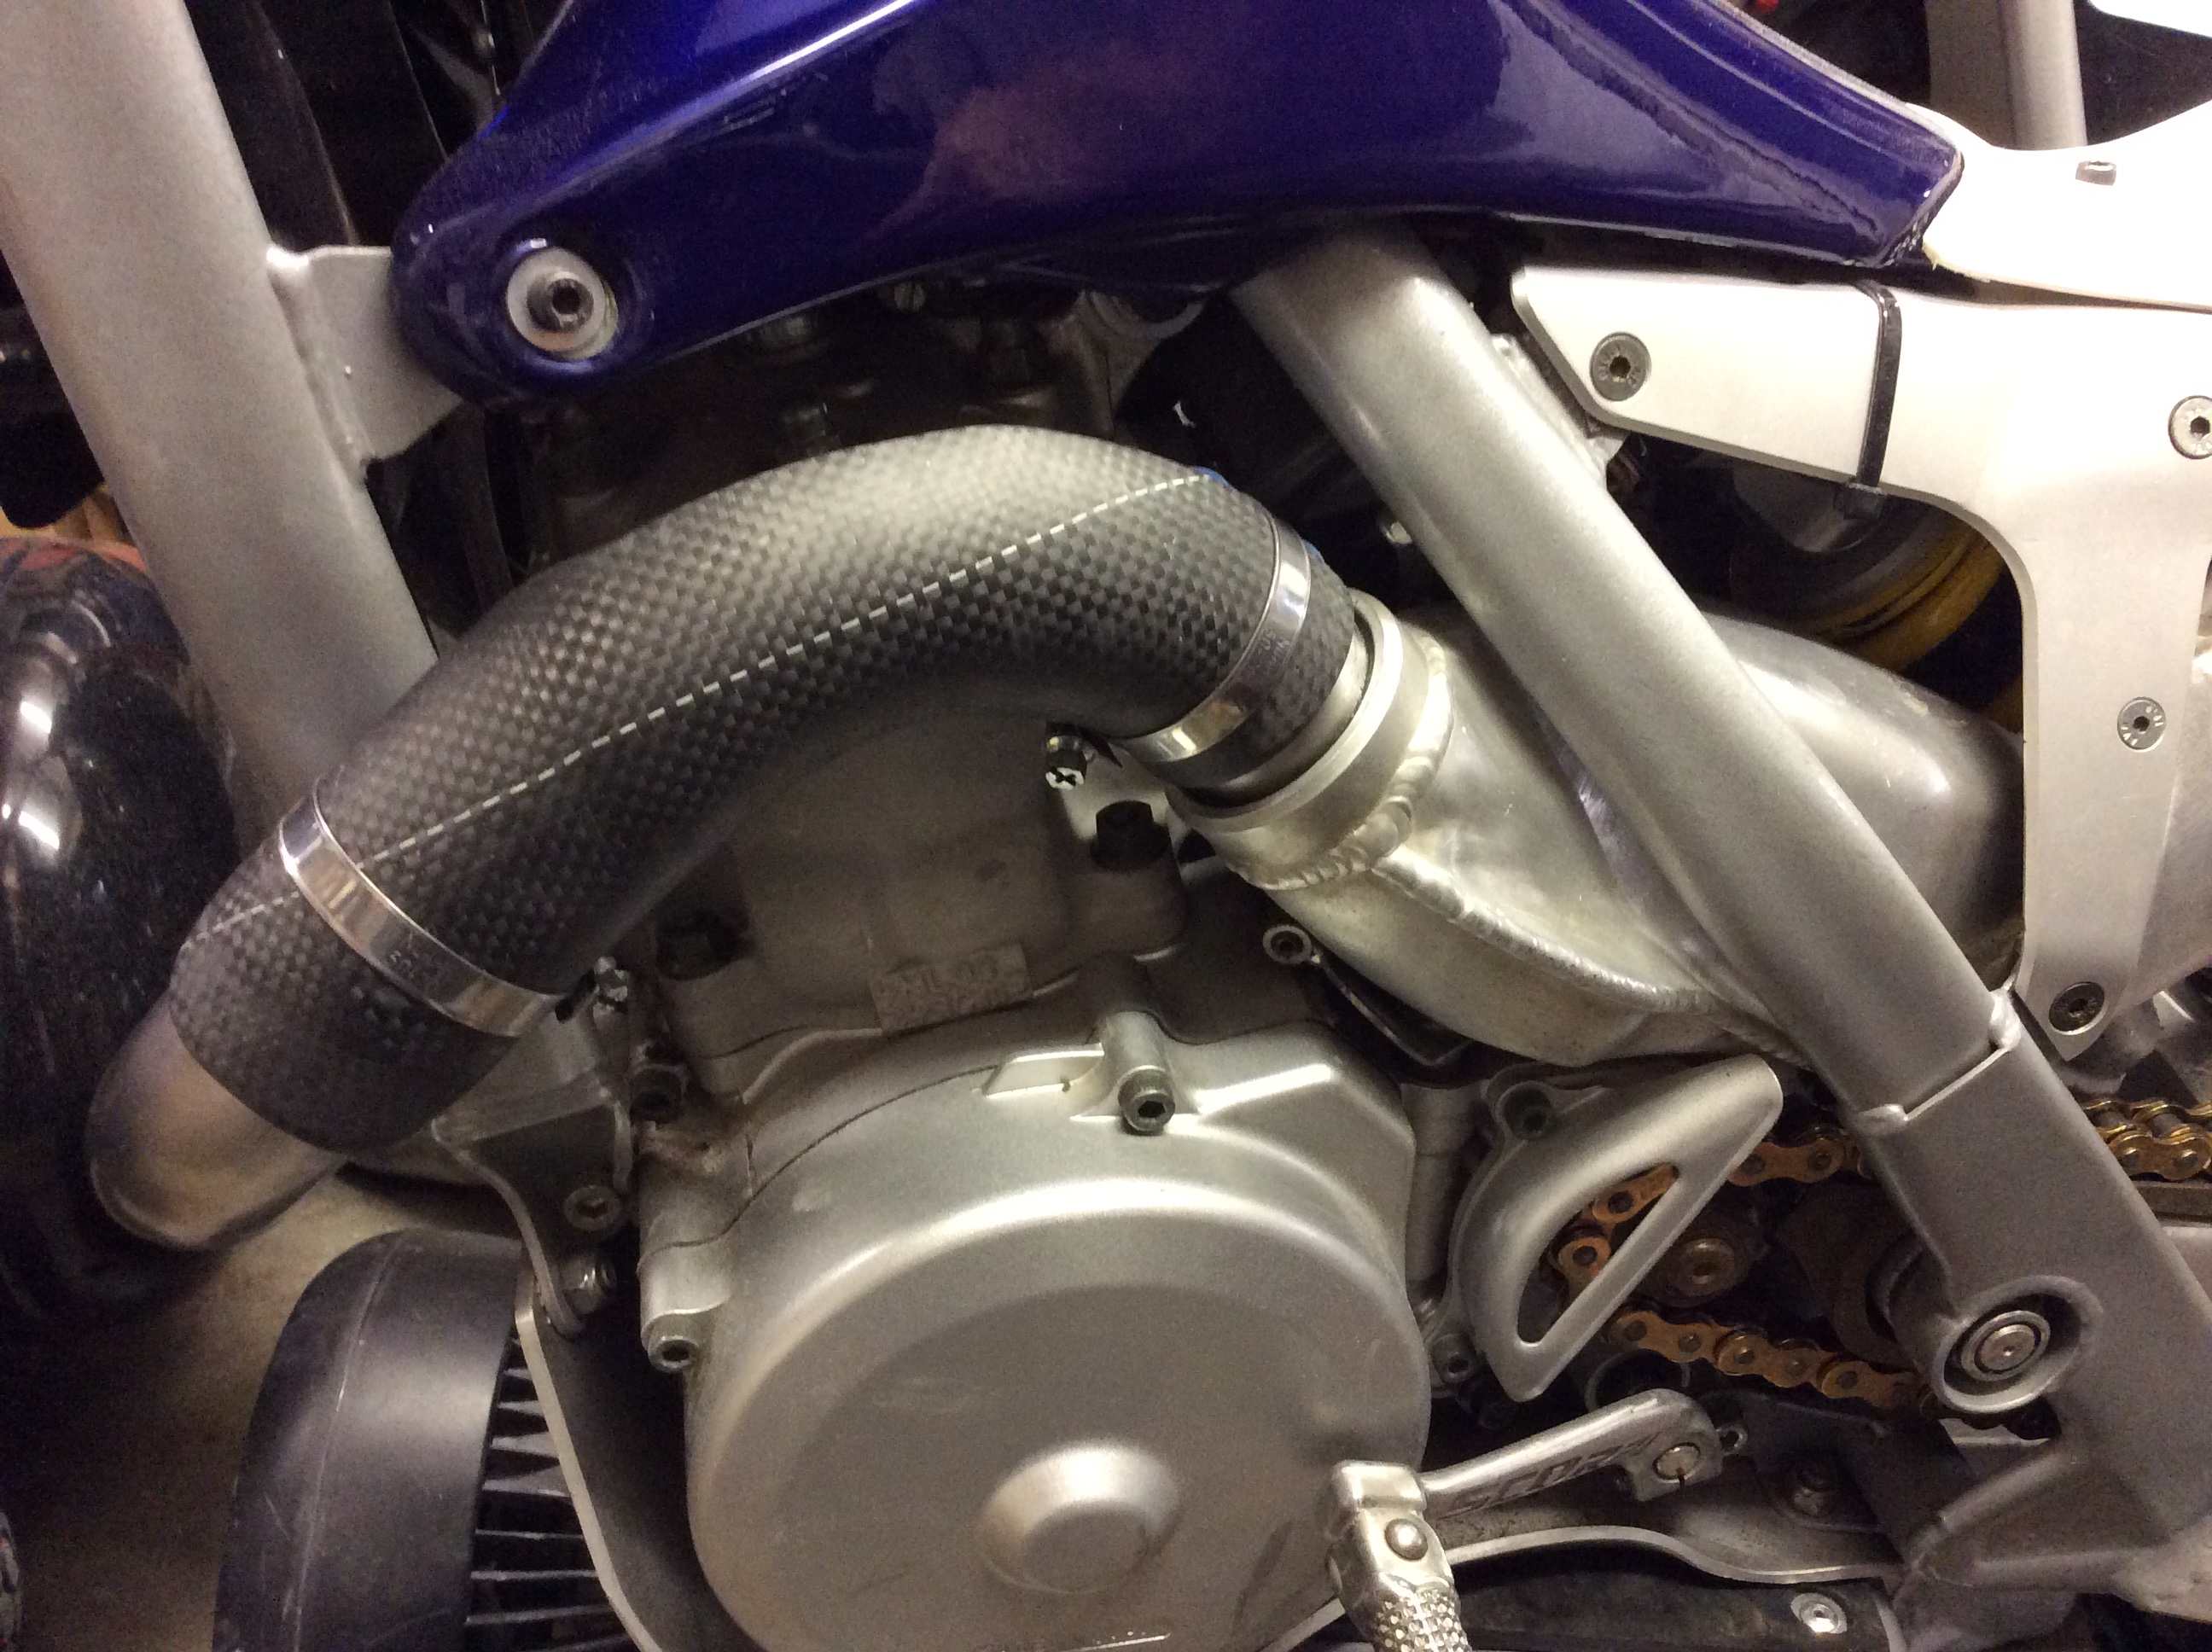
To properly countersink the holes, you must use a countersink in the drill press or milling machine. The countersink angle must match or the sprocket will work as you accellerate or decellerate, ultimatley ruining the hub.Just dealt with this. No countersunk sprockets in 40t. Only counterbored. Considered swapping from flush head / countersunk style to the counterbored shallow dome stle heads. The Scorpa swingarm to bolthead clearance was pretty tight, and the countebored sprocket and that style bolt was marginal if any clearance. Ultimately, I countersunk the counterbored sprocket and used the original flush head bolts. Catch a look at the recent topic where I installed the Jitsie snails and 40t rear sprocket.Assume you are looking for the flat bottom bash plate. Not sure if there is truth to this, but supposedly the flat type can give fits while perched on a log that is not level. The curved type does not force rhe bike to be imbalanced. If you do not find one, consider building one, and in the design, you can add protection for the ignition cover and water pump.Planned to be riveted if this works well. Need to find some #3 monel solid rivets to attach the clamp to the carbon. Putting the silicone sheet between the clamp and pipe should keep it from loosening.Practice helps. If it were something I needed many of, say a production run, it would be more involved as I would make a mold. The mold would allow easier fabrication and a more glossy finish, plus repeatable edge trims. This morning I helped a friend rebuild his leaky MAR fuel tank. Pretty much reskinned the original fibreglass with new materials. More work than the exhaust guard, but worthwhile. Next for the Scorpa SY will be a carbon guard / access cover for the silencer. Going for the carbon appearance, but will not dent, and should allow repacking without welding.Wanted to add, the white line in the carbon is a tracer. Tracers are an option in some carbon fabrics and are an indicator of the fabrics direction in regards to what is known as the warp. In critical repairs, fabric direction is called out. Bummer the tracer is there, but I was not too concerned, just saving the pants from burning.Mark, as an aircraft repair tech with specialized in composites I cheated and was lazy building it, knowing what I could get away with. The headpipe was washed and scrubbed clean with Simple Green soap and Scotchbrite to remove residue from the burnt pants. Next I placed masking tape over the metal surface and drew lines of about the shape and location I wanted. Over the masking tape I placed a layer of high temp very flexible silicone rubber sheet, 1/8” thick. A helper positioned and held the rubber sheet in place while rolling it also around the curves, as this was done, the entire rubber sheet was wrapped in black plastic electrical tape. The tape was wrapped tightly. The silicone sheet provided the uniform air gap between the metal pipe and the carbon guard. I rough cut three sections of carbon cloth approximately to size but adequately oversize. On plastic sheet, I drew the actual cut boundaries for the carbon cloth. Epoxy was mixed, then the three plies were stacked while pouring epoxy between the layers. This epoxy / carbon stack was worked while between two layers of plastic film sheet. Using a Bondo squeegy, the epoxy was worked into the carbon fabric, and all the air was removed. Once ready, the entire stack of wet carbon was cut between the plastic film sheets on the previously drawn template lines. The lower plastic film was peeled away, and the entire stack of carbon was positioned onto the headpipe that was positioned in a vice by clamping the flange, but was over a trash bucket to limit the mesh if drips happened. Once positioned, the upper plastic film was peeled off while carfully draping the wetted carbon. Once positioned, the entire carbon layup was covered in peel ply, then worked by hand to comform to the shape. Then cured. The headpipe was not mold release waxed, I very carfully cut through the cured carbon into the 1/8” silicone sheet with a curting wheel, then the carbon guard came off with black tape stuck on the inside. This tape easily peeled off and the tape on the headpipe removed easily. The edges were final trimmed, then everything was wet sanded with 600. Total time spent, maybe an hour.I was working on building a burnt pants heatshield also. Was not sure the cost of pants was justified so I made this. As for neat and tidy, thanks.When I got this SY, there was evidence of the previous owner burning traces of riding gear onto the exhaust headpipe. During my informal dismantle and reassembly, I scrubbed that headpipe to remove all traces of burnt on gear, oil spooge stains and carbon builup at the headpipe slip joint into the exhaust mid box. After several hours of riding the SY, it was apparent that even I was leaving burnt riding gear traces onto the headpipe. Being frugal, I waited on some leftover high temp epoxy, then rounded up some scraps of carbon cloth. In a short bit of time, I fabricated my copycat heatshield. Mounting is simple, two high temp silicone bands between the carbon and stainless headpipe, everything held secure with two worm clamps. Hope it lasts a while and gets the job done.
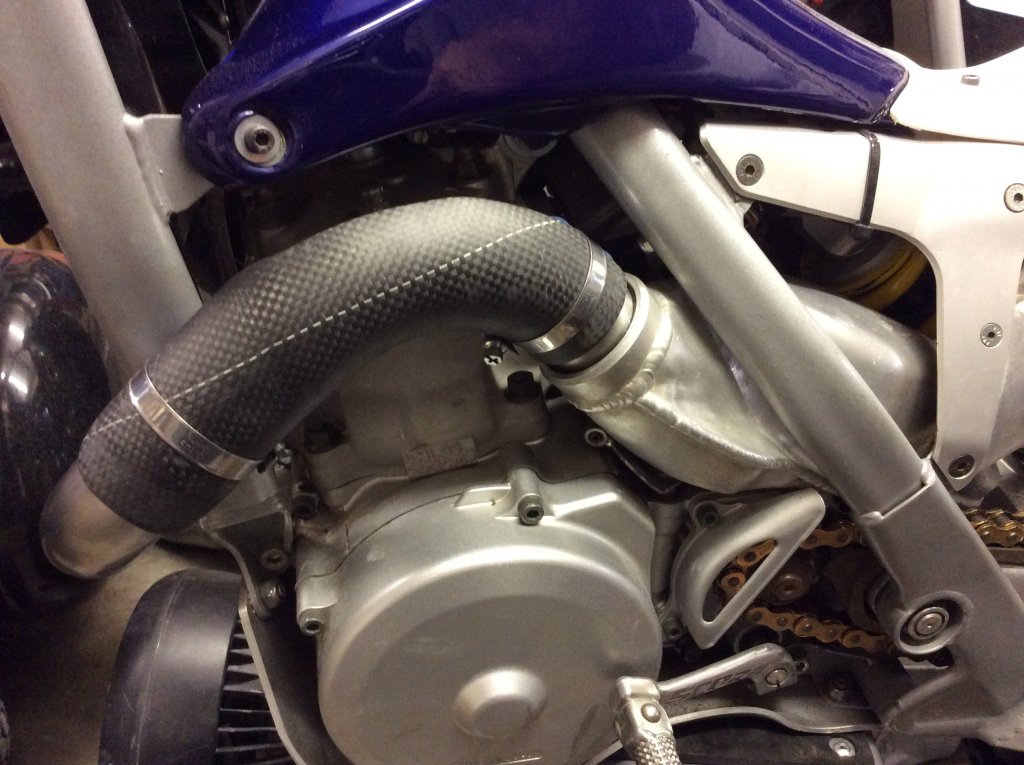 FWIW, I did take a minute and flipped the master link so the clip is on the tire side of the chain.Do a google search for Jim Snell showing how to install the pump seal on a Gas Gas.Avgas and Maxima Formula K2 in both the 73 OSSA MAR and the Scorpa SY250R. I take a beating about mixing and running 50:1, but have no spooge with proper jetting, and after talking with Maxima, opted away from anything less oil than 50:1. Yamaha and Scorpa wanted 40:1 in the SY.I guess being old, and long time rider and mechanic, but still able to make a mistake could have had the clip installed wrong. On another website it was suggested to install the master link with the clip towards the tire to lessen tne chances of a rock knocking it off. Seems logical, so an easy swap. As for those rims...two things, first they are a brushed and anodized finish that is not shiny. Yes they are dirty, this bike is ridden, but does get washed, just not so much bright polished to be as pretty as the OSSA MAR.Then it would be prone to popping off. Zoom in on the photo. It is installed correctly.Minor change, but does make things easier.Ensure the chain is properly tensioned and keep an eye on the exhaust midbox. You might see chain marks on the exhaust.You might not easily find a 40t with the countersunk holes. My recent search only found oem 38t with countersunk holes. Ultimately, I bought a new old stock and modified it to fit properly. If you are also installing a new chain, do your homework, as some chains are physically larger than others, and will require attention on the tensioner block and possibly the center exhaust box.I spoke with Mike Komer while seeing if his shop had a Talon rear sprocket with added teeth from stock. His recommendation was 40 or 41 being what he rode back when these bikes were current. Mine at 10:40 seems good so far. Better low speed control and less abrupt launch. 41 might work, but suspect 42 would have difficulty keeping the front wheel floated as the engine winds up quickly.10:38 is stock. I just went to 10:40.Well that is interesting. And yes, the Scorpa cylinder does have a sealed bolt type plug in the hole the linked TYZ photo has the decompression setup. Let me see if Paul from the Hell Team in Australia replies to my email. Possibly that other automatic decompressor from the chain saw would screw into that already existing port, and make this thing even easier to fire up. Thanks for finding and sharing that link.Yes, I have spoken to Mike before. Actually, this bike I have was imported through his shop. Just to be clear, the bike and engine are fine, yes it has a long kick start lever and starts easily when cold or hot. The point I want to emphasize is not that it starts difficultly, but rather there is a lot of compression to kick through, even when moving the kickstart by hand. I asked about the bleed hole wondering if anyone had done a mod like this before, simply so if the bike stalled while in a section, it would take less effort to refire the engine. Currently, it takes a dedicated kick to start and while I have not tried to bump start it, I am not even sure that could be done vs skidding to a stop. If the later years and non UK models are known to have a lighter flywheel, and some people have mentioned the advanced timing and lighter flywheel can combine to have the engine stall without warning, it is not uncommon to reduce compression slightly with a lighter flywheel. I need to make a call or ask those that may know more questions. Actually, it is a fine bike as is for entry level like myself, just wanting to sort out a few quirks it does occasionally, like stalling, but not often.new handlebars, triple clamps, flywheels, rear fenders, head lights, forks, rear shocks, middle exhaust pipes, silencers, sticker kits, cylinder head volumes, foot rest positions. Want to add, without much effort, it is apparent there was evolution to these SY250 machines. There were certainly changes in the first years with the forks and triple clamps and possibly frame improvements. The list above for 2007, seems the release of the 2007SY250F four stroke saw some of those items make it onto the two stroke Word was the bars and triple clamps now had multiple mounting options for bar location. Supposedly the 2 stroke got the lighter flywheel countries outside the UK had been getting all along. In 07 the forks swapped from Paioli to Marzocchi. The 2007 SY250R got a straight rate rear spring and I assume valving changes inside the shock. The head was changed and not sure where they repositioned the footpegs, but it says they did. Most other items are paint and graphics changes.The actual brochure I had saved did not want to open easily, but this list is what was changed for the 2006 to 2007 model. I did check the parts books, in 2007 the part number for the head was changed from previous years, while the long ride version retained the previous years same part number. This list was pulled from an internet page stating these were the changes to the long ride, but that seems like the list I had previously mentioned in regards to the SY250 racing. Note the near bottom and it does indicate a change to cylinder head volumes. Possibly, they reduced the compression to work better with the lighter flywheel. I honestly do not know. new handlebars, triple clamps, flywheels, rear fenders, head lights, forks, rear shocks, middle exhaust pipes, silencers, sticker kits, cylinder head volumes, foot rest positions.