I once modified the bottom shock mounts on my Fantic 300 swingarm by using "clevis pins" in the 12mm diameter that I required and simply cut them down to the length needed and drilled and tapped a 6mm thread down the centre for the shock retaining screw and then mig welded them in place. It worked a treat and I'm only an average welder and don't have a drill press either and I'm still riding the Fantic occasionally to this day. Hope this is helpful.
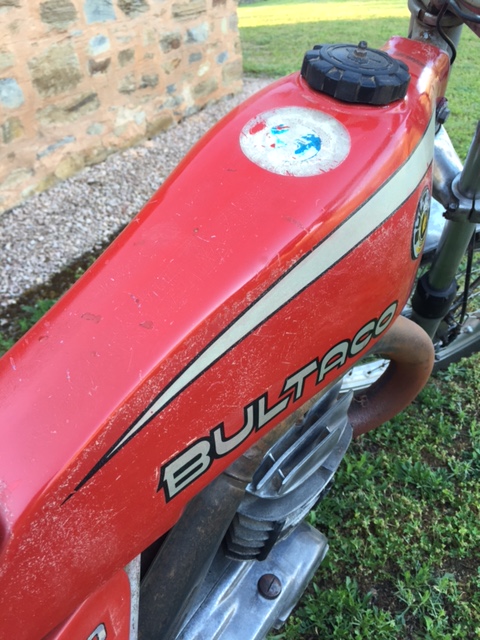
The problem is that I clear coated over the sticker I’ll redo the tank maybe one day but the bike isn’t very original anyway and as it’s a regular rider it wears a plastic tank most of the time
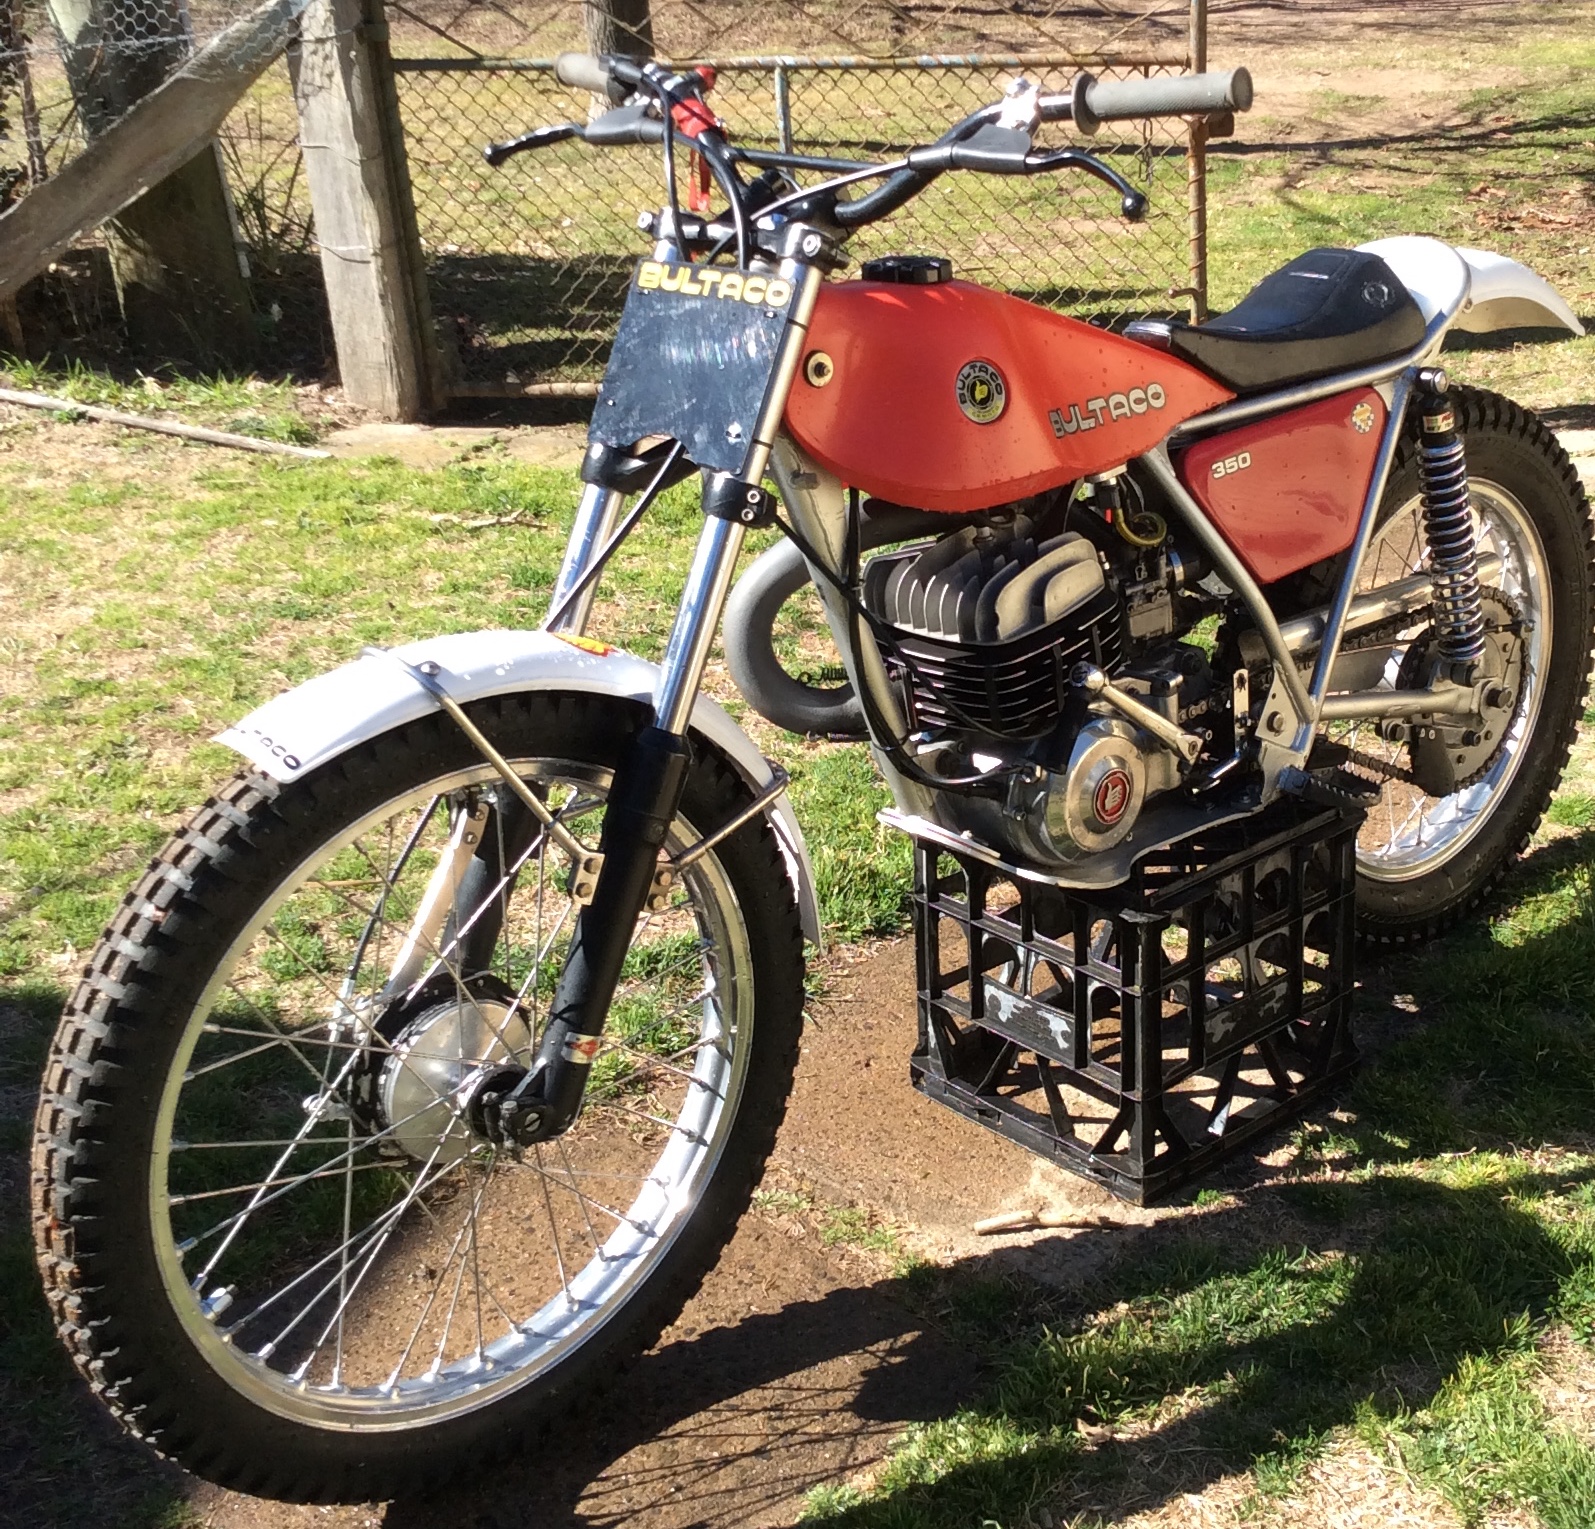
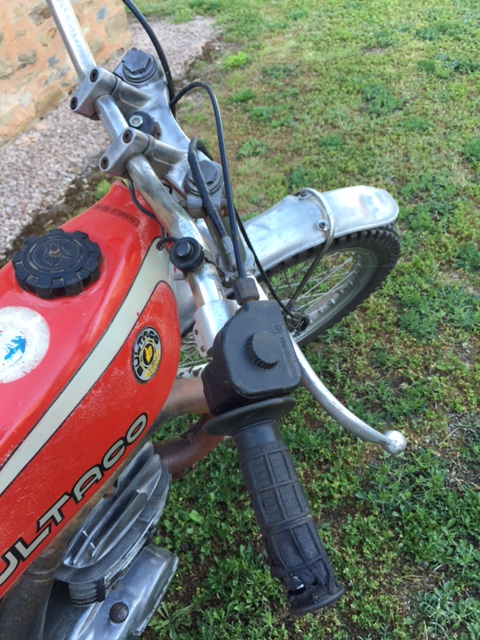
mrb505, your bike is a bitza as you have stated but looks really good, what is the frame ? Is it a modified 183 frame? I like the look of that substantial alloy bash plate.
It was missing the 2 x Bultaco stickers on arrival but had everything else as per above link, so when they never turned up after contacting him, I sourced some stickers from within Australia but they turned out to be smaller than the "255 x 30mm" jobs that were currently on my bike which looked right and I believe were original. That's when I contacted Rob at motoresto who made up the stickers in the 255 x 30mm size that I required, he now also does them in the letter only format, contour cut as he calls them. Hope this makes sense.
Posted
·
Edited by fourex extra pics of side panels.
1 hour ago, cornishflyer said:
fourex, what is that sticker between the filer cap and the steering?
Great pics by the way, really useful
Just so I don't confuse things any more then they are already, the pics I've posted showing a weathered tank are of my 183 that I bought Nov 2017. Believing that all the attached stickers were original, I've tried to replicate them and this is the result. Not completely happy as the circular Bultaco emblems are not hard plastic convex items and the word "Bultaco" is a sticker and not a letter only transfer, if you know what I mean.
If you want it authentic a 158 shouldn’t have a sherpa sticker on the tank pretty sure they had the 1975 world champion sticker instead
The sherpa sticker is from 198/199 models yours should have the round sherpa t on the side panels I’m not too sure if your model had the made in Spain sticker either
If you bought the stickers in a kit you’ll probably find the the Bultaco tank sticker smaller in height and length than the original, in those kits they are 198/199 size
That link is gold, thankyou. I don't remember my 158 having that '75 world champ sticker however, the M183 I bought last year does have it, 182/183 being the next models after 158/159. I'm glad I'm not the only pedantic Trials enthusiast out there, I also noted the "Bultaco" emblems seemed too small on the websites I was viewing compared to what I think it should be, so I got someone in Oz to make them for me. Pics of my 183 below before any restoration.
I'm getting close to applying the decals to my tank and side panels. The sticker kit I have has some bits I'm not sure about. I've had a rummage through the undergarments of the internet but surprisingly can't find any close ups of the top of the tank. My bike is a M158.
Does anyone know where the "sherpa" sticker goes?
How about the "made in spain" sticker?
Finally, the side cover stickers have an arrow next to the 250 text, yet all of the 158s I see photos of don't have that. I guess I should just cut that off?
Cheers
I think you have bought a sticker kit from Peter S in Victoria, his sticker kit is not 100% correct for your 158/159 model, nor is it correct for 182/183 or 190/191. I'm confident the below pic is the 158/159 brochure from back in the day, as soon as I saw it on a google images search it immediately reminded me of the brochure I once had for my 158 back in the mid 1970's. Stripes on side panels started with mod's 198/199 for Australia.
Hello metisse, I'm curious what jetting your 199A uses if you are able to share. I have a 183 that runs the Bing, one day I would like to try the Dellorto PHBH 28 BS from my old Italjet to see how that performs since engine capacities are similar being 326cc for Bully and 330cc for Italjet. Below is the Italjet jetting for its all green 250 (237cc) and 350 (330cc). This may be some help to Martin also.
Used to KTMs and Honda machinery... this GG has been an eye opener for sure!
Hello Miner, from those pics you posted I can see that your chain is a little tight and the chain tensioner block is up-side down.
One thing I've done in the past when I've had the linkages disconnected for greasing is take the swingarm through its full arc and you can easily determine the correct chain tension, obviously you want the chain to have the slightest bit of slack when front sprocket, swing arm pivot and rear axle are all in a straight line, then with the bike fully reassembled and sitting up on a stand with rear wheel off the ground make up a spacer block that squeezes in tightly between chain and underside of swingarm at a pre-determined point. Now put that spacer in your tool box to be used whenever you need it, make it out of hardwood timber or a short piece of pipe or electrical conduit or whatever you can lay your hands on.
That's what I do any how, makes setting correct tension easy.
I don't know for sure as I have not ever seen a Cota 247 C in the flesh. I'm basing everything on what I've found on the interweb and the fact I have a black framed '74 Cota 247 sitting in my garage only a few feet away from me that I'm using as a comparison, I'm fairly sure they simply added volume to that main muffler to alter power delivery but once again I am assuming.
G'day David, the main muffler looks quite different on this last model and takes up the space where the filter box once lived on previous models. You can see it in this pic.
Very nice-looking 247. They do have very beautiful styling.
The air filter casing usually fits up close to the underside of the seat and has a hose with a 90 degree bend. I'm sure yours will work fine the way it is and only mentioned it in case things like that are important to you.
I see it has a MK1 AMAL carby. Beware of the throttle slide sticking at the top of its travel.
I'm pretty sure the air box is correct for this model that Andy has, being different to previous Cota 247 air boxes
Alternatively, you could convert to Magura hydraulic for a bit more expense. I've been using this setup for over a year now and it works better than anything I'd tried previously.
PS: I'm now remembering what else I did to get the nice clutch action that I'm happy with, I carried out the Beta clutch mod with regards to clearing out all the glue and crud between the friction pads and fitted one of these actuating arms,
Hello All, does anyone know of someone that manufactures clamps for old Bully's, specifically a top clamp to suit M183 (350) without that off set tiller effect. Cheers.
As this is my first post and there's an "introduce yourself" section I thought I would say a quick hello. I'm Chris and have a 1966 Bultaco Sherpa that I'm planning to restore in the coming months, or maybe years as not in too much hurry. From browsing the forums I've been awed and impressed by the depth of knowledge and support so a big thanks for all the information I've already gleaned but I have many more questions. The bike is not in great nick although is mostly complete (I do have the wheels). I've owned it since 1982 when, after destroying my brother's "field bike" (a Casal), my dad bought me the Sherpa mainly to shut me up as I was a bit bike bonkers. Anyway, it's sat in a shed for a good few years and needs quite a lot of love which I'm now in a position to provide and I'd dearly love to fulfill a long-held ambition to do some trials. I'll set up a separate topic so the restoration can be tracked through the various stages. As I say, it's been really useful and entertaining to be able to search the forum archives so I'm hoping my experiences will be useful to others in the future too.
Yes, I've been running a 48 PJ and # 3 slide since about mid 2015. It's only lately I've started riding this bike again after mainly using my twin shock Fantic in the past two years.
You can mention all the names you like, or how many world champs the guy has. All i know is that every time i hear jack price riding a section his bike is knocking. Go watch the BTC video from hookwoods if you like, it was particularly bad there. Fast forward to 37:50, if that isnt a bike underjetted, i dont know what is. Its so bad you could possibly say its overheating or there was water in the carb, but that isnt the only section let alone the only trial ive heard it do that
Yes, that sounds painful doesn't it. The richer # 3 slide is a good change but in the case of Jack Price in that video using the throttle openings he is using, I think a richer needle taper is also needed. I don't ride anything like that due to being old and of 'C' grade ability but still find it a little lean on hill climbs and those trail rides between sections, hence my starting this post. I'm going to experiment with KLG, KLH , KLJ needles when they arrive.
peterb, are you sure it's a GJH that you recommend. The reason being, I've looked up the Keihin chart for these needles and the GJH is actually leaner from 1/4 to 3/4 throttle due to the taper compared to the JJH. Cheers.
Not completely in my opinion, I've been running the # 3 slide and a 48 PJ since mid 2015 and it's better than the std 3.5 and 45, but it could still be better imo. I think a change of needle is the key to what I'm looking for, but I'm not confident on which way to go.
Thanks peterb, I'll look into a GJH, is that with the std # 3.5 slide ?
As above, my '14 model came standard with a JJH needle which I have always felt was a little lean coming into the mid-range. I'm just curious if GG has changed this needle as std between then and now ? If so what is it please.
Thanks, the cost hasn’t been very much at the minute but that’s because the welding, caroming, shot blasting and powder coating has been done through work. The polishing cost me £250 for all parts expect the engine block as it wasn’t fully stripped at the time. But I thought about welding it as to keep costs down and as it’s something I can do myself. I’ll have to pay a company to turn the weld down on a lathe though as I don’t have access to one.
The engine rebuild company i’ll be using said they can bore the sleeve out. But they need to know what size the next oversize is. It’s 71.80mm standard so will it be 72.30mm? I’ve seen oversize kits at that size
If you use someone like inmotion as an example, than 72.00 mm would be it. They supply the 'italkit' brand pistons I believe. With a 72 mm italkit kit the piston is going to be something like 71.95 mm + 0.05 mm clearance = 72.00 mm bore size.


.jpg.014a5b5cd698a1bab8230ae2127a1964.jpg)


Shock mounting bosses.
in Bultaco
Posted
I once modified the bottom shock mounts on my Fantic 300 swingarm by using "clevis pins" in the 12mm diameter that I required and simply cut them down to the length needed and drilled and tapped a 6mm thread down the centre for the shock retaining screw and then mig welded them in place. It worked a treat and I'm only an average welder and don't have a drill press either and I'm still riding the Fantic occasionally to this day. Hope this is helpful.