pmk
Members
-
Joined
-
Last visited
Everything posted by pmk
-
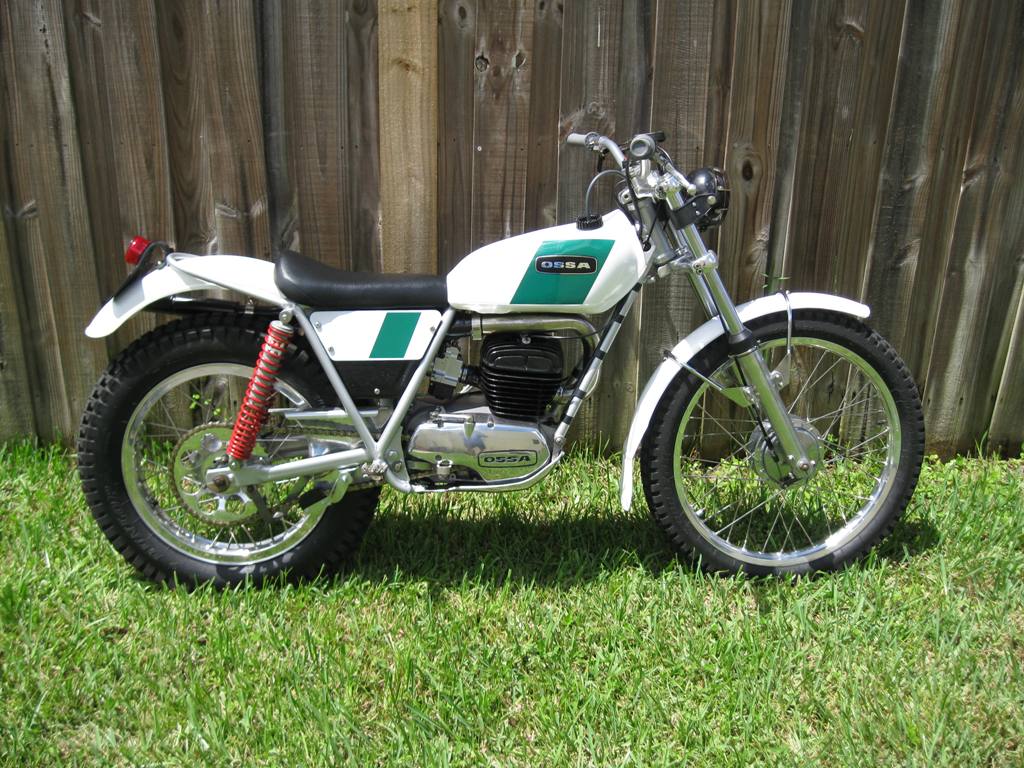
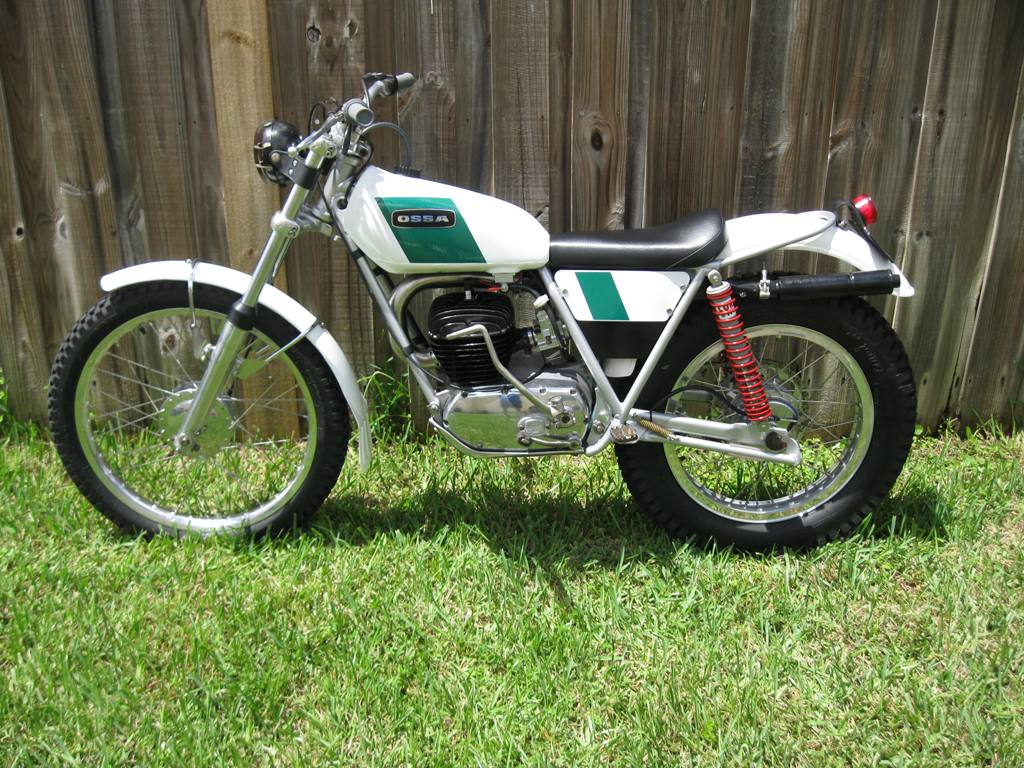
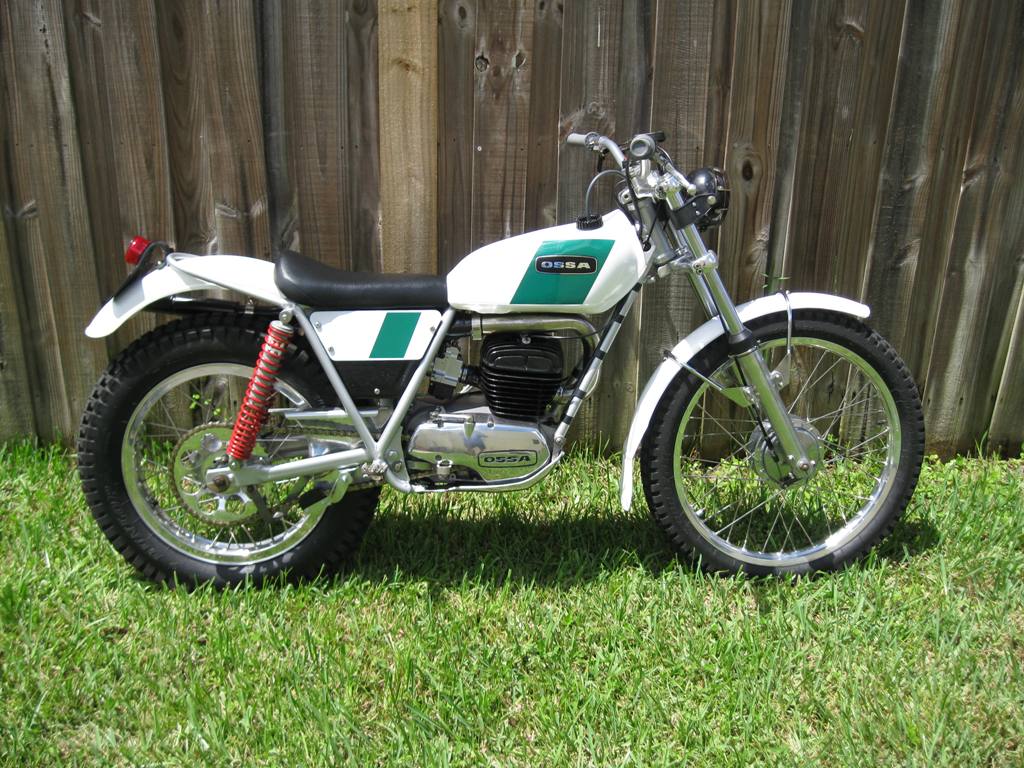
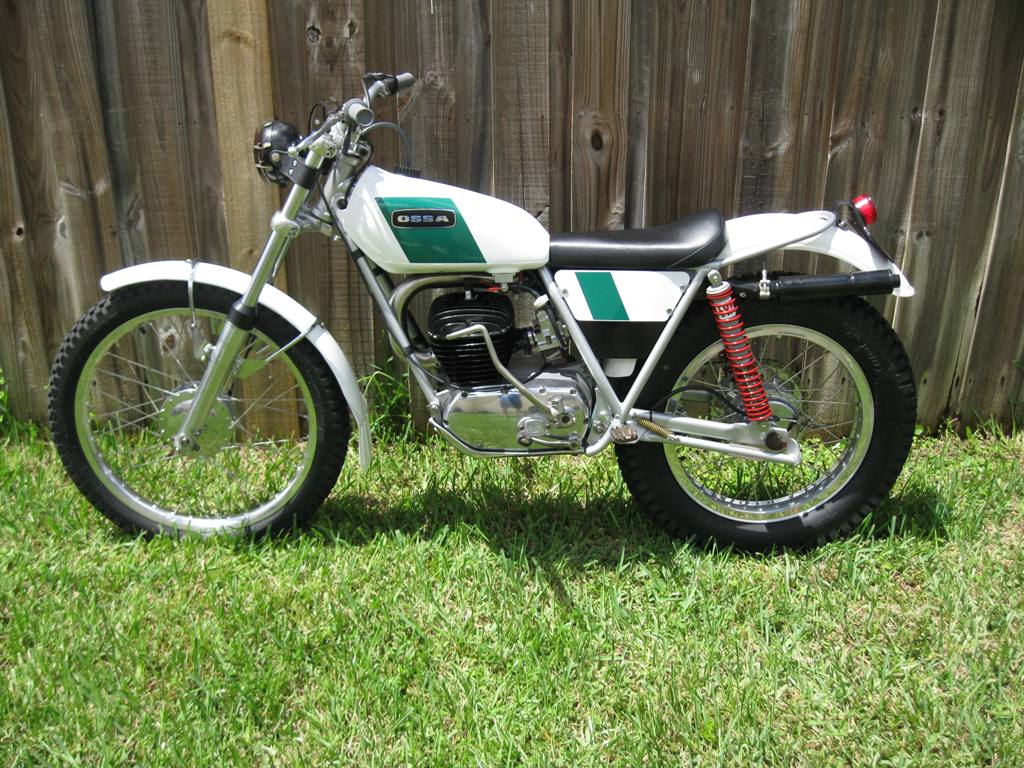
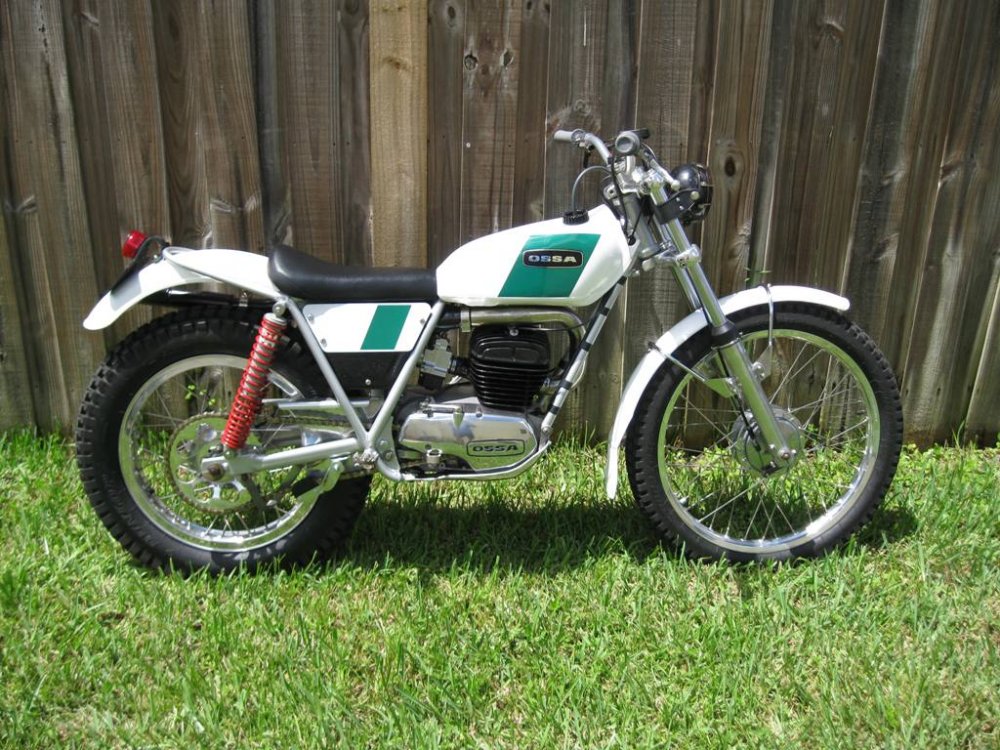
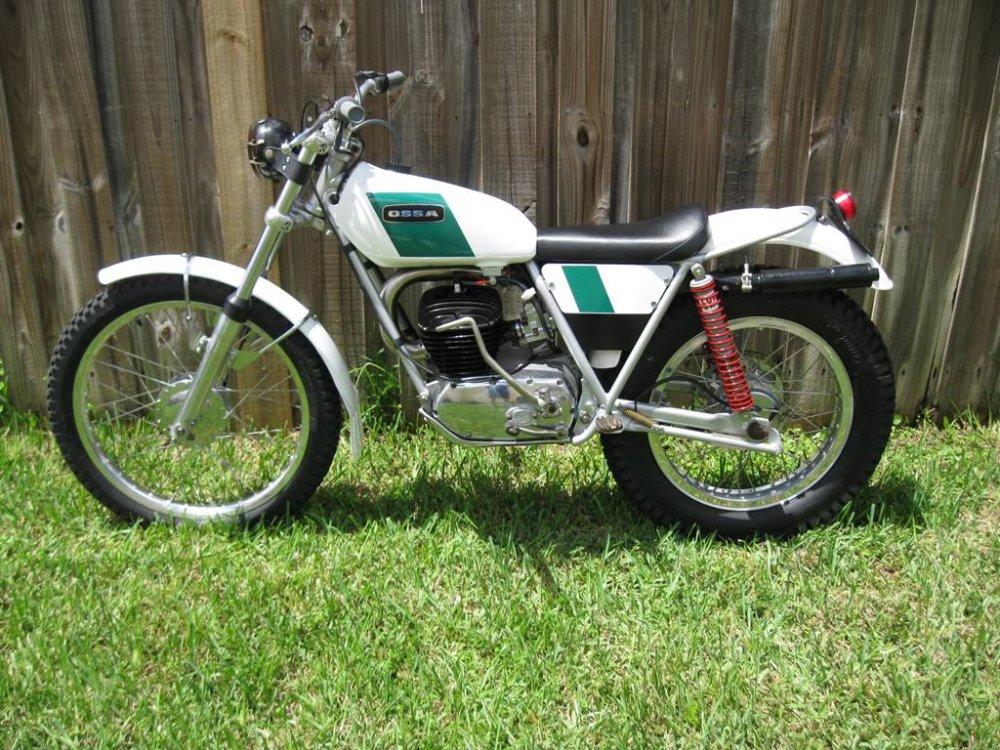
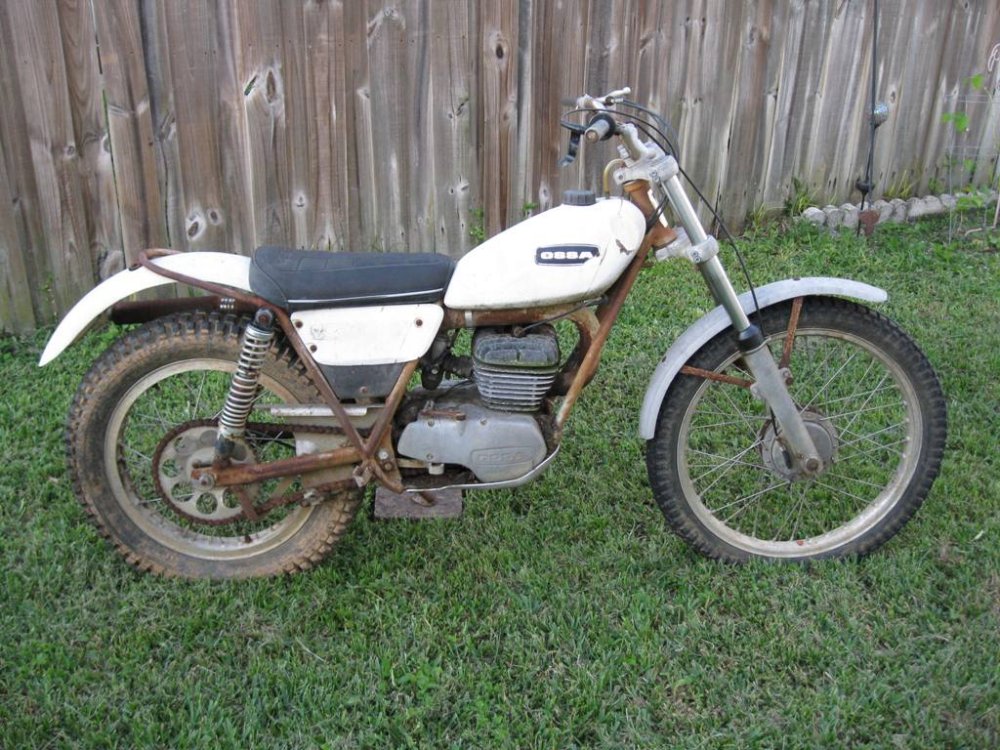
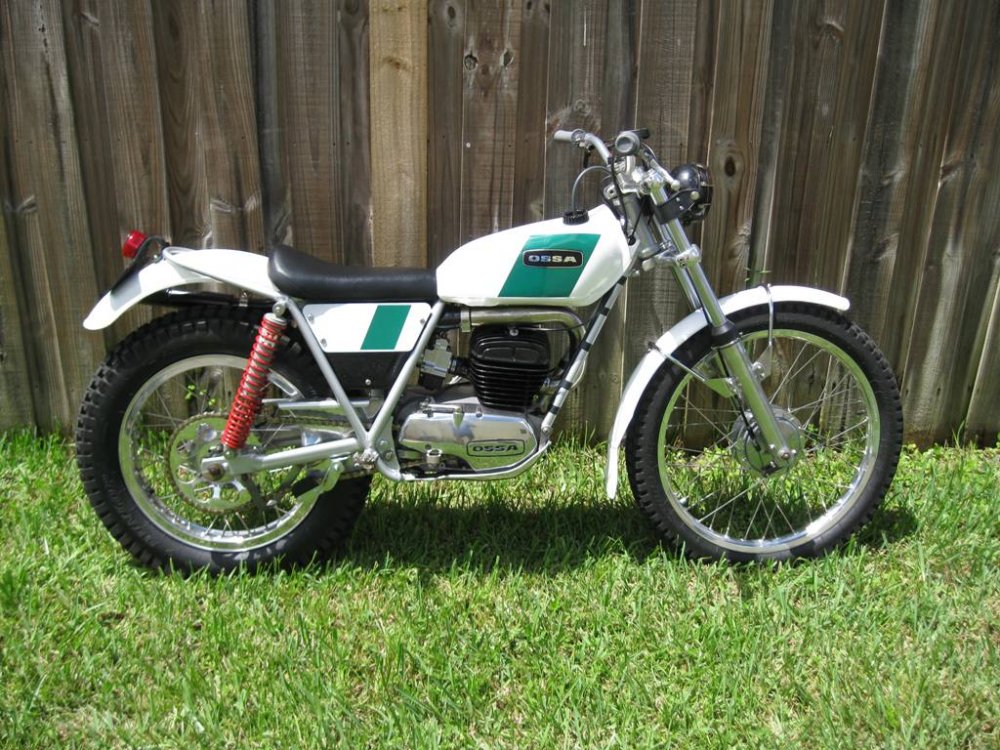
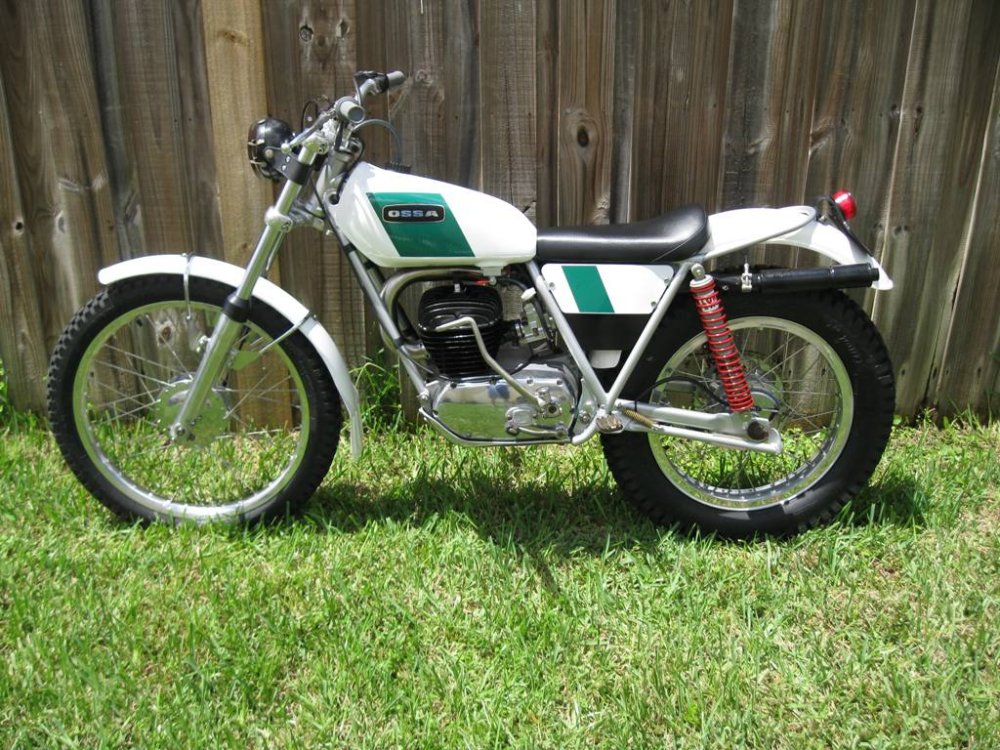
Finally, pretty much finished except the lights operating. 1973 MAR 250.
-
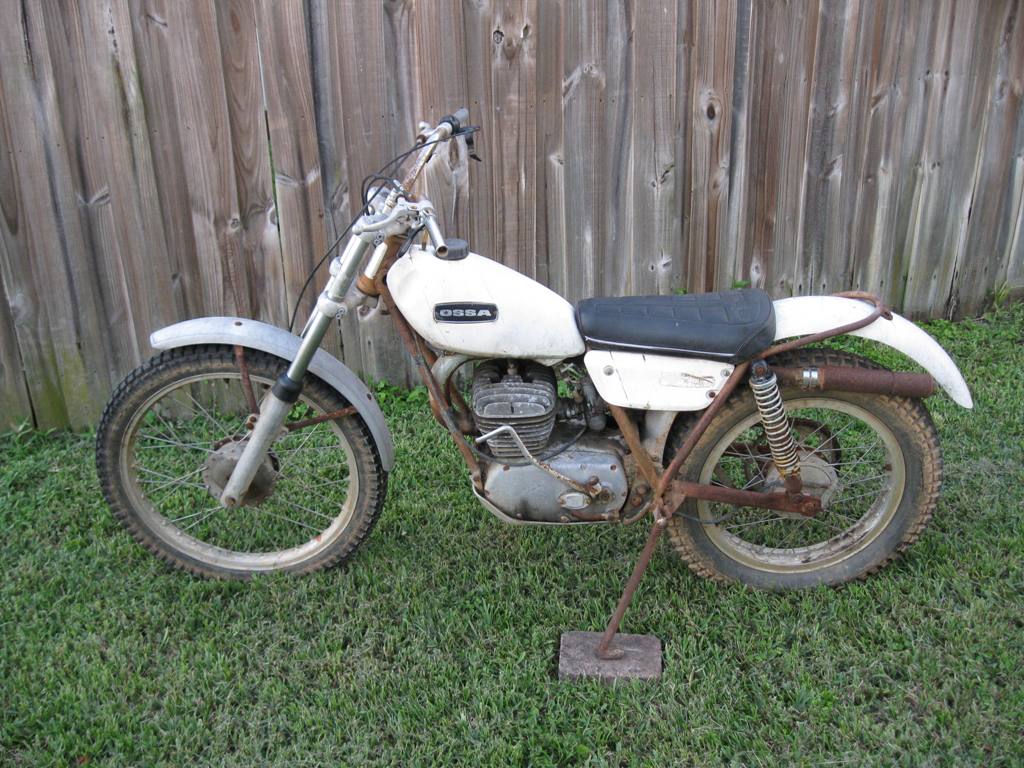
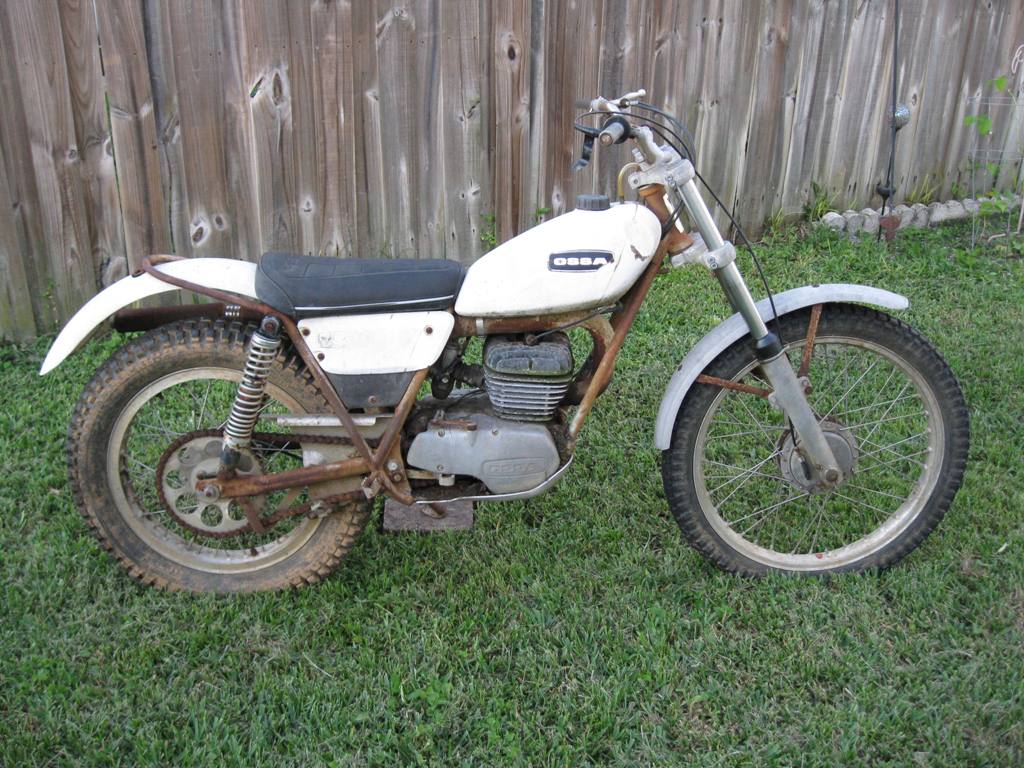
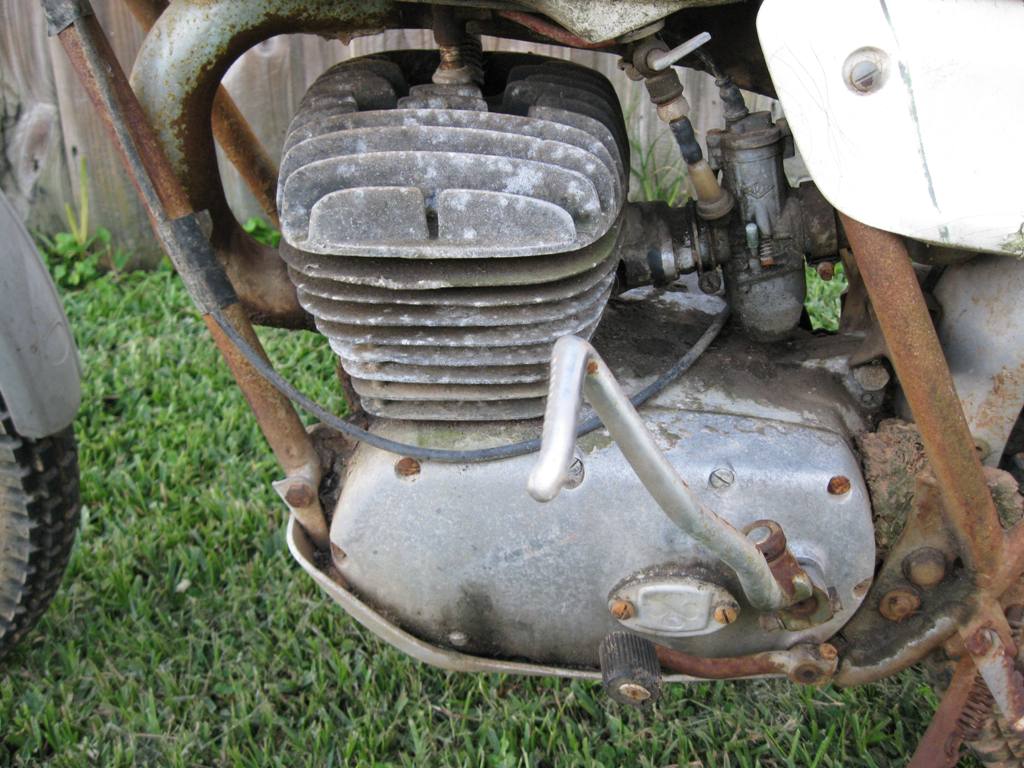
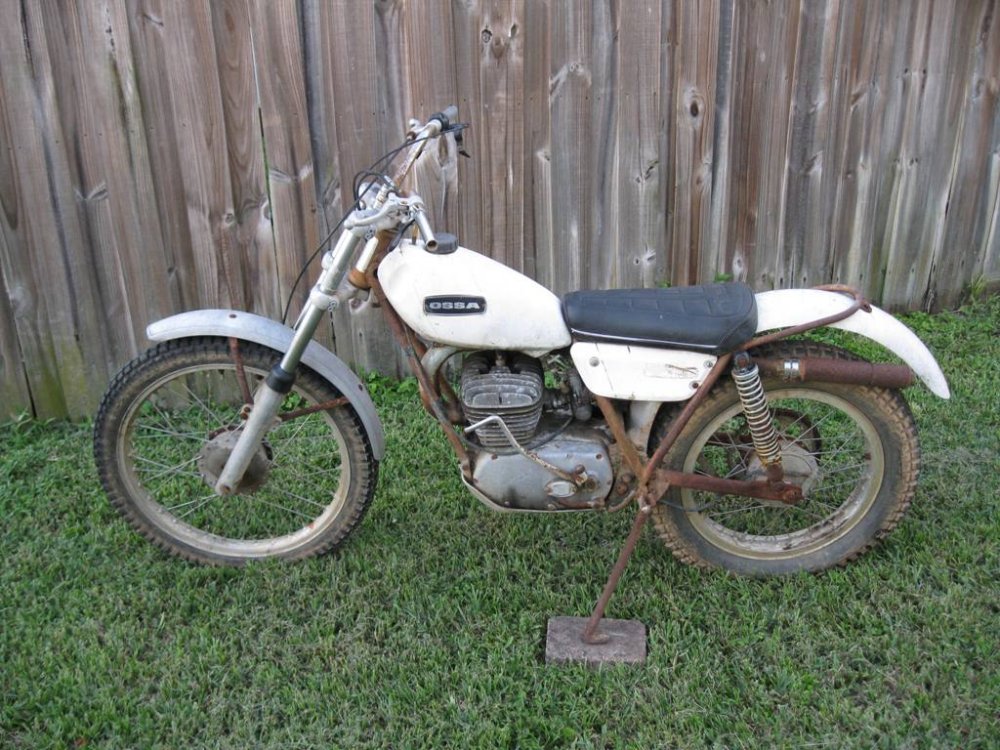
In early November I started this topic. I posted two photos of what I started with, a 1973 MAR. Picked up from the original owner, ridden but not destroyed. Months later, and I never planned to restore it to original, this is how it finished up. Many of the original parts that were needed for my riding buddies MAR he is restoring to original were given to him. Mine is pretty much done, except for lighting simply so I can get from trail to trail without too much hassle. I have posted the photos on FB also, sorry if you have seen them before. The before and after photos. As it was when it was rolled out of the truck when it got to the house and how it sits today. As a kid that grew up around Japanese machines in the 70's, the OSSA had a bit of a learning curve. I truly appreciate thank you all for the help and input from everyone, especially Woody on this site, and Alex Snoop here in the USA. The internet and keyboard does not always convey gratitude, but rest assured it is genuine.
-
If it helps, the thicker steel plate that goes into the clutch first is 2mm thick. The remainder of the steel plates are 1 1/2mm thick. Visually, other than thickness, they are indentical as best I could tell. Simple to correct, and now proper.
-
Yes, was not aware and did not suspect one oddball clutch plate that retained the good looks of the others. Correct it is the first plate in the entire basket and supports the rest of them. Not a big deal to check, and won't happen to me again. So many little quirky things to learn, certainly have been spoiled by Japanese stuff.
-
Lotus54, thank you for getting me to look that info up. I learned one more of the quirky things about OSSA motors. Apparently, they use three different clutch plates. All the fibers are the same. However, while the steel driven plates appear the same, one plate is thicker according to the manual. I did not notice or remember reading that, so, I'll pull the clutch plates out and see. I expect the manual is correct. Not difficult, just one more thing.
-
OSSA stuff is new to me. Japanese and KTMs, even Maicos I have worked on before. When I got this MAR of mine, I started researching and reading. What I did notice was that the guy that wrote the manual almost seemed to have been or was an aircraft technician. Many of the words and phrases had me thinking I was at work repairing an aircraft. Oddly, I agree, non of the three OSSA MAR motors I have disassembled had locwire. Two had cotter keys and one had nothing. The manual though, did say to use either cotter keys or safety wire. I have rolls of lockwire, less expensive, easier to do, and few bits to accidentally drop into the gearbox. That was the reason I chose that route. From a safety standpoint, not that we as moto riders ever concern ourselves with safety, fewer sharp pointy edges to remove fingerprints.
-
-
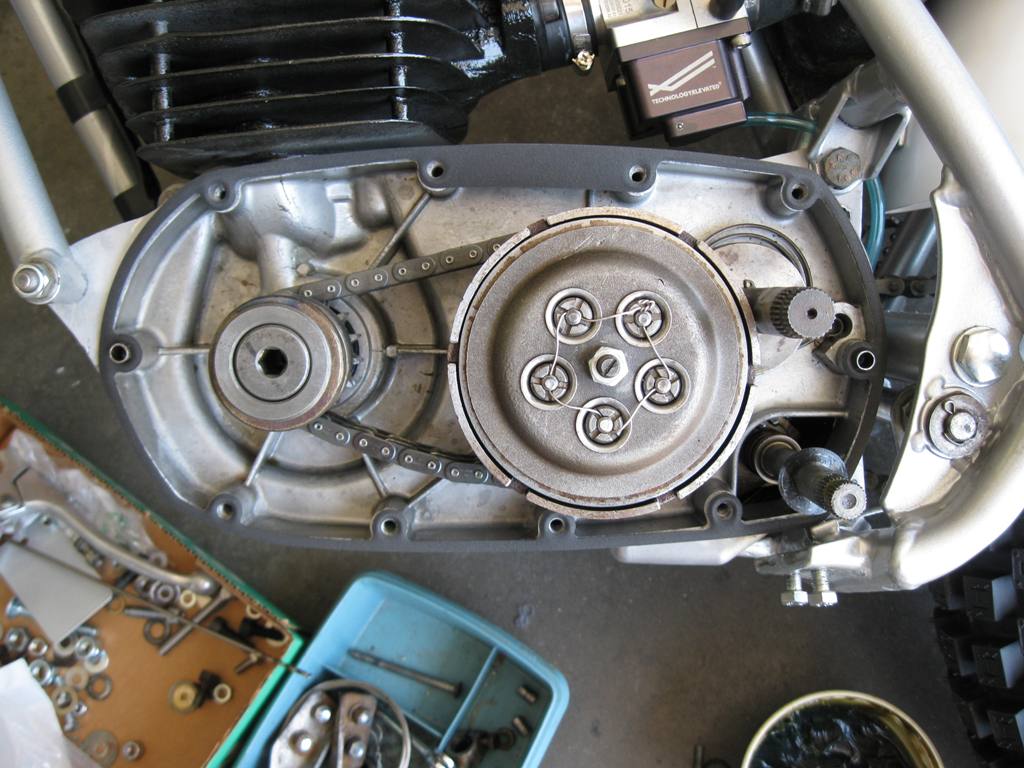
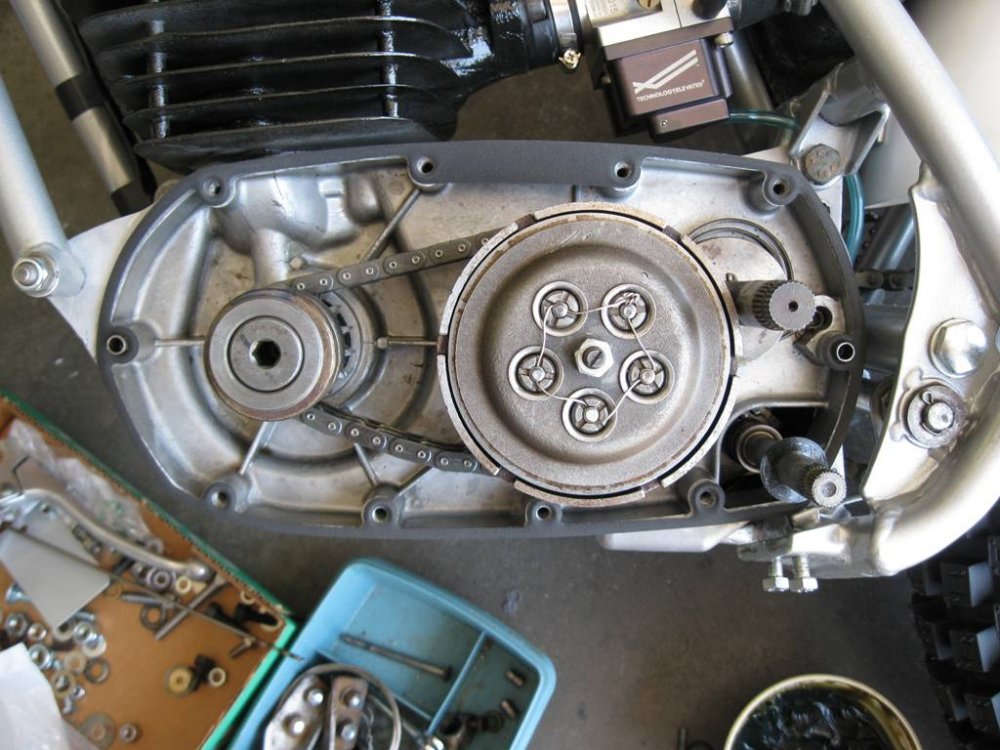
The photo shows how the locwire was used to single strand the 5 safeties. The studs are welded into the inner clutch basket, so while not normally positioned in the way I did the wire, even though the wire appears to pull to loosen, the studs will not rotate. The wire is simply ensuring the slotted nuts do not unwind. The wire laid down best as shown for my clutch. Depending upon how the stud holes are in a different basket, it may lay better in a pull towards CW direction. Ensure you do not pull the wire fully tight, the cups the springs are inserted into will raise and fall as the clutch is used. If the wire is drawn tight, it could break.
-
I locwired single strand through all holes. I can post a photo later when I am on the laptop.
-
Having fully rebuilt Fox MTB rear shocks, moto stuff, especially vintage stuff is super easy. No micro parts, just simple old school shocks. Even my Curnutts, while a bit more intricate, are super easy. Check Thors site to see if the parts are special or standard.
-
Yes, correct, the only adjustment made while running is idle rpm. As for other adjustments, upon initially running the engine, the carb was a bit rich. So, I shut it down, held the throttle wide open, and turned the adjuster screw. Took all of about 30 seconds max. Refired the engine and checked. No jets to swap at all. Plus the carb, once set is supposedly able to self compensate for altitude changes. Agree, there is no pilot air screw to turn while the engine is idling. The bike does need a good run to verify the correct needle is installed, though Corey at Smartcarb was pretty confident it would be correct as he shipped it. If nothing else, being made from billet aluminum, it does look good.
-
Correction, I posted it as an APT, when actually it is the newer company called Technolgy Elevated Smartcarb. I am still getting the OSSA MAR fully completed. My experience with the Smartcarb is minimal, but so far very good. I should get a real ride in hopefully in a couple of weeks. Finishing a few items, mainly rebuilding the Curnutt rear shocks. Maybe a new topic should be started, but overall, I beleive the topic of polishing parts has been well covered here already. https://technologyelevatedco.com/ This carb style and size, 28mm, has been fitted to modern trials bikes with excellent results according to Technology Elevated.
-
Technology Elevated Smartcarb. My friend needed an original carb for the MAR he is restoring. Knowing I did not want a restored bike, but rather a rider with minimal concerns with things like the fibreglass tank or metal fenders, many of the original parts from my bike were went into the parts bin for the restored bike.
-
150 PSI is a pretty standard pressure we use when building modern shocks. Correctly it is 10 atmosphere or 147 PSI. The 100 PSI is fine for slower shafts speeds that are not sustained and will provide a bit more compliance on the initial bump. You did not mention where the leak is at. Those should be an easy rebuild and parts should be reasonably priced. If those are the red, white, blue FoxShox, they always had a great appearance to them also.
-
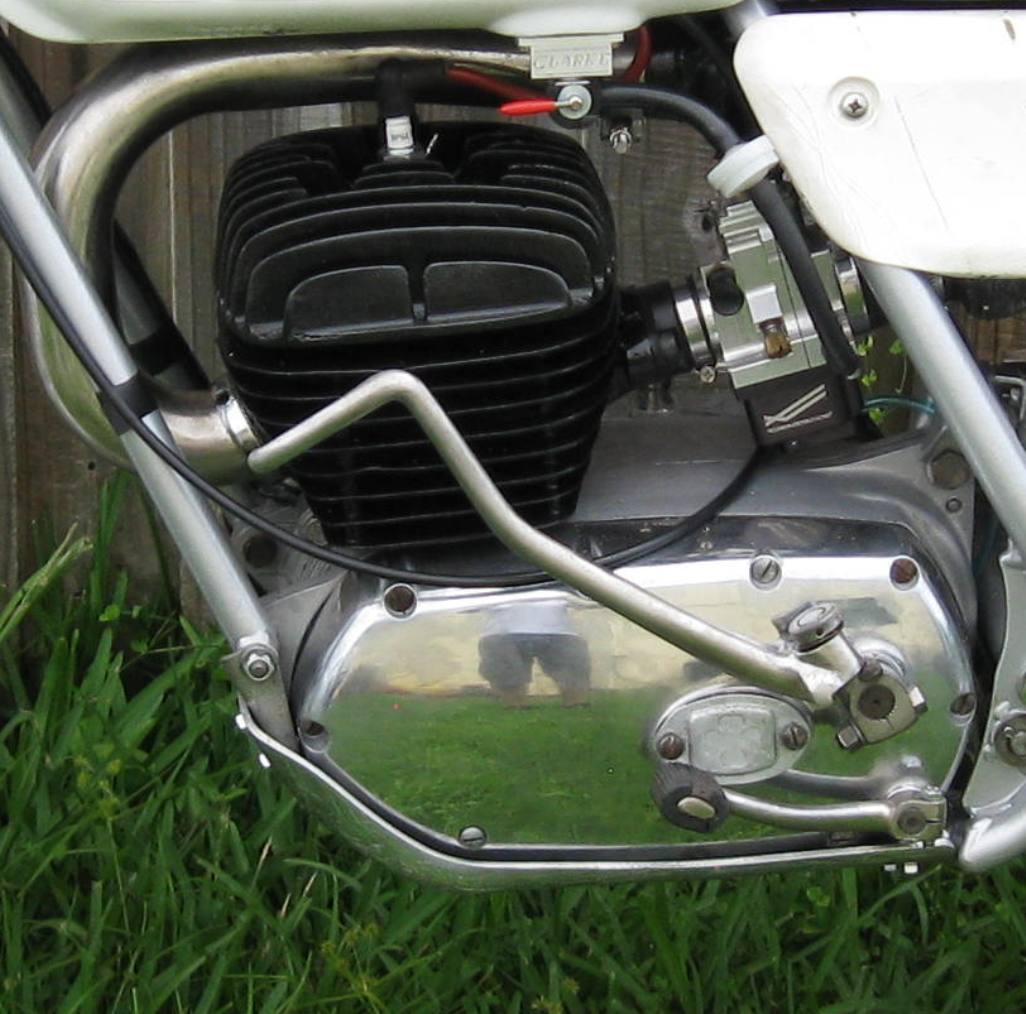
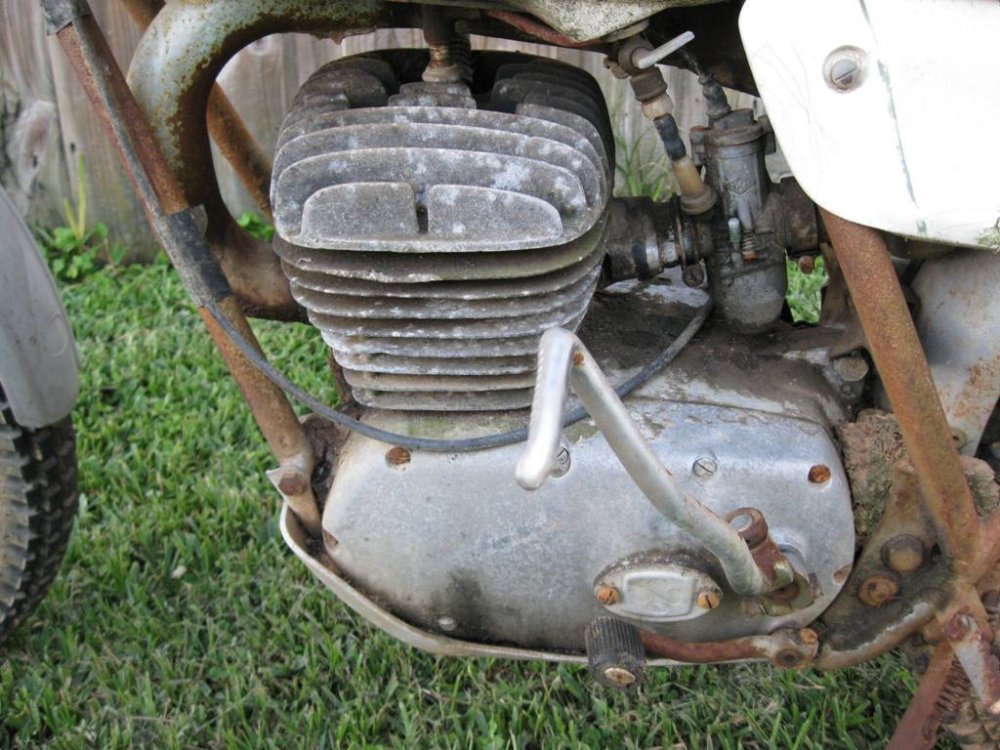
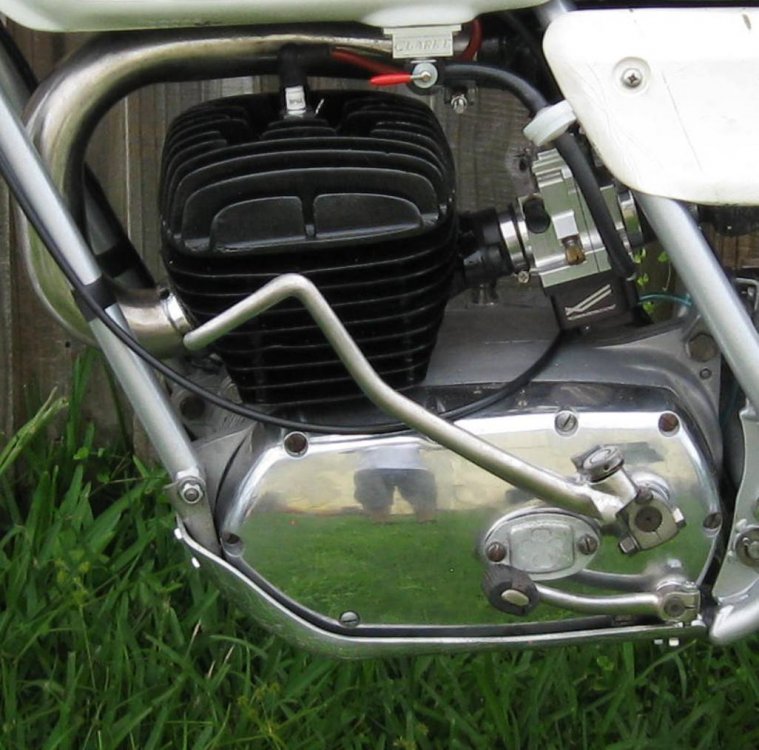
FWIW, you can see how it came to me, the one photo is after blasting (with skidplate also shown), next is sanded, then after polished. Consider the polished photo is after handling and install onto the motor. A couple of minutes touch up and it will be no handling marks from fingers and grease.
-
I assume, and maybe incorrectly, these are Fox Shox coil spring type units with or without reservoirs. If they are Fox Airshox or Dual Airshox, those uses far different pressures to set up the air springs. Thor Lawson site states 200 psi off road, 100 psi for trials and road.
-
I will probably need to do the WD trick to the center cases. They came pretty clean but still had a few spots that concerned me enough to avoid painting them until a later time. My center cases are not polished, so for them it will be Scotchbrite and WD.
-
I did the polishing on my MAR. In the past, I have polished other aluminum items and even plastic aircraft windsheilds. Depending upon how bad the surface is kind of determines the action to take. My OSSA had been stored outdoors for many years. The surfaces of the engine side covers was corroded, and there were scrapes also. Same for the rims, hubs, forks and more. I was able to glass bead all the parts except the rim. Glass beading removed the corrosion for the most part, but leaves a blasted textured finish. Next I used a Dual Action sander, same as for automotive bodywork. I started with 120 grit and finished with 600 grit. For polishing, I secured the item by either clamping or using screws into the wooden makeshift plywood polishing table. I then used an electric polisher, with a large knitted wheel. Foam wheels would work also until the final finish. Using the knitted wheel, I used Mother brand aluminum wheel polish. Going from 600 to near mirror finish is pretty easy. On aircraft parts I have used other polishes. Most work well. Flitz is good. Simichrome is good. Met All. And no doubt others will all give good results. Often it is simply how much time and effort are you willing to endure. It is very dirty work. Once done though, often a simple touchup restores the finish. For those doing the tadk by hand, yes it can be done. To obtain a good result with less effort a low cost polishing pad or wheel in the electric drill can work also. If you do use a knitted or fabric pad, use an old screwdriver and clean the wheel often. Remember, do not use papertowels, they can scratch the finish, I was using old towels, not the best but they do work. Microfibre cloths work well also. Just ensure if you wash the rags, do so outside with soap and water before the washing machine.
-
Yes, I could have used Rivnuts or one of the variations of that type insert. I have easy access to those also, plus have various install tools for them. ReasonsI opted not to use them. The installation hole is larger than that of a clip nut, unless I used flushhead style, the head thickness is more than the clipnut. Clipnuts utilize all metal high temp locknuts, so there is minimal chance vibration could loosen the plate. Clipnuts also allow greater fastener torque. There are more reasons, but I considered even going with steel pop rivets that could be drilled out next time, but continually returned to the bag of 8/32 clipnuts. Cool video, looks to be some type of aircraft builder training video. Clipnuts are kind of common from places like Aircraft Spruce and Specialty. Ot sure on cost, but should not be too bad.
-
Got the exhaust mostly done today. Fabricated cover, drilled and verified cover was secure. Washed and applied OSPHO to treat bare steel, then gave it a quick paint job. Packed with silencer packing, if I like the tone, I will remove the cover and seal it, then reinstall the cover and final paint. The cover was made from Stainless tubing, the fasteners are aircraft stuff I had around, we call them clip nuts. The screws are 8/32 or about 4mm and thread into the locknut portion of the clip nut.
-
Reviving an old post. Recently I had the need to remove three cush drives from 72 and a 73 MAR. Using the proper puller, obtained frim Alex Snoop, the first drive was easily removed. This motor had previously been diassembled. The second motor also had been disassembled previously and this one removed easily also. On my own 73 MAR, which had never had the cush drive removed since it was built in 72, it was a bear to remove. Even with the correct tools the drive spine would not release from the taper. I applied heat from a propane torch while the pullier held tension. After talking with Alex on the phone, he suggested a large hammer striking the actual gear puller end to shock the taper loose. The puller was tensioned via an 18" breaker bar, so there was certainly tension applied to remove the spline cush drive from the crank. Accepting the fact that I may need to cut the drive and hope it split to release, we gave one last effort using the puller. The puller threads got a fresh coat of grease. Tension was applied and still it remained stuck. As before, the amount of tension was very high. While ensuring the clamp was secure that was keeping the puller jaws from slipping outward, the drive released almost exploding off the crankshaft. The cush drive spline was inspected and five cracks were found running along each spline. A replacement was installed after the seal was replaced and the tapers were lapped together. Ensure, when removing these drives to stay off to the side in an effort to prevent injury. It is now reassembled, and hopefully will have no issues. The reason the drive needed to be removed was to replace the crank seal. The seal, while still working, was loose in the case and easily removed.
-
There is also a respectable area under the clutch that pools oil also.
-
Photos of modifying KX footpegs to fit the MAR. Note the bolts used are high strength and there are no threads in joint. I did need to install a washer on the front and rear side of the OSSA frame stub to obtain a good side clearance fit. The footpegs are not spring loaded down, and will take a slight effort to drop back if the bolts are set slightly snug. This is good for the left side when starting the engine. I may remove some teeth on the cleat to let the kickstart lever contact the footpeg if it starts easily with the left footpeg down.
-
I started this topic asking if the right side shift shaft O ring could be replaced without splitting the cases. This week I trimmed the shift shaft. The engine was on the bench, still assembled. The MAR will never be a right side shift, so trimming the shift shaft was not harmful. I knew I needed to remove the clutch cover. So today was the test. At least on my motor, with a close trim of the right side shift shaft, the shaft can be withdrawn exactly enough to allow the O ring to be easily replaced. I think the photos will explain it better than words. I did use a hardened thin washer to act as a guide when trimming. Also, the clutch side cover was installed, holding the shift shaft extended out of the case as far as possible.
-
Yesterday, I began the repacking of the 1973 OSSA MAR midpipe. The task how I am doing it involved cutting a "window" into the round chamber section, removing the original packing, then making a cover to be fastened with bolts. The cover will be sealed and allow repacking next time to be pretty easy. Inside the the midpipe, the original packing is a crazy but long term packing material. Placed against the perforated baffle tube is a fine steel wire matting. Not steel wool, but rather a non woven almost like a spool wrapped method of placing the fine steel wires around the baffle. Next, the fine wire is held in place by many wraps of a large wire. This offers no true sound deadening, simply secured the fine wire mat onto the baffle tube. Downside of the large wire is removing it. Next, wrapped around the fine wire is a layer of fibreglass packing material. The fibreglass is placed over the fine wires and then rests against the midpipe outer steel wall. Overall, I would say the pipe I have was fine as it was. Unfortunately, there is no easy way to know if the packing is intact, oil soaked, or blown out. I carefully decided where to cut the access window, avoiding any issues when the pipe is mounted. I favored to the right side, to avoid contact of the window cover with frame or left side panel. I plan to repack with all fibreglass packing material, stuffing it into the midpipe. Removal of the oem wire material took quite a while. The forward end of the midpipe where they crimped the midpipe to clear the frame still retains a small amount of oem material. When crimped, the oem sound packing is now wedge between the baffle and midpipe outer shell.