Jump to content

motosolex

Members
  • Posts

    122
  • Joined

  • Last visited

Everything posted by motosolex
 
 
  1. Thanks. Did so. When checking Green to Ground no resistance. Red to Ground no resistance. So problem is in wires, connections or the stator coil if I understand the system. . Cheers
  2. Hi fellows. Interesting. We have Fantic 240Pro with same issue(s). Connected a new DUCATI Energia blue coil and.....no spark. Is there a way to see if perhaps this coil is bad? And from the stator comes 3 wires: Green, Black,Red. What would be correct ohm readings of these wires? And are they measured against each other or to chassis ground? thank you.
  3. motosolex

    240 coil

    Thank you Fourex. Well, swapped around the wires to no avail. Used the Ohm meter to measure wires from magneto on the red wire to frame and green wire to frame. No resistance/ continuity on either. The black wire from the mag did show continuity. Can anyone confirm or indicate correct readings? ————————- We wonder now if there is a wire, pickup or stator issue???? Any Flywheel removal techniques or pointers? Thanks
  4. motosolex

    240 coil

    And of course Yellow wire still grounded to frame?
  5. motosolex

    240 coil

    Will rewire tomorrow. Thanks for the astute observations.
  6. Hi fellows. Fitted the blue Ducati Energia coil as per the attached diagram. Still no spark and now considering removal of flywheel to dig deeper. Any tips on flywheel removal operation (standard r-h threads)? Anything else to consider or look for? Thanks.
  7. motosolex

    240 coil

    Here’s what we’ve seen thus far. Subject to confirmation. We hooked ours up accordingly. Still no spark. May need to dig into the stators. Any tips on flywheel removal?
  8. Hi fellows. Got a Ducati blue coil to replace the Dansi. Can you please specify or post the schematic for the Ducati’s leads: 2 greens 1 red 1white Thank you kindly
  9. We just rebuilt our Dellorto. What are the floats’ symptoms as a heads up?
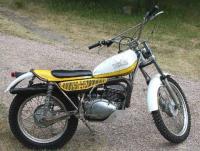
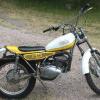
  10. Hi fellows. Co-owner of this Fantic 240 (AKA the dad) here. No spark on her. Isolated kill switch, coil bracket well grounded, cleaned terminals, examined spark plug wire. It’s equipped with a Dansi 110445 coil which may be suspect. With our Ohm mètre we get no continuity across any of the 3 terminals marked “C, G or ground”. There is also no continuity between the aluminum housing and terminals. No continuity at all from plug connection to any of the terminals. Should there be any readings across the terminals? If so what are the Ohm readings? I am wondering if the Dansi coil is kaput. Finally, any good replacement options? thank you.
  11. That's universal. There's a few hold outs that buck the system and some willing clients that support the local shops. At least in Portland OR.
  12. True the investment of a good impact hammer makes the difference. After a few good whacks the damper rod screw came undone. Next step is either new stanchion rods or have these rather pitted ones redone. Also new hardware and copper gaskets. Haven't seen the correct copper gaskets at the local hardware store. Any sources? Thank you
  13. Perfect. I’ll give this a try. What are good replacement washers? Since these are no longer available from Yamaha.
  14. Any pointers on safely removing the bottom Phillips head screw which secures the inside damper? Worried about damaging its head and then needing to extract the remains. Also, any device to put into the tube to secure so as to be able unscrew and later tighten a new bolt? thank you.
  15. Hi Fellows. Began to rejuvenate my TY80A front forks. I was surprised to see a Philips screw at the bottom securing the damper. I am being super cautious and hesitant to begin undoing the Philips head with a Philips screwdriver. I am wondering if I need to invest in a hammer impact driver to undo the screw or an impact wrench? Also any device I can use to secure the inside as I undo the screw and later tighten up the new bolt? I will surely want to replace the screw with an Allen Hex bolt like on my TY175C, and new washer. What would be a good washer material to use, copper, fibre. Thanks.
  16. Ok. I have to ask what manual is that in the picture? It actually looks helpful compared to the exploded parts diagrams we have. Thanks.
  17. Here’s a note from a rare guide on assembly of the 349 engine. Can anyone out there please paraphrase step no.11?
  18. Greetings Oldaz. Here is the 349 set up. Maybe this will help. Keep us posted on what you do to arm the spring. We will need to do the same soon we hope Perhaps posting a picture will help solve the issue.
  19. Superb. Nice to have a lathe. I need to look through the bin of parts to see how our pushers etc. are. Did you happen to get some PCs? Thanks for the info.
  20. What sort of refurbish work on pushers did you do? thanks.
  21. Nice work. Keep us posted.
  22. Thank you fellows. Will keep looking into the matter and play around more with it in a few days. If in the meanwhile you happen to come across and info please pass it along.
  23. Thank you. The spring and flat washer are for sure for the left side of the hub. Look forward to your response.
  24. Here’s what we have in the picture. Not sure of the fitment order since bike arrived in parts. We believe we may be missing something. In the photo the speedo tangs’ plate is backwards. The spacer in question we are unsure of its proper location.
 
×
  • Create New...