| |
-
Hi
Could be sucking in gearbox oil from a defective crank seal.
-
When starting you are mainly using the pilot circuit in the carb, so the colour of the plug, which is an indication of mixture in normal riding, is less relevant.
Check the carb to inlet manifold rubber for splits whist you have the carb off.
Have you adjusted the mixture screw at any time? Adjusting this whist the engine is running may help.
-
A lean mixture can make hot starting difficult.
Flywheel side seal leaking can cause this. I think you can change the seal without splitting the cases. Remove flywheel and pull out the seal with a small hook. I have also seen a self-taping screw into the seal used to get a grip on it. Just be careful not to damage the shaft.
New seal will tap in.
Other potential sources of lean mixture are leak in inlet manifold and blocked pilot jet.
Has it always started badly or was it OK once?
Once you have excluded all other issues you could try changes in the carb to richen the mixture to see if this helps.
PS does it hot start better if you use a bit of choke. If yes then issue is in the mixture.
-
At the suggestion of Joel Corry, I changed the shock oil to 10w and pumped it up to 200lbs per inch.
Seems to work well. Copes with the additional weight without bottoming out but is still soft enough to float over obstacles.
The 320cc engine seems to have all the power we need.
The gearing is quite high. Comes from a time of solo use when I used 2nd gear to blast through every section. Might reduce front cog by one tooth.
As ever though the machine is much better than the rider!
-
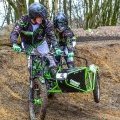
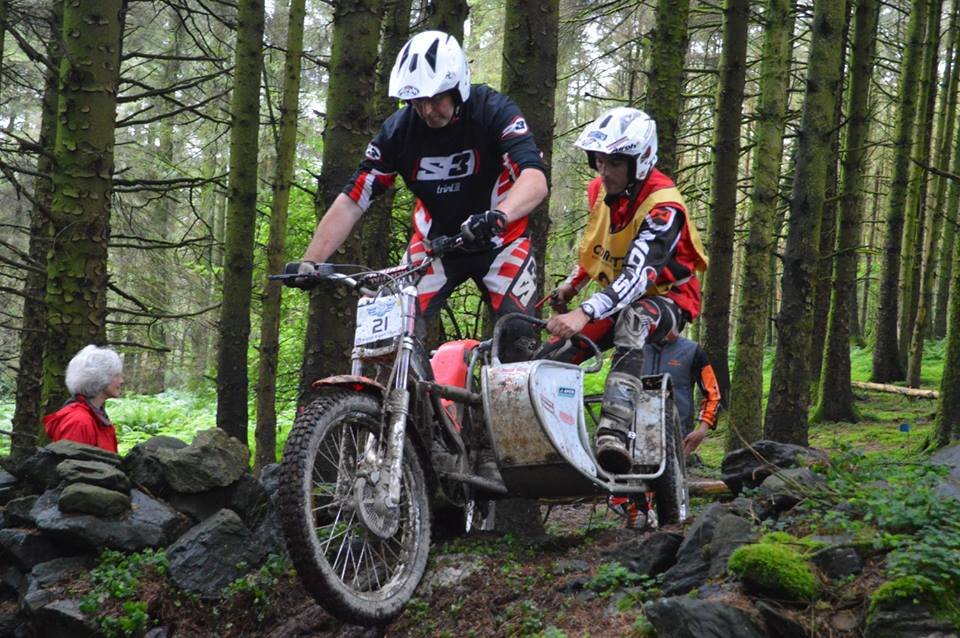
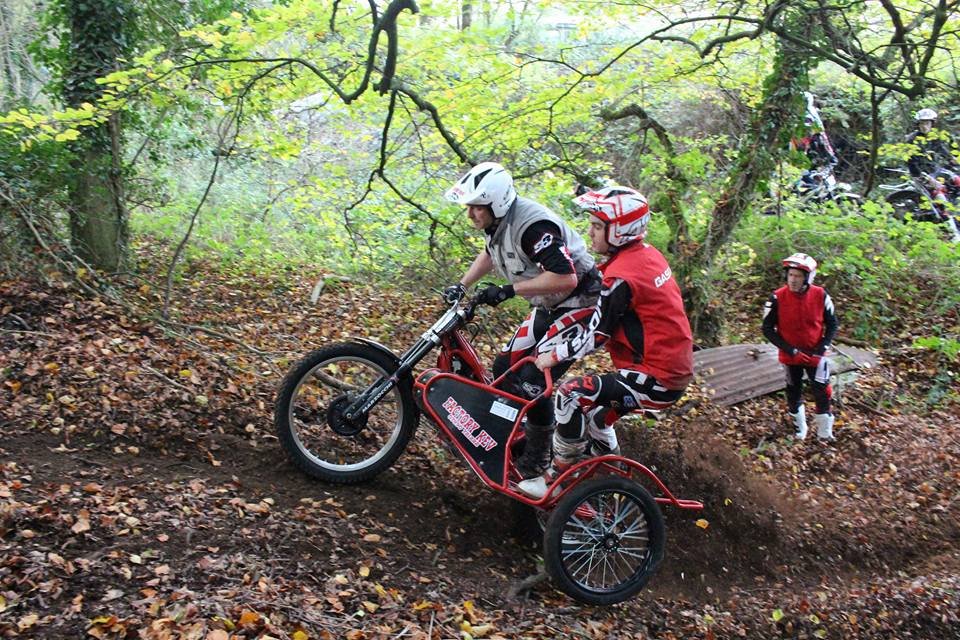
Have managed to find the services of an excellent passenger and a place to practice.
After a few sessions we have managed to gain some control so at least we can now make it go in a straight line.
Still looking for some events to compete in.
-
To get at the valves you are best to tilt the engine forward.
To do this you need to take out the lower front mounting bolt and remove the two side struts. They say you can move the rad. to the side out of the way but I found it easier to disconnect it.
You need to loosen the carb clip so that it disconnects from the airbox as the engine tilts
I have a 2013 and twice "thought" I should check the clearances. However both times they were fine.
I would say, given the difficulty of getting to and measuring the gaps, unless it sounds noisy or is not running well you could get away without checking.
I have spoken to other Beta 4T riders and their experiences of checking the valves is similar to mine.
Do you have issues that lead you to suspect a valve issue?
-
Also the bolt locks the engine at TDC so is good for valve timing and setting the tappets.
-
Like arbutus I used the locking bolt when I removed the flywheel.
I was concerned that it might not be strong enough for the job so use a clutch holding tool (the one like mole grips) to hold the primary drive sprocket as well.
Might have been overkill though as the locking bolt was good enough to hold it when I put the nut back on.
The Beta manual recommends just the bolt to hold everything whilst the engine is stripped.
-
Have discovered mine is not the only JCM outfit. There is one in Joel Corroy's JCM museum. Won the 1985 French championship apparently.
Gives me much reassurance that the bike generally, and the air shock in particular, will be up to the job.
-
Hi
Like you I am just starting.
I bought a used chair and attached it to a bike I already had. Massive amount of work, and more expensive than I thought, even though I started with a chair in relatively good condition.
As you don't have a bike I would suggest you buy a complete outfit.
It probably doesn't matter what sort it is as its bound to be better than you and your son are as driver/passenger.
A quick trip round the garden with my daughter as passenger tells me this. We struggled on the simplest obstacles. The technique is seems completely different from solos.
It is a lot of fun though, so keep your eyes on the small ads and you should find something to start with.
Good luck!
-
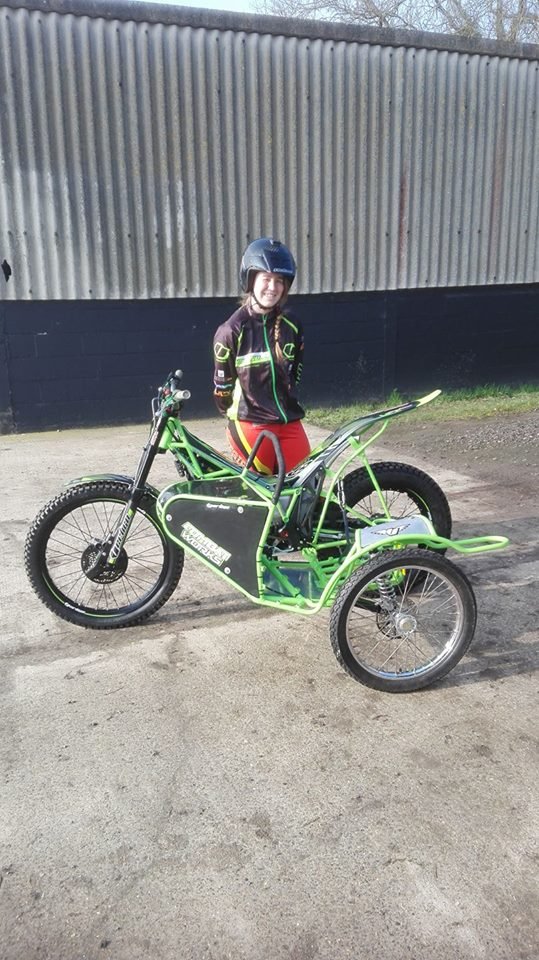
Finally finished!
Fitted the wheel with a drum brake. Had to change the bearings and drill out the brake plate to take a 15mm axle. Soldered a new brake cable which routed neatly under the tank and down to my new brake peddle.
Painted the chair frame and brackets. Wrapped the ally panels with vinyl wrap to get a white finish to match the bike.
All in all very happy with the final result. Could this be the only JCM outfit?
Have had a quick ride with my daughter as passenger and the rear shock seems hard enough.
Will try and convince some of my local clubs to include sidecar sections, so I can give it a proper test.
If you are looking to have your own outfit I would strongly suggest you start with one someone else has already done, would be a whole pile less work!
-
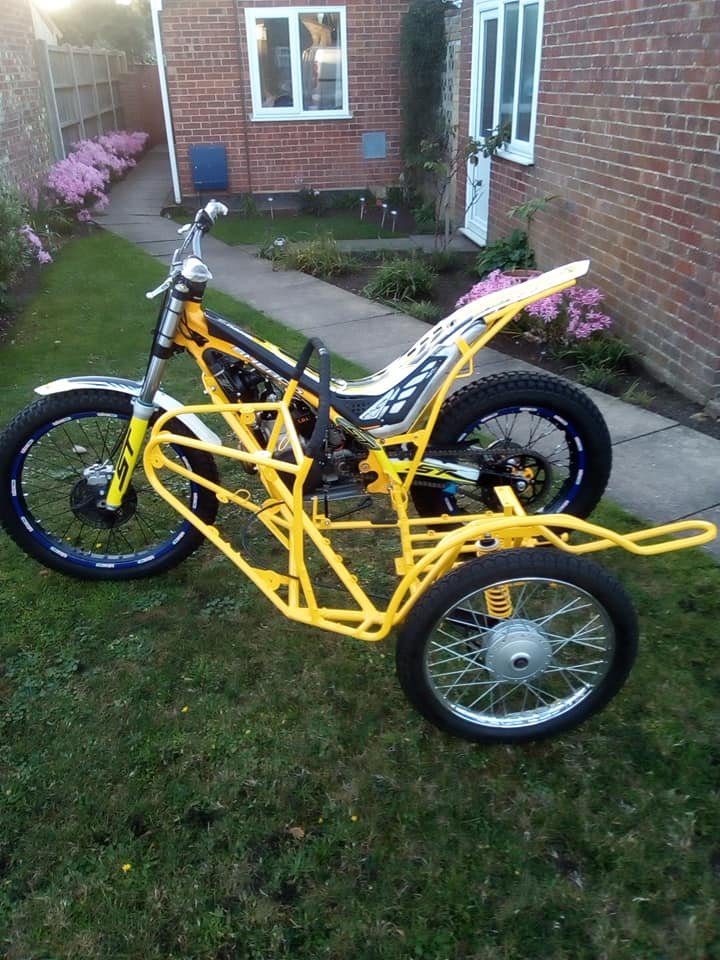
After much cutting, grinding and welding I have finally managed to get the chair attached to the bike. Am quite pleased with the result.
Fabricated a jig to hold it together whilst I worked on it, and set it up as per the measurements from p@ul250.
The headstock mount was a little tricky. I had to utilise the bolt that acts as a steering stop as one of the mounting bolts.
The lower front mount is a modified engine mounting plate. The rear is attached to the original footrest mount.
Had to replace the side bar on the chair as it was cracked and the fourth mount up to the rear subframe is to try and prevent this happening again.
Have fabricated a footrest attached to the rear wheel axle, and a chair brake pedal, which I have squeezed in under the bike swinging arm.
Have given it a quick ride around the garden with a bag of sheep feed as the passenger. It seemed to handle well and was huge fun.
Need to sort out the chair brake, for which I will use an alternative wheel with a drum brake, (in keeping with the bike), give it all a coat of paint, and attach the floor and side panels.
Then I just need to find a passenger!
-
Mystery solved. Not some fancy suspension just incredibly seized bearings.
A severe beating has got the shaft out but it will have to be replaced.
This simple outfit project gets lengthier by the day!
-
Have been doing a bit of work on the chair prior to fitting and am a bit confused by the suspension set up.
The chair is supposed to be a Beamish one, and is chrome plated so may well be.
The swinging arm appears to have some sort of torsion set up a bit like a trailer, but also has a shock. Is this right?
All advice much appreciated.
-
Mark, did you manage to get to the bottom of your problem?
-
Paul
Just finalising my measurements.
Have seen contradictory methods for measuring toe-in. Can you confirm your measurements are over the bike's wheel base (i.e. distance between the axles) rather than the overall length of the bike, as appears often on-line.
Would seem more logical to me to be the wheelbase as it is the touch points of the three tyres that seem critical, but I just wanted to check.
Thanks
Stuart
-
The weep hole is located at the base of the pump housing on the cylinder. Probably obscured by the CDI unit.
As you are losing fluid from the cap overflow I think anything from the weep hole is not the source of your issue.
There is a drain bolt on the front of the cylinder it is best to keep this slack when refilling as it allows any air to be purged from the engine waterways. Fill till fluid comes from the lose bolt then tighten, and complete the fill.
If system is full, pump, fan and thermostat are all OK then I would try a replacement rad cap. Think they are the same on all EVOs so could borrow a known good one and see if it helps.
Is fan spinning at the correct speed (should be just a blur when running)? I have seen some threads here when people are experiencing overheating due to slow fan caused by low voltage.
After that perhaps consider crud in the rad waterways (flush with a hose). Blowing head gasket (although you would expect to see oil in the coolant with this).
Start with the cap!
-
Have refilled and pressurised the JCM shock as advised. The rear suspension is now extremely stiff, so will give it a go fitting the sidecar and see how I go.
-
I fill up till it overflows with the front wheel lifted. I'm sure some comes out as it gets hot but after getting up to temp if it continues "burp coolant" its either getting to hot or the cooling system is not getting correctly pressurised.
Could also look at the simple things. Is the radiator clear from debris, is the fan spinning at the correct speed, is the radiator cap OK?
There is a weep hole in the barrel near the pump. This allows any coolant that gets past the first pump seal to escape without contaminating the oil. Are you seeing anything dripping from here?
-
Spoke to Joel Corroy (who designed and manufactured JCMs) about fitting a sidecar.
He advised that if I changed the shock oil to 10w and pumped it up to 15Kg/cm2 it would be suitable to take the extra weight.
Will give this a go before investing in a new shock.
-
Fantic240motor what type of impeller upgrade did you get? Have seen something for a 2T but not a 4T.
Mark, check your fan is running the right way round (should draw air front to back). When I first got my 4T it spilled coolant and I found the fan had been wired incorrectly so it pushed air the wrong way. I solved by switching the wires over in the connector under the side panel.
Now never loses a drop and I use a pretty standard coolant mixture.
Also might want to check the pump shaft whilst the pump is apart. Mine had scoring round the seals when I took it apart.
-
I lost the 90 degree fitting on my Evo and replaced the breather with a one way valve on a short pipe (easily available on line).
I found one of the fittings from a bicycle pump flexible hose (the old fashioned ones) screwed into the hole in the top of the cap. Used a small piece of hose to get the right ID for the new breather.
Has worked fine ever since.
-
Have managed to sort out the frame mounting points, am now looking to attach the chair.
Don't have any welding capability myself so am looking to get everything set up in a jig and then get someone in to do the final welding.
Less luck with the rear shock though, even at maximum pressure the JCM shock was not up to the task, so need to source an alternative.
Anyone have a spare shock they are not using? Solo would do as I could get a stiffer spring, but would consider anything.
The idea here was to source a used chair and attach it to a bike I was not really using to produce a cheap outfit for a bit of fun. So not looking to spend more than the whole thing is worth on a trick new shock.
Have to have a look and see what is available on a well known auction site.
-
There is a connector on top of the rear of the engine. Best to remove the exhaust to get at it.
Might also be worth removing the flywheel cover and giving inside a through drying.
-
Thanks for the advice.
Modern sidecars appear to have very little in the way of mudguard or passenger seat. Appreciate that there is little sitting down for the passenger, but are there some other practical reasons for this?
|
|