All Activity
- Past hour
-
Thanks a lot! Yeah, I tried to "open" the mounting brackets a bit by hammering a round piece in but still won't go in freely. I think I'll remove some material from the casing as the frame side brackets aren't exactly ultra-thick... So I'll need a different intake manifold? Might probably find a silicone one on Amazon, maybe... but my priority is to see if it has spark and runs. If it works I'll gladly put some work into it, but due to my previous bad luck I'm a bit skeptical
-
The centre cases are all the same casting so are interchangeable. The reason the ignition cover might look different is because the rear most part sometimes gets cut off or modified, either to stop a build up of mud or they simply get broken by derailed chains The replacement engine is an enduro engine, the Explorer is a trials engine. The enduro motor will have a different state of tune/porting and different gear ratios. They also use an expansion chamber motocross type exhaust although your Exporer exhaust should still fit into the cylinder. They use a 32mm carb as they're basically a race engine It's not an uncommon problem to find a different engine won't slide into the rear frame mounts. You might find that the mounting brackets have been squashed inwards slightly with repeated tightening over the years. You can try puting a piece of solid bar against the inside face of one and putting a solid bar through the hole in the other and tapping outwards, then repeat on the other side to try and open them out a bit. Or just take a bit off the engine to enable it to slide in
- Today
-
Well, the original Explorer engine turns but it takes a lot of force... probably a seized bearing on the bottom? Also not sure the Motoplat works, as it requires 500rpm to make a spark and there's no way to make it turn that fast as is. It's been outside for years, I think, so rust might be the issue... and the reason for being there might have been a broken Motoplat unit (no spark)? No way to know for sure. The "new" engine was stored on a shelf with the inlet taped, and the guy told me it was bought from a reputable seller, so IN THEORY it should run. I plan to make the engine brackets slightly thinner as they're massive, while the frame brackets are already thin. I'll have to measure them, but as I said I'm now worried other parts might be different and I might find out the hard way.
-

1973 Ossa Explorer - issues with engine transplant
konrad replied to Triad's topic in Classic Trials
What is "semi-seized" on your old engine? Can you make one good engine out of old and new parts? -
Yeah, I plan to measure the old engine "brackets" with a caliper and compare them to the ones of the "new" engine. I didn't pay attention to it before buying, silly me, but from the shape of the right side cover I'd say it comes from the enduro version... who knows what other differences there are. The carb inlet is bigger, can only hope the exhaust flange is the same.
-

1973 Ossa Explorer - issues with engine transplant
konrad replied to Triad's topic in Classic Trials
Those engine brackets already look pretty insubstantial by modern standards. I would not want to thin them. How much material do you think needs to be removed? Make some measurements. P.S. It may be preferable to heat and bend the frame mounting points. In general, I try not to make modifications that can't readily be undone. -
Montrials joined the community
-
Thanks everyone for the help, I checked inside the left-hand idle hole and it looks like a small black cap has blanked it off, I suspect the mixture hole had one too, I've temporarily hot melted glue in there and it's running much better, idle is perfect now! Just gotta find carb jets base level now. Thanks again, I now have a very happy son!
- Yesterday
-
Use silicone grease on O rings to make them stick in the grooves of casings during assembly. whining noise may be the primary gear with the clutch meshing , Check the nut that holds the clutch basket/bell on is tight.
- 1 reply
-
- 1
-

-
As konrad said they are like that .This is for when the carb is used OEM on a bike that will have the adjusters on the left hand side e.g early GasGas pro 280 There is no need to plug it it is already blank , it does not matter if dirt gets in the hole , it will not get inside the carburettor.
-
Triad started following 1973 Ossa Explorer - issues with engine transplant
-
Hello guys, last year I've got a 1973 Explorer with a semi-seized engine. Managed to find another one that should be in working conditions but the owner doesn't know which model it's from. I tried putting the engine in, it looks the same when it comes to frame brackets but it doesn't fit... it's like it's slightly thicker than the stock one where the engine meets the frame in the swingarm/filter area. Also noticed the right side sprocket cover is different (longer)... any idea? Is it better to slightly file the engine bracket or the frame?
-
Reghusky, I’d suggest you use an epoxy putty to fill the hole. It’s very easy to control the application. You simply cut off the amount you need and mix it with your fingers. If you use a 5 minute liquid epoxy it could run inside your carburetor and make problems worse. I inserted a link to JB Weld SteelStik that’s worked great for me and it’s formulated to work on metals. You could use the leftover to put in your toolkit in case you break something while on the trail. The other option, if you can determine the thread, is to put a screw/bolt in the hole then tighten it down. That way it can be removed easily in the future. https://www.jbweld.com/product/steelstik-epoxy-putty-stick?srsltid=AfmBOoow4TSrJyoiKEz1T--jEoSYMv0MvMKrvs4AjsApeWY9MXnM8HpG
-
That's a good idea, I was wondering what to plug the hole with! Cheers.
-
I don't see that you have anything to lose by plugging a hole that should not exist. Personally, I would try something quick and dirty like hot-melt glue. If that was successful, I'd use epoxy.
-
Yep, that's what I think Konrad, I wonder if it was meant to have a blanking plug in it which has fell out. It was running but idle was erratic. Piston, rings and crank seals have all been done.
- Last week
-
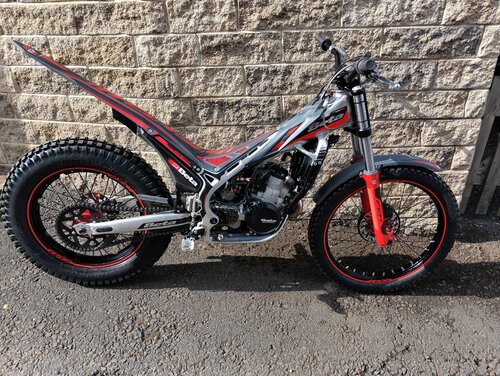
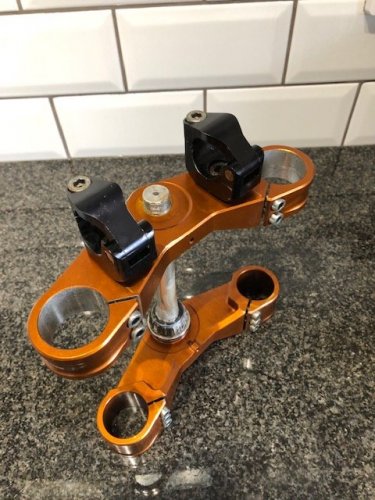
A first session on this bike. Wheel maintenance: new bearings/cleaning/polishing hubs/tire/deglazing discs/new sprocket Steering maintenance: new bearings/seals/polishing Replacement of the GasGas front fork with a reconditioned Paioli, 10x better looking and quality. Fabrication of the spacers that match the wheel. Replacement of master cylinders and hoses, new caliper, brake pads. Renthal 5" handlebars, grips, anodized clamps, anodized banjo bolts, throttle grip, new levers. I present to you the new white fairing. It's a very rare fairing. I had it shipped from the United States. It's marked JT32 and differs from the JT35 in the absence of a bike computer on the tank and in its very bright colors. Indeed, the photos are misleading. The red you see for the lettering is neon pink!! On the JT35 it's red with touches of neon pink. This one is MEGA FLUO PINK!!! It's magnificent, it's totally fun and typical of the era. I love it! The reminder with the purple anodized parts matches very well. The look will evolve; it's not definitive, but it's just a preview.
-
hello Sam, £1000 - £1200 for the pair? Let me know if you are interested, Steve.
-
Guessing konrad refers to part 11 and associated bits 👍
-
Typically, the unused side would not have been machined. If it was like that from Day-1, the engine would have had a massive air leak and never worked properly.
-
Yes. Yamaha used that on some conventional carbs. Could be a torn diaphragm or gummed up. Suggest you disassemble and inspect/clean.
-
For all intent purpose that would be a tiny mechanical fuel pump that activates when the throttle returns to idle position. No such thing is shown on the diagram you attached. & If the bike runs well you really should not be messing with the jetting, but 🤔 if changing the jetting is simply moving the e-clip on the main jet needle I think I would try that.
-
In addition to the diaphragm for the slide, the carb has a diaphragm with spring on the side. On a CV carb diagram for a different bike, I see something similar identified as a coasting enricher. I think I have also seen something called an anti backfire valve on other carb diagrams. Could that be the culprit? Is the purpose of such valves to prevent a pop? The bike runs well so I'm reluctant to change jetting. MK-BSR33-79-Detail-Sheet-copy.pdf
-
Yes, I agree it looks like the casting is made for both. It definitely goes from outside to inside, I thought the unused side would be blocked or capped. I wondered if anyone had the 125 and could confirm or deny?
-
HOOKYH started following Evo noise (clutch)
-
Hi, have quite a loud whining noise that comes and goes with clutch engagement. When its disengaged there's no noise at all. Had the clutch apart and all seems fine, did wonder if it was the basket bearing but there's no play. Haven't changed oil type (nano trans) but has fresh oil. Any suggestions welcomed. While im here does anybody have any tips for putting the clutch cover o ring in place? Has literally just taken me longer to put the cover back on than take the clutch to bits, inspect it, clean it and reassemble it! Edit: 2012 250 2t
-
I'm used to the PHBL, but your VHST looks like this photo: https://www.speed-parts.nl/carburateur-dellorto-vhst-26-mm-bd-flat-slide.html The casting probably was made that way so it could have mixture and idle screws on either side. You could test with compressed air.
-
reghusky started following Beta rev 3 125 carb issues
-
Hello, I wonder if anyone can help please? My son has a rev 3 125 2006 with the dellorto VHST 26 carb. I have taken the carb out to clean it and check jets, it has a threaded hole here which leads straight into the carb bore, should this be blanked off? I can't believe it's right to let unfiltered air straight into the engine?! Also does anyone know the standard jets/needle position for the dellorto? Thank you.
-
Recent Topics
-
Classifieds
-
TC News Feed


