| |
-
Thanks for the clarification, Brian!
That settles it for me, it's as I thought, dab/rotation= 1 point.
Jon
-
Nice site. Intuitive and easy to move around in.
Jon
-
My guess is that the slightly longer intake, with the added stored volume of air/fuel, acted as a sort of small "boost bottle", allowing the engine to draw just a little more fuel at the start of the intake phase/opening throttle. Interesting side effect and it would be fun to do some testing.
Jon
-
You may need to change the jetting a little but probably not much from stock. Mainly to tune the off-idle response but you can post how the engine is running and someone here will be able to give you some good advice.
Jon
-
Beautiful cover.
Bob Ginder at B&J will know exactly what to do, he is very well-versed in all-things-vintage.
Jon
-
Lengthing the intake will have an effect of tract resonance but this will probably tend to improve lower RPM torque which should not be too big a problem. You will probably need to tune the carb as there will undoubtedly be other modifications in the project's intake/exhaust. This should not be a big problem and they big thing to remember is to try to keep the intake tube diameter as uniform as possible.
Jon
-
I was only guessing, Copey, and you are correct, the best thing would be to have a good tech guy look at it. It's always a tough game to talk about mechanical measurements, as .009" on a piston may be fine as measured in one place and not-so-fine in another. I think we can all agree that cracks anywhere on a piston are cause for replacement.
Jon
-
Here! Here!
My days of "A clean or a 5!" are behind me....
Jon, scars to prove it.....
-
Mark,
Just picked up on this and will give some info that might help (hopefully).
.009" is way out of spec. and the stress cracks are a result. You are very lucky as this kind of clearance usually results in skirt collapse and a very messy crankcase. Assuming an iron/steel liner (not plated), from the new piston clearance at .009" it is apparent you will probably have to go to an oversize piston and re-bore, not a hone, as the cylinder is tapered and you will usually not get the walls straight even with a rigid hone. A dial bore indicator will give you a direct readout of cylinder wear, if you have one.
In the newer type watercooled engines the piston clearance is in the area of .0015/.002" with a forged piston. I'm guessing that the RL is a cast piston and the air cooled engines operate at a wider bore distortion/temp range, so the clearance will be a little more (even with the lesser expansion rate of the cast, compared to forged, piston) probably in the .0022/.0024" (.055/.060mm) range (the Suzuki guys will know the correct clearance, I'm sure).
Two-stroke pistons are usually tapered and cam-ground to expand to appropriate cross section under operating temperature. 2T pistons are exposed to unusual temperature influences, unlike a 4T piston, with intake/transfer/exhaust ports having much different charge temperatures. Piston skirt clearance is measured at the lower 15mm of the piston skirt on the thrust surface, which is the front or back, not at the pin side, which will give a larger measurement and not the one you want.
Jon
-
Solid, reliable bike, good for a beginner to bash about on. As with any used bike, assume nothing has been done in terms of maintenance and service everything, especially all bearings (steering stem, linkage etc.).
Jon
-
Just rack it up to yet another of His miracles.........
Jon
-
...or ducky that looks...
-
Jon,
As far as the o-rings are concerned, although you can try to re-use them it's always a better idea to replace them. Inspect the old ones carefully for any cuts or shaved sides. You can clean then in ATF (other solvents may damage them) and then apply a light coating of grease before re-installing them.
The hose clips are reusable. Just use a small thin screwdriver to snap them off and a pair of pliers to snap them back on. They are, of course, diameter-specific and can only be used on a certain diameter of hose, unlike the worm-drive hose clamps.
Jon
-
If it was an early Pro, the reservoir mounted up high at the left front of the airbox (like the standard TXT models). You can get the springclip to mount it on the cylinder brace like the newer ones as it's much easier to get at.
Jon
-
The 02' Pro had two o-rings and a Magnesium sidecase, which was changed in the 03' model to a seal/o-ring and aluminum sidecase. The "nail" apparently is to stabilize the long spring and prevent wear to the servo cylinder tower and I'd probably leave it in there.
Jon
-
Let's be realistic here, Copey, I doubt very much that the battery-powered ones you use (with all the squiggly things and spinning tassles) would not work in this case...........
Jon
-
-
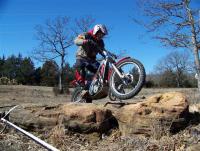
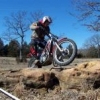
My point exactly. A dab/pivot counts as one point.
I've been watching some classic C.H. Wood Trials films from the 50's from my collection
and I would imagine that the "pivot" would not have been imagined to be a valid technique,
they were just trying to make it through the surprizingly difficult, for the type of bikes,
sections of the era.
Jon
-
....staining the walls....
This is really silly, but reading through a page at a time
really makes me laugh! It's like watching a slow-motion train wreck,
I can't take my eyes off it........
Jon
-
Another tip for sliding the seal over the upper tube:
The seal should be lightly greased (inner lips and outer ring,
which seals against the lower leg). To keep the lower lip of the
seal from being damaged or folded up when sliding it over the
tube, cut a triangle from a plastic sandwich bag (like a
three-corner hat) and put it on the top of the tube, install
the seal by canting it slightly upward so one side of the lip
engages the tube, push on the seal and rotate it on to tube.
It should slide easily on with no damage.
Jon
-
-
...was a bargain....
I'm quite sure Carl Yung is spinning in his grave at the perversion of
his word association diagnosis tool. Then again, there is a very good
chance that some post-grad doctoral Psych student sees the core of a
dissertation in here somewhere....
-
Add to the list: fork flex. If the front end is loose or misaligned, the flex may be enough to not allow the floating disk's ability to self-center in the pads.
Jon
-
"I blame Timothy Leary"----Duuuude. Have you ever looked at a section? I mean reeeeeeeeeeealy looked at a section?....
I agree, if counting a rotation as an additional point is, in fact, a new "rule", it adds an additional level of complication without providing the advantage of clarification. Trials, to me, is, at it's core, a remarkably simple, straight-forward sport and adding rules like this fails to follow what I percieve to be the spirit of what we actually do.
Jon
-
Probably low oil level in the fork caused by air in the cartridge when assembled/bled. The fork, while in use on the bike, will bleed air from the cartridge, but this will also lower the oil level in the fork and keep air in the top part of the cartridge.
I like to add oil up to about an inch from the top and then stroke the damper rod to force air out. You will feel more resistance at the lower part of the stroke at first as the cartridge fills with fluid. Be sure to add oil to keep the level above the cartridge top. When the cartridge is free of air, you will feel consistant resistance through the whole top to bottom stroke. You can then set the oil level.
A bleeder rod is a very handy tool to have and you can make your own like I do. Find a nut that fits the threads on the top of the damper rod (where the top cap goes on) and braze or weld it (I braze and machine in the lathe) to a piece of tubing.
The photos are of bleed rods to fit 5 different types of damper rods. The Marzocchi is on the right and does not need holes on the side and is about 10 inches long. The other two are about 14 inches for Kayaba, Showa, WP etc and need to be longer to reach down into the longer tubes of that type of suspension. They need bleed holes on the side as the damper rods hold fluid and it is pumped out the top but the Marzocchi's don't work that way so no holes needed.
The bleeder rods really make it easy to bleed air as you don't have to chase the rod when it disappears down inside the tube and then try to get a good grip on it with oily hands. It also makes it easy to pull back the spacer and insert the plate so you can attach the top cap.
Jon
|
|