All Activity
- Past hour
-
What happens if you give the throttle a big blip when it starts revving up? Could also be starved of fuel if there is not an air leak as Lemur has suggested.
- Today
-
Thank you for your reply. There is 499 K ohms resistance (increasing) and 504mv dc through the red and back wires (which would have originally been connected to the 9v battery)
-
A capacitor is a 2-terminal device. The third terminal is likely connected to one of the others to simplify the bike's wiring. For reference, the OSSA's capacitor is approximately 22000 uF. Most multimeters will not read a capacitor value that large. 10000 uF is a typical limit. If you connect the capacitor to your multimeter on the ohms setting, the resistance will appear small initially, and gradually increase as the capacitor charges. You can then short the capacitor leads together (discharging it) and repeat the observation. The multimeter will charge the capacitor to something on the order of 350 millivolts. Once the capacitor is charged, switch the multimeter to read volts (or better yet, millivolts). The capacitor should hold that charge for a long time (perhaps hours) but you will be able it see it slowly discharge due to the drain imposed by the multimeter. Passing these tests does not guarantee a good capacitor, but it's better than nothing and about all the DIY mechanic can do. P.S. An electrolytic capacitor is a polarized device. Operating one at its rated voltage backwards will destroy it. But when testing will a multimeter, polarity is not a concern. This is because the voltage is so low, no damage will occur.
-
Generally the capacitor is not a tremendously expensive or special part and worth stocking a spare to test or replace, the primary reason it is on there is because your bike is fuel injected and Fi needs DC power in the form of a battery and or capacitor to supply sufficient electrical power to the DC fuel pump. Symptom of a failed cap on your ride would be lack of fuel pressure not lack of spark.
-
Hi can anyone advise how to test this capacitor from a 2016 Vertigo (it’s got the batteryless upgrade). I can use a multimeter and read micro farads etc, I just don’t know the valves I should see (there are 3 pins, nothing written on the unit). Also would this being faulty cause failure to start (definitely no spark) ?
-
Sadly yes, nothing that a new engine didn't fix.
-
Uncontrolled acceleration can be caused from intake vacuum leak. ... that is where you have a very small air leak type hole somewhere between the carb and cranckcase.
-
 JP42 joined the community
 -
Hi just picked up a 1978 tr77 starts lovely and idles nicely BUT after a few minutes it will pick up the revs to almost maximum without any input without sounding dense where do i start?
-
 NobbyC joined the community
 -
Hi team, Had an issue with my TY, engine ran away due to leaking crank seals, totally leaned the poor thing out and had to stall it to stop the engine. Replaced seals and upon re start very noisey, struggling to idle and noticing movement in the head and barrel so presumIng I have stripped the head studs. Has anyone else experienced this? Cheers Rob.
-
UPDATE: 12 tooth front sprocket, JTF 1906, fits w/modification of the rubber chain guard to allow the sprocket room to spin and add 2 chain links (128 vs 126 stock). This mod transforms this bike for the better. The rear suspension is now alive; springy & lively, the bike "pops" off ledges, drops & other obstacles. The chain no longer tries to wrap around the front sprocket under engine breaking or when bump starting & requires minimal chain tension (pinky finger between the s/arm & tensioner). If this bike is just going to be ridden in small circles in the back yard or a typical small trials area this mod isn't necessary, but if you want to ride the SSDT or any distance ride like I do then this mod is a must as it gives this bike the legs it needs for travelling at speed in 5th & 6th. The only down side is first is now just low enough for me to climb the stupid steep climbs very aggressively. No more stopping to smell the flowers part way up. Two other small mods also transformed this bike. It came w/a quick turn throttle tube which I replaced w/my slow turn from my 125. Big mistake. I was having a hard time grabbing enough throttle for the long climbs & not getting into the meat of the power band resulting in failure. Since the first 4000 rpms of throttle are unusable the quick turn throttle works a treat, no more failure. Another mod was to install the S3 curve pegs which I had kept from my 125. I hated them in short order on the 125 but on the 80, which has to be ridden aggressively, they work decent. Large platform for my big feet & set back. However, the sharp set screws caught me out once already. Hopefully they dull w/time & use. For my next/last major mod I am going to find a mint low hour 2013 - 2017 KTM 85 SX & do an engine swap so I get what should have been in the frame from the start. Hopefully, better shifting & better running for the first 4000 rpms. In for a penny, in for several thousand more!
-
 guzzi323 joined the community
 - Yesterday
-
Yes, let gravity do the work!
-
I did and I’m sorry I didn’t post the solution sooner. The reason I couldn’t get fluid to flow was that the adjuster screw on the lever needed to be turned out just a little. What happened is that the piston inside wasn’t opening or closing enough to reveal the ports in the cylinder. It was sealed tight by the piston. Adjusting the lever a bit allowed the piston to move farther, into an open port configuration. if you’re having the same issue, turn the adjuster screw either in or out. Hope this helps!
-
The 250 is a good bike, just make sure you run it hot enough to burn off the excess 2t oil, or the crank case pools it, and they feel poor, performance wise.
-
No not lower.just more comfortable. Why do you need lower pegs, The pegs i brought spread the load on my boots
-
 Nevskiy joined the community
 -
Evening all I’ve recently rebuilt the engine in the above mentioned bike and it starts and runs but there is a running issue. When it’s idling it seems to hold the revs just fine but if you give the throttle a blip at all, it seems to rev really aggressively and takes a few seconds to drop back to a normal tickover. Also on initial start up if you use the choke fully open it seems to absolutely rev its knackers off . I can tell it’s a fuelling/carb issue but unsure what to look for . Thanks in advance if any of you can help Kind regards Paddy
-
You also need to remove the primary drive and the clutch. Basically everything on the primary side. David forgot to mention that. Don`t lose the small washer on the kickstart gear inside the center cases.
-
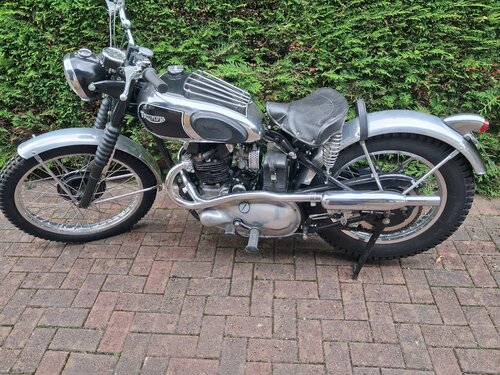
Time Left: 26 days and 9 hours
- FOR SALE
- USED
converted to trials trim ideal for Beamish style trials ,lots of new parts including 21"/18" alloy rims ,high level exhaust,full electronic ignition,mudguards,bars,levers,cables etc,1949 with a V56,000.00 GBP
-
did you figure it out? I'm having similar issue with my rear brake on 2017 txt 250. lmk how you did it please. thanks!
-
I replaced the inside of master cylinder with a new rebuild kit. came with a new spring, I don't know what it's called but the long metal cylinder thing that pushes in and out and finally the circlip, then the rubber boot. everything in there works fine. so when you say better off with clear tube over fender, is it just a long hose connected to the bleeder screw?
-
I phoned both GasGas main dealers here in the U.K. and they said that since KTM took over the kit comes without the pin. John Lee motorcycles had one left ( MT280218009 ) so I bought that one. The reason for change was a corroded pump drive shaft but the old pin was a very tight interference fit and I thought a new one was a better option than trying to reuse the old pin although it did come out with a bit of heat and not so gentle persuasion !
-
Don't normally need hot air gun for Bultaco unless someone has used sealant on the centre gasket. gearbox output sprocket and seal spacer cylinder shift drum external mechanism shift drum indexing plunger all the nuts and screws - one screw is tricky to see
-
Trailercamp the issue you are describing is you had the lever adjustment too far in which stops the piston from traveling its full range. You fixed a 27 yr old problem?
- Last week
-
Remove the rear brake pedal comepletely. Use a phillips screw driver to pump it. You are far better off with a clear tube over the rear fender. The air will not move until the fluid is above the master cylinder about 8 inches.
-
The water pump drive pin is a solid pin, rather than a hollow roll pin. The original GG part number is MT280218009 for the pin, and the original Waterpump shafts were MT280218006 - which was just the shaft with no pin, but then in 2004 GasGas updated the part so it was delivered with the pin, this was then part number MT280418006. So check your invoice, you must have been given one of the old 2002-2003 one without the pin.
-
 trailercamp joined the community
 -
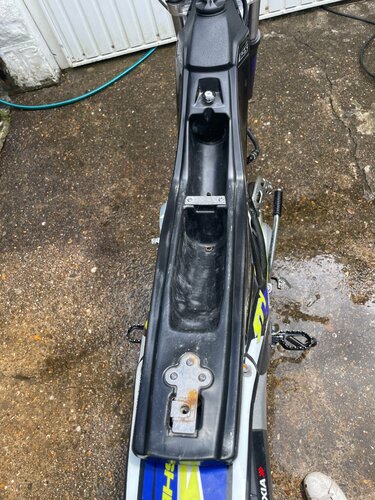
Hi, I want to share my experience, it may be of value as our bikes are from the same era. I have a 1998 GG TX270, when bleeding the front brake I found that the passage hole from reservoir to piston of the brake master cyl. was not drilled all the way through at the factory. As the brake pads wore the lever kept moving closer to the handle bar and eventually not applying enough force on the pads to be effective. I assumed air got in the line. In actuality there was no new fluid coming down from the reservoir to take up the fluid volume of the caliper piston pushout. I disassembled the master cyl. and tried to push a needle through the passage assuming it was just plugged. With careful inspection looking in the cylinder I could tell there was no passage hole breaking through. I carefully drilled and deburred a small hole finishing the hole from the factory. perhaps this could be the issue with your clutch master cyl. Of course, I had to do this the night before a trials event. It's always that way. Good luck with yours.


-
Recent Topics
-
-
Classifieds
-
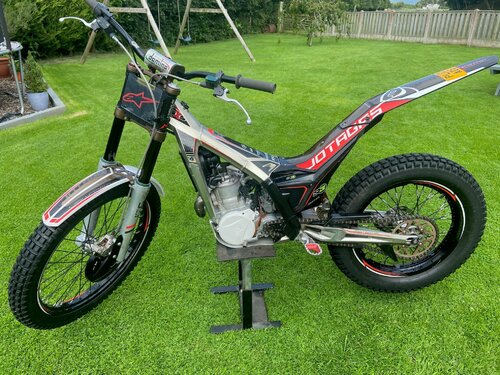
6,000.00 GBP
-
1,650.00 GBP
-
By pre65wobbler
12 days and 10 hours -
-
-
-
TC News Feed
