| |
-
Does anyone have any top tips for painting plastic tanks? Specifically I have a plastic tank for my 199 Sherpa which looks pretty tired but is structurally sound. Is it feasible to re-paint it and how do you make it stick?
-
Hi Eddy
Posted then found this on my drive, hope it helps
Penno
Very often on all Bultaco's - people buy clutch plates etc - when it is usually clutch adj that is incorrect.
Not sure which manual you are using ( bin is best place for most of them)
One problem I have found over 30 years of adjusting them is that it is best to go the whole hog - adjust and maintain whole clutch mechanism in one go - then thing work really well and is also lighter.
My method. May take a liitle longer - but is best.
1. I assume you have already looked at plates. On yours they will be all steel - not as easy to see wear as people pretend - and frankly although I have sold a lot - not as many as any other make - they are not a serious wear item as long as not abused etc.
If totally shot - the all steel plates will show real signs of wear when you look at them - but next steps will confirm it anyway. If you do find they are very worn - obviously you can but new ones - or if cash is tight - you can go over each one with a centre pop - but do it in a surface plate - and do not go mad.
2. You need to disconect all the cable and mechanism. By far easiest method is to remove the timing side cover. Remove the clutch plates from other side by undoing the nuts - or if you have the post and pin hub centre - compress springs and remove pins. There is a special tool - but you can easily make one.
After removing plates, remove what I call clutch mushroom ( about 40mm with flat head )
Remove clutch rod - by pushing out from either side with small screwdriver etc. CARE YOU DO NOT lose clutch ball.
Now is a good time to clean out the centre hole in the gearshaft that the clutch rod runs in - they tend to rust/crud up and a good clean with WD 40 - while working the clutch rod back and fo - or better still a similar dia piece of rod. Carefull if you are tempted to put a piece of rag in there you do not get it stuck.
3. Replace Clutch mushroom into hub on clutch side.
4. Re- place plates.
5. Check clutch thrust bearing is in place on outer clutch/spring retainer plate. Before you do this slacken of adj nut ( it takes 21mm socket) so that you can easily turn adj screw in centre of plate.
Use a little grease to hold thrust bearing in place when you put on outer plate.
6. Replace clutch cups and springs. Good idea to check no-one has put an odd ( short)
spring in here.
If you have post and pin - you have no control on spring tension - just compress spring - with dished washer on top and replace pins - care - or they fly accross workshop - this is why special tool is handy.
If you have threaded clutch hub - several methods really.
I - bottom springs - using a tubalar spanner - but when I say bottom - do not go mad or you will shear the threaded part. Just turn nut until it feels as if it does not need to go further - then slacken each one 4 complete turns. easier to count if you have a rod through your tube spanner - but easy enough whatever you do. This will usually leave about two complete thread showing at the top ( I mean you can see two threads on top of each clutch nut. If you do not fancy the bottoming method - you can just go to two complete threads showing in first place - but I prefer to bottom them.
You have not replaced any clutch rod/ball etc yet
7. Now you can find out if it was an adj problem or plate wear - as without rod and ball etc - and with the adjuster screw turned out half a turn from full in ( so it does not actually touch thrust bearing)
You can replace k/start lever and test. With your hand you can leave the timing case off.
If you are going to really test it - and need to kick it - best to but timing case back on as you are not so likely to bend k/start shaft. You can leave it off - but kick carefully - do not jump all over it!
You still have no clutch / clutch ball fitted.
No slip - your plates are OK and it is adj. Slip - plates are shot.
If plates are ok - or if you have needed to fit new ones - you can now carry on adjustment.
Take timing cover back off. Carefully refit clutch ball. Refit Clutch rod. On end of rod where it enters sleeve ( sprox) gear there should be a felt washer - to stop crud going in. A small disc of piece of rubber inner tube with slit works just as well.
Good time now to remove the clutch operating arm - and really clean and grease it so it is a smooth fit in the timing cover. It is retained by a shoukdered bolt. Check that the flat on the opertaing arm has an undamaged - half ball bearing shape on it ( it often gets damaged) Clean off any burrs on arm etc - and also check that the bore of the timing case where it fits is clean/smooth. Graese and turn by hand to ensure nice smooth action.
Replace timing case. New gasket is always best.
DO NOT FIT cable.
8. Adj as follows. Your clutch arm should be more or less positioned to it is at about right angles across he engine ie about 90 degrees to line of frame - actually just back from there is best - about one notch futher back towards rear. ( no more)
On other side turn the adjusting screw in - until all the play you can feel by hand on the operating arm is taken up - and then back off a little so you have about 2mm free play. In other words you can just wobble the clutch arm a few mm forward by hand until it becomes solid. Take up excessive play by turning adj screw - but never make it solid - so there is no free play - you need a few mm slack.
Inevitabvly when you try to tighten lock nut it will go out of adj - best to use 21 tubular with srewdriver through it to hold adj screw stready- or just use 21mm socket with T bar and when ready give the t bar a wack towards front of bike! You may need a few goes to get this right. Experiment!
Object is that you can move operating arm - by hand just few mm back and fo without feeling solid.
Absolute - no cable fitted. Final position will be clutch arm pointting back a little from halfway position. If you need to move arm take off spline and re-position- but do not have it more than a little further back than just past halfway.
Re-fit cable - and adjust at h/bar lever until you have 2-3mm free play at h/bar end.
If you find you have too much play at h/bar - either the cable is wrong/stretched - or the clutch rod is worn short or the clutch ball is the wrong one. Do not compensate for this by moving clutch opertaing arm - fix the problem.
If you really wish to set it up ( but not as critical as people think) pull cluch lever in and press k/start - clutch will slip - and you will see plates turn. Observe outer spring retainer plate - it will wobble.
If you have the threaded type clutch posts - you can play at adjusting nuts a LITTLE - in or out until pressure plate runs true - then thread some lockwire through nuts etc
If you have post pin - there is sod all you can do.
This will work
-
Hi Eddie
If you search the twinshock forum under bultaco clutch there are loads of threads in there on set-up and possible problems. Thats probably the easiest place to start.
Cheers
Penno
-
Fair call Andy. I've also been trying to think if there is any other major sport in which a single family has made such a significant contribution over the years as the Lampkins have to Off Road motorcycling and particularly Trials?
-
Just think of each litre as a 1000 (thousand), divided by 80 gives you 12.5 so as already posted 62.5 for 5 litres. I run my 2003 315 at 80:1 on the strawberry flavoured Ipone oil with no problems.
Graham
-
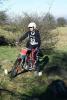
Beautiful job, keep it away from the rocks!
-
Avtur is posh paraffin for jet engines, Avgas is aircraft standard petrol for piston engines. Lightning Jet used to use something called Avpin which was particularly scary because it could burn without oxygen, just the job for your 4rt to turn it into the ultimate carbon accessory.
-
There's one on e-bay at the minute. Item No 200113745904.
-
Thanks Sutty, I'll give them a try
Penno
-
Can anyone put me on to someone who does rebores in the NW of England, specifically for a 350 Sherpa. Idea is to save a bit on postage and support local businesses.
Cheers
Penno
-
My son's 04 125 works fine apart from a couple of recent trials where he has ridden a distance between sections pulling a high gear at which point the clutch has 'disappeared' it was slipping so badly. Once its left for a short while and its only ridden in and between sections for a short distance/lower gear everything is ok.
Does anyone have any experience of this and what should I potentially be looking at as a cure?
-
Can anyone recommend a good wheel builder in the North West (England)
-
Thanks guys, I trialled the bike for the first time last weekend and had a great time, I ran it on the same mix as my lads Gasser which was 50:1 Ipone Strawberry special but by the end of the afternoon it started chuffing a bit and the plug was dry but very black. I suspect the carb (Bing) needs a bit of fine tuning on the mixture and possibly worn components.
Penno
-
What's the best two stroke oil for my 325 Sherpa(159) and what ratio do you recommend?
-
Thanks Guys and Best Wishes for the Festive Season
-
Whats the best oil for a 159 Primary Drive? and how 'draggy' should the clutch be?
Thanks
Penno
-
Thanks Nigel, I changed the float assembly and spotted that the needle had slipped up inside the slide and the needle circlip was caught on the spring which was holding it high re-seated it and its working .
-
My 159 will kick up ok on choke and run fine although it needs the odd blip to keep it going when the choke is off. However, after about a minute from starting it just dies as if there is no fuel getting through. It's fitted with a Bing Carb.
Any suggestions or tips gratefully received.
-
"Jobs a good un" thanks Guys
-
The kill switch isn't connected at the moment
-
I have recently got hold of a 159 which has been stored for a few months but was definitely a runner (and I can trust the guy I got it from). If I crank it over with the plug on the head I can't get a spark. I can't see anything obvious, the points check out with a multi meter and have tried a spare ignition coil which made no difference and have also tried more than 1 plug.
For the wiring into the 'chocolate block' is it correct that the red cable from the flywheel magneto goes to the black lead in the ignition coil?
Any advice gratefully received.
-
The rebuild continues but I am struggling with the swingarm bushes on my 350 199A. After trying a Sammy Miller kit which wasn't too succesful I have got a set of Bushes from Dave Renham. I have pressed in the Bronze outers which seemed to take more effort than I thought it should but there is no way the inners will go in without what seems like an equal amount of effort.
My assumption is that the outers rotate on the inners is that correct or does the whole assembly rotate on the spindle?
Is it normal to need a lot of effort to fit the outers and are the inners normally that tight?
All advice and suggestions gratefully received before I have to mortgage the kids to buy more bits!
Penno350
-
HiTensing
Thanks for the tip, I think I will cut my losses and take your advice
Cheers
Penno350
-
Hi Tensing and thanks for the post.
The first bike I ever 'restored' was a 4 speed sherpa back in the early seventies but I have always particularly liked the style of the late 70s 350s.
You are right about not being cheap, I bought the bike locally off ebay as a non-runner with ignition problems but it looked otherwise sound!!!. A few months later I am bringing it back from nut and bolt level with rebore, new bearings/seals, powder coated frame, new shocks, re-chromed forks etc etc. and hopefully looking forward to riding it in the very near future.
Struggle at the moment is around the swing arm, when I bout it someone had fitted ??lite bushes and everything was seized solid which took a bit of shifting. I bought a Sammy Miller kit to replace them but the nylon outers are squeezing the metal inners. Advice from SM was to 'turn down' the outer diameter of the nylon bushes but without a lathe that sounds a bit hit and miss.
Do you have any top tips on this area?
Cheers
penno350
-
Hi Guys
Resto looks good, I am currently rebuilding a 199a white frame model but I am struggling with the swing arm bushes which are a Sammy Miller replacement set. I have cleaned out the inside of the swing arm but when I fit the Nylon outer it grips the metal inner bush. Advice from Sammy Miller mechanic was 'turn down' the nylon outer but this seems a bit hit and miss as I don't have a lathe. Anybody had similar experience or provide any advice which would be gratefully received
Cheers
GP
|
|