arbutus
-
Posts
58 -
Joined
-
Last visited
Contact Information


-
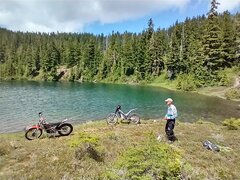
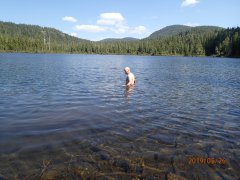
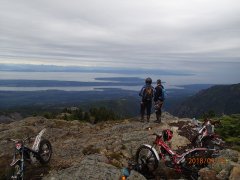
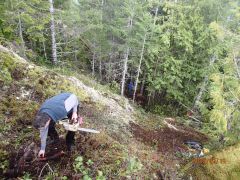
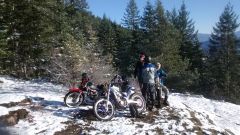
Two weeks ago I had to replace the 2 O-rings in my 2009's slave cylinder after 13 year's of service. Up to that point all I ever did for servicing was fluid replacement by adding mineral oil to the master cylinder reservoir and vacuum bleeding through the bleed screw. Because the system was entirely dry after the O-ring replacement, I filled the floating slave cylinder/piston/top hat until it had a meniscus then slid it over the stationary piston which is part of the clutch cover. The cover was off the bike and held so that the slave cylinder/piston assembly was vertical, thereby not allowing air to enter the system from this end. There is enough oil capacity in the floating piston to fill the fluid passage in the clutch case completely to overflowing. The case can then be reassembled on the clutch side of the engine. Top up the fluid in the banjo bolt hole before reassembling the hose and banjo bolt. One interesting thing I found was that the slave cylinder's internal spring and guide were assembled by the factory in reverse order to that shown in my 2009 parts book. I put them back together the way they came out, figuring they worked fine this way, after all this time. On the end of the spring that went into the clutch case, I opened up the first coil, so that it would stay inside the case's fluid passage without falling out when being held upside down. At the other end of this spring, I slightly squashed the first coil, so that it would retain the plastic spring guide for the same reason. With the clutch cover back on the engine, and the hose reattached with the banjo bolt, I now refilled the master cylinder's reservoir with Shimano mineral oil. I had the lever free play adjustment screw backed out all the way so that the compensating hole between the reservoir and master cylinder was not blocked by the piston. I expected gravity to take over and fill the hose down to the banjo bolt, saving me some work. No way. To get it started, I pumped and held the lever with the bleed screw removed, then I covered the hole in the banjo bolt with a finger, only then did I release the lever. After six or so cycles of this pumping action there was enough fluid in the hose to start a syphoning action, and gravity took over. This was a fast flow, and I had to be quick to refill the reservoir before it sucked air. With fluid coming out of the banjo bolt's hole, I squeezed and held the clutch lever, momentarily sealing the system, allowing me to install the bleeder screw. One more pump with the bleeder screw cracked open then closing it for good. Another pump with the banjo bolt just cracked enough to weep, then tightening it, and I was done. The clutch has worked fine on a couple of rides since, and I did not have to get my vacuum bleeder out for this job. I hope this procedure may help someone else. The photo is from the 7 hour test ride up Mt. Irwin (4300ft.) , down and up the saddle to the top of Mt. Hal (4880ft.), then dropping back to basically sea level. This small lake is on Mt. Hal. Cheers.
-
Trials bike trail riding on Vancouver Island
-
-
Check to make sure the little aluminium "bullet" is still in place at the top of the damper rod. The damping adjustment screw pushes down on this part. After changing oil in my 2009 300 4t a few years ago, I did not notice this small part had come out of the damper road and fallen down inside the fork. The first ride out, the wayward bit jammed into the side of the damper rod, not allowing the fork to extend. The damper rod was scored bad enough I replaced the damper. That wasn't the end of my problems either. when I received the new damper assembly, it was obvious the part was meant for the fork tube on the spring side. Bob Clark from Mountain Motorcycles whom I was dealing with, (the former Canadian Beta importer) figured out that the parts books were wrong. They had the part numbers transposed from the left to the right sides in the fork section. I hope this isn't the case with your bike , as the part is not inexpensive. Good luck!
-
My Tech T's are the most comfortable trials boots I've worn, that's going back to the '80s. They are the quickest boot to get wet feet in too, that's with melting Snow Seal into everything. Maybe I am just having bad luck, but I seem to loose the bottom buckle straps too easily when walking in brush. I was fortunate when "Pauls 320" found the last missing strap on the next ride. Spares are available from the dealers.
-
Use the crankshaft locking bolt located in the lower front of the right side crankcase. Don't remove the bolt that is closest to the oil filter cavity, the locking bolt is lower down. Remove the locking bolt, then remove the copper washer. Replace the bolt when the slot cut in the crankshaft flywheel is visible through the 8mm hole, the piston is at TDC now. The tapered end of the bolt will fit into this slot and will hold the crank and external flywheel so that you can torque the nut. Replace the copper washer and re-tighten the bolt when done. Use enough force to seal, but not enough to deform the washer. I found out the hard way that the factory recommended torque for the locking bolt caused the copper washer to become concaved, and the bolt made contact with the flywheel. It would not kick over, was the big clue. For some reason Beta cuts a 10 mm hole under the washer, before the threaded 8 mm section that the bolt uses.
-
I've noted that Mountainbrad said that he lost the freeplay in his brake, indicating not enough mechanical freeplay in the lever adjustment. After a ride, with my bike back home I noticed brake fluid weeping from under the rubber diaphragm of the reservoir's cap. No big deal, I just tightened up the screws a bit. The next time out on the bike the brakes started to drag, even with mechanical freeplay being felt. I ride in similar topography to Squamish, nearby on Vancouver Island, where we experience elevation changes of over 1550 m or 5100 ft. The solution was to open up the venting channel cast into the underside of the cap. I widened it carefully with a hacksaw blade. Now the cap vents to compensate for air pressure changes up and down the mountains, as well as keeping the fluid in the master cylinder. Even if you don't ride up mountains, seasonal air pressure and temperature changes could affect the brakes with a cap screwed on too tight.
-
Mine is doing fine a year on after the mod. I took off just enough so that it barely goes over centre to stay in the down position. In fact it caught me out recently when i reached down with my right hand to fold it up, it snapped back taking my finger with it and squashing it against the swingarm. No 2 stroke needed to make the air blue at that time.
-
With my 2017 300RR, I filed or ground the stand and mounting bracket a small amount to allow it to swing over- centre. It now stays in the down position enough to allow re-positioning the bike on soft ground or side slopes, without the infuriating habit of flipping up every time. When the ground isn't level enough, I just lay the bike on it's uphill side. The EFI allows for easy restarting with no flooding or gas pouring from vents as on a carbed bike.
-
Places I would check are the weld joining the shifter pawl mechanism to the shifter shaft, and the centrifugal auto compression release on the camshaft. Look for hairline cracks in the welding, put a bit of stress on the joint to see if a crack opens up. When I bought my bike the compression release was not functioning, a burr had developed on the flyweight component that prevented the small spring from returning it to the cranking speed position. As well take a close look at the condition of the O-ring that fits to the small spigot behind the oil filter compartment, it forms a seal to the right side crankcase. Mine had a slight tear, so I carefully beveled the mating hole in the right crankcase with a countersink to ease the insertion of the spigot. New seals might be another idea. The Jitsie flywheel puller did a good job for me.
-
Yes, I removed the primary drive gear, mine came off easily by hand. I followed the service manual in every step, except I didn't need to disassemble the kickstart gears. The crankshaft is an interference fit into it's rolling element bearings, therefore the recommended use of the puller. On the advice of a Heavy Duty Mechanic friend, for reassembly, I heated the inner race of the crank bearings to 100 C with an electric heat gun, checking the temperature with a Fluke meter equipped with a small thermocouple. An infra-red radiation pyrometer (thermometer) also does a great job. You should not need to remove the crank from the right side case to inspect/ service the transmission. I don't recognize the broken gear bits in your photos, sorry I can't be of any help in that regard. Stu, I sent you a personal message regarding the puller. Cheers, Greg.
-
I have just put my bottom end back together after installing a heli-coil in the crankcase for the crankshaft locating bolt. (2009 4t) 1 No, the W/P shaft has to come apart to allow the cam chain to drop down for head removal. 2 No, a shaft passes from one side of the engine to the other linking the oil pumps together, it must be decoupled before splitting the cases. 3 Yes, I only had to remove the kickstart lever. 4 I used a home made puller, that copied the factory part, to split the cases, it worked perfectly. No damage to any parts. 5 The crankshaft locating bolt properly seated in the crank's slot does the job. This whole job resulted from a repair 5 years ago to the W/P seals and shaft. I used the crank locking bolt to hold the crank, and hence the W/P gear fixed while the W/P shaft was unscrewed. Trouble started when I re-torqued the crank locating bolt to factory spec with the copper washer. The initial hole for the bolt is larger than the screw threads used, and the washer deformed to a dome shape, allowing the bolt to contact the crank. It would not turn over with the kickstart. I knew right away what the trouble was, but as I had already buggered the copper washer, I made a new one out of sheet aluminium. My mistake was using too thick a sheet, thus not engaging enough threads, They eventually stripped out. My advise is to torque the bolt to less than the factory spec, tight enough to seal, but not deform the copper washer. Secondly, use an 8mm bolt with 15mm of thread in place of the bullet nosed locating bolt, keep it in your toolbox. Cheers
-
The pads aren't installed with the metal backing to the disc, I hope?
-
This may be too late to be of any help, but, the overall length is 0.510", and the OD is 0.232" . Mine popped out and up inside the tool I made to stroke the damper to purge the air. When I unscrewed the tool, it fell down inside the fork. Bike is a 2009 Evo 4t with the Paioli fork. Good luck.
-
I agree with Nigel, cutting coils off of a spring increases the spring rate (force required to compress the spring a certain distance) while reducing the initial force to lift the slide off the idle stop. The method I've used in the past was to turn a wooden dowel to just a bit larger than the spring's I.D. Slip the spring over the dowel by turning it in the direction that opens up the coils, then lock it in place by turning the other way. Clamp the dowel in a vise and then use a length of emery cloth pulled between both hands to remove spring material. This method slowly removes metal and reduces the chance of suddenly overdoing the grinding with an aggressive wheel. You may be surprised how fast this cuts down the wire thickness, too.
-
Take a look at the condition of the cylinder base gasket. On my '09 280, the gasket was deformed inwards under the right side transfer ports, creating an air leak. The bike was hard to start, but ran fairly well once fired up. I replaced the original paper gasket with a thicker metal composition gasket.