| |
-
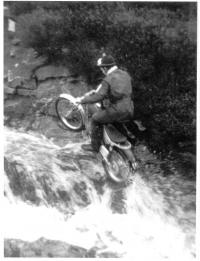
Riding along the wall @ 1:45
-
OK, there aren't any cleans, loads of 3s and the odd 5 but i wouldn't ride on those terraces. Plenty of other videos on YouTube in the same vein to link to and there's one I've seen of them riding (clean) along the top of a wall/dam about 45cm wide. Loads of natural talent. Tenaci-Wong should be signing them.
-
I suspect it's the risk of "or someone gets hurt and we need first aid/ ambulance etc" part that will decide when normality resumes. It was a major thrust of the ACU's decision to cancel events.
-
+ "Gaunt" as in Gaunt Suzuki http://www.bsaotter.com/geekies_gizzmo.html and Gaunt Jawa https://www.BLOCKED LINK.com/gaunt-jawa/
-
I just watched American Pickers S15E04 and look what they found in a barn...
-
When I removed the bearings from my Mk2 Pursang (similar engine) I put the cases open side down in my mother's oven and they came out by gravity with a resounding clang when the cases were hot enough. Mother was not too happy with the smell of Roast 'Gunk'.
-
Had an email from ACU today. It's been decided and the point about the risk of putting pressure on medical services is well made IMO, in addition to the risk of transmission.
In the meantime, before events resume, I will be ordering parts from the various companies who supply goods and services to motorcyclists to fettle my regular ride, build up a couple of projects, replace some riding gear and stock my spares box. Support for the suppliers during this period of suspension will go some way to ensuring they are still trading when events resume.
-
CMSNL Netherlands. They have a pattern part which fits well.
-
I suppose it depends on your age. For me, its the Kit Campeon Bultaco. I never owned one but I lusted after them when they came out. It was form following function.
-
I've seen everything from 1" square wooden pegs to something like piano wire. For my six penn'orth I'll say that I wouldn't like to fall on a 1" square wooden peg.
-
Anybody got any thoughts on flywheel effect; I assume there is a lack of? I was watching a youth rider on a full/near full size electric bike on a damp incline that gave no grip problems to monos and twinshocks of varied makes and age and while the IC engined bikes could roll off and back on the throttle to find grip the electric bike just span the rear wheel when power was applied and seemed to come to a dead stop when power was cut off. When power was reapplied again the wheel just span.
-
Some pointers:
If comfortable leads you to choose baggy, baggy is not a good idea; baggy trousers can catch on kickstart, etc. Same consideration for waterproof overtrousers.
As an aside, re catching on kickstart, if you have a Honda with auto decompression it's a 5 if you have your engine stopped by moving the kickstart.
If your legs can come into contact with the front pipe of the exhaust fit an exhaust heat shield as polyester and hot exhaust pipes make for a nasty burn.
-
I noticed a drip of water traced to the drain hole in the swinging arm. Poking around with a length of wire revealed a lot of rust partially blocking the drain hole and released several cc of water. I've squirted copious quantities or WD40 into the hole, and the hole on the other arm, and tilted the bike rearwards on the paddock stand to drain any water left in the swinging arm. I'll be taking the swinging arm off and giving the internals a more comprehensive flush with WD40 and am considering diluted (with white spirit) Waxoyl.
Anyway, something to look out for.
-
now. Hadn't realised 4 wasn't showing highlights until after Qatar.
-
I'm highlighting the crucial part of the text in red.
I think that what is missing from the discussion that is developing around the original post is consideration of the direction of and what the "driving force" x "radius of rear sprocket" (the moment or torque) is acting on in relation to the gearbox sprocket and the suspension geometry.
On a bike with a rigid rear end, does it matter what the rear sprocket size is, apart from larger ones are more vulnerable?
On a bike with a swinging arm consider the forces acting on the swinging arm through the swinging arm pivot as a function of the relationships in space between the centre of the rear wheel axle, the centre of the swinging arm pivot and the top of the gearbox sprocket from where the chain is being driven. For the time being just sketch these out for a particular bike and I think the issue is the degree to which "squat" is induced as power is applied through the driveline for a given rear sprocket radius; and the situation changes with suspension movement....and then consider suspension geometry, forces and damping....
If anybody has a reference to an engineering paper on this please post. I've tried to do my own sums to determine what the ideal is but I've done this purely out of interest; I've long come to the conclusion that I am the weak link in any rider/bike combination. I agonised for about 30 seconds about the pros and cons of 9/44 or 10/48 on my TLR200; should I have agonised some more?
Related to this do an internet search for Silk, JJ Cobas in relation to jackshaft, front sprocket concentric with swinging arm pivot.
If I used a 1964 Honda C90 motor do you think I'd get a Pre 65 Scottish entry for this? Obviously I'd get rid of the pedals. The saddle should count in my favour.
-
Edited after feedback from johnw:
One production run had white mudguards - see Pages 218 & 219 of "Colin Seeley...and the rest". It appears from the photos in this book that the front mudguard did not have an integral mud flap (neither did the VF mudguards). If you trim off the mudflap of a Gonelli guard and reverse it (so that what is then the front is more pointed) I believe you have something close to the original. I have no idea who the manufacturer of the white mudguards was/is.
Another production run batch had Black "VF" mudguards.
Incidentally, on Page 218 there are pictures of the Works RTL 240 which looks an absolute beast; seemingly a Seeley TL200E with what looks like the barrel and head of a 500!
-
On the balance of probability mini may be right...
However, tell us more:
1. Is it a Reflex or a non Reflex model?
see here: http://www.trialscentral.com/forums/topic/47707-tlr200-carburettor-rebuild/?hl=%2Btlr200+%2Bcarb
2. What is "worn" on the original carb?
I have succesfully rebuilt 2 original carbs and even the slides are as good as new (they are anodised; do not, as somebody posted, sandpaper/emery the slide if it is sticking - just make sure the slide and the bore are clean - then, if there are any high spots in the bore use Solvol Autosol or similar and lightly polish the bore in stages and clean thoroughly before inserting the slide to check)
All I've replaced to date is a float valve, pilot jet screws, needle and needle jet. Float height is critical (The TLR250 shop manual (same carb as TLR200D) says 20mm; but do you measure that from the bottom of the groove for the bowl seal or the top of the groove - anybody know?) NB the Clymer manual suggests 24mm...which would suggest a tendency to run lean? - I need to find my notebook to see how I measured it.
Avoid non genuine parts - see my other post.
If you have a Reflex carb you can rebuild it to Non Reflex specification (needle and jets)
Standard TLR200D specification is:
Main Jet 98 Pilot Jet 40 Needle circlip: second groove from top Needle ID: stamped 2FA Slide: 166C 2.5 (same slide for non-Reflex and Reflex)
Starting point for air screw is 1 7/8 turns out
I did make a post to see if there were any other recommendations from standard but no replies (there are other posts suggesting slightly larger jets but no consistent message. I have found that the standard TLR200D specification makes the bike work well for me)
If you want the part numbers I could post them later. Gordon Farley's should stock them...
Both the carbs responded well to an ultrasonic clean; ideally buy a decent Ultrasonic Cleaner with a heater; the sort about the size of a Tower PC with a case in stainless steel and a deep bath. I've only used water with a drop of detergent in the bath but before U/S cleaning I have used carb cleaner aerosols (the sort with a pipe to fit into the ends of the galleries) to blow through the galleries in the body and have also soaked the jets in carb cleaner. Carb cleaner is nasty stuff; use it somewhere well ventilated (or outside but don't get it on your car, pets etc) and into a bucket/open drum and wear rubber gloves and goggles; be very careful using aerosol cleaner and/or blowing out with an airline - you could be squirting into one end of a gallery and it will come out the other end pointing at your face....
If the old carb is terminally worn out for some reason then find a good S/H one to rebuild.
If you persevere with the new carb
have you visually checked inside the carb throat to see what is happening when the choke lever is actuated?
Is the airfilter new/clean/porous - old foam can congeal and restrict air flow.
Is the float height set too high so it tends to run rich and thus the choke has no effect?
Otherwise with a pattern carb it is difficult to find a good starting point for setting it up there are too many combinations and permutations of jet size (stamped versus actual), needle taper shape/dimensions, needle position (the circlip might be in the "correct" groove but if the needle is a different taper and the needle jet is not right...) and then add the impact of quality control regarding the internal drillings, finish and cleanliness.
Take it apart and compare the components with OEM parts. A fellow rider of a TLR eventually got a pattern carb to work by using the pattern body and mostly OEM parts; there's no reason why it shouldn't work if everything is the right size and in the right place and the galleries are clear and the internal plumbing is as it should be, but that's a big "if".
-
I posted an enquiry about preparation of Honda Tlm200 and Tlm220 motorcycles for Trials on the Honda Forum but no response so far.
http://www.trialscentral.com/forums/topic/54936-tlm200-and-tlm220-preparation-for-trials/
Can anybody on this Forum provide advice? Gracias Esteve
-
Part number is 23221-437-000. Still available new from at least 2 popular stockists of NOS Honda spares. 437 is the model code for an XL125S.
-
Here is what I know:
1. Photos below and the measurements I have made are OD = 117mm (at the outside edge; the back of the flywheel steps up to a larger OD =122mm), ID = 86mm, internal depth = 40mm (from highest outer ridge to inside surface) - the flywheel is part filled with oil as I had turned the engine on its side and removed the cover. The maximum height from the centre boss is 168mm (from the edge is 165mm). The rear of the flywheel is stamped:
KOKUSAN JAPAN FP5175 4E
In a document entitled "On the problem of the XR200" (and#169;Nov 2002 Vincent Crabtree) - Google it - it states the Reflex Flywheel ID is 86mm and the OD is 126.8mm but the ID of the cover at the edge where it mates with the crankcase is 124.5mm which isn't consistent. In the same article it lists the weight of a Reflex flywheel as 2.4kg (I cannot confirm this) and the TLR200 as 2.85kg (my scales show 2.845kg)- . The article is however very interesting if you are interested in Honda singles of 100 to 250 cc based around the same design.
TLR200D and TLR250F stators are shown in the parts books as having 4 poles for windings; the Reflex has 8 poles. In the image above you can see the 4 poles but there are only 3 windings on this stator; the engine is an ME07E but of unknown provenance. Perhaps the absence of windings on one pole is because the TLR250F does not have a battery?
TLR200D and TLR250F only use 2 mounting screws (at 1 o'clock and 7 o'clock in the picture above) for the stator compared to 3 on the Reflex. You can see a screw head at 4 o'clock but that screw secures the wiring harness. The empty 4th hole in the stator is just that, an empty hole; there are only 2 stator mounting points in the side cover. The stator is stamped '4L' (or 4E?) by the screw at 1 o'clock.
N.B. the image of the cover and the stator is inverted; when I removed it I turned it over to photograph the stator so the top of the case in the image would be the bottom when mounted - in other words the pole with no winding will be at the bottom when the case is mounted on the engine.
3. No, 3 screws for Reflex and 2 for TLR200D and TLR250F. Below are images for a Reflex generator cover; they look the same as a TLR200D/250F from the outside!
5. The Reflex flywheel is different to the TLR250's. The TLR200D flywheel is the same as the TLR250's.
Reflex models (USA) have different part numbers for Flywheel, Stator and Pulse Generator compared to the TLR250F and TLR200D (the unrestricted/no emissions equipment model with 35mm forks and alloy rims commonly found in the UK). Part numbers for TLR200D and TLR250F Flywheel and Pulse Generator are identical.
Flywheel Pulse Generator Stator Generator side cover C.D.I. Ignition Coil
TLR200 Reflex 31110-KJ2-671 30300-KJ2-670 or 671 31120-KJ2-671 11341-KR5-000 (3 screws) 30410-KJ2-670 30510-KJ2-670 or 405
TLR200D 31110-KJ2-003 30300-KJ2-154 31120-KJ2-003 11341-KJ2-000 (2 screws) 30410-KJ2-003 30510-KJ2-000/3
TLR250F 31110-KJ2-003 30300-KJ2-154 31120-KR9-003 11341-KJ2-000 (2 screws) 30410-KR9-003 30510-KJ2-000
This is a Reflex flywheel and stator:
Compare the back of the Reflex flywheel with a TLR200D's:
This is the front of a Reflex flywheel:
It appears (by looking at the headlight bulb voltages) that the electrics use different voltages for lighting depending on the model:
Rectifier
Reflex 12volt lighting
TLR200D 6volt lighting
TLR250F 12volt lighting
-
I'm happy with 10/48 as well. Also popular is 9/44 because 44 is the standard rear sprocket and 9T fronts were readily available back in the day; 9/44, or rather 44/9 = 4.8888:1 which is just a little lower than 48/10 = 4.80.
10T on the front gives the chain an easier time and the chain doesn't ride as low over the swinging arm at the pivot as with a 9T front sprocket; purist argue a rear sprocket larger than 44T upsets the rear suspension ... search for an earlier post on this....
Going to a rear sprocket bigger than 48 isn't recommended as the "sharks fin" won't cover it.
-
I'm preparing a TLM220 for the Aircooled Mono class. All recommendations from anybody actually riding one would be appreciated (versus hearsay). I've seen a few being ridden as "Twinshocks" and they seem to perform very well in terms of power and agility; I just wish I'd tracked the riders down and asked them for some details...
1. Keep the Autolube or ditch it and use "Petroil" - what ratio petrol to oil for a modern synthetic 2T oil? Any need to rejet for Petroil?
2. Throttle cable. If the autolube is ditched what is an off the shelf single run cable than can be used to replace the split type?
3. Steering head angle. Is standard OK or is there a favoured modification.
4. Front Brake pads (disc brake); any preference for make/type?
5. Sprockets. 12/42 is recommended on one post in the Forums but that would seem to be a bit high?
6. Airbox mods. The Forums mention using a Montesa 315 filter; any pictures? Other suggestions?
7. Exhaust. Is it an expansion chamber or does it need to be cut open and repacked (e.g. like a Fantic 240).
8. There seems to be a gasket/sleeve missing from the join between the exhaust and the back box/silencer; where can this be obtained - part number or substitute?
9. Is the standard back box OK or are there aftermarket ones that offer a performance gain?
10. Footrest position and height?
11. Is anybody making tanks to fit under the one piece TLM250 type seat/tank shroud?
Thankyou
-
I need to find an Oring for the intake manifold. The PO used a broken oring and sealant in there instead of putting in a new one. Always interesting to see these sort of "fixes".
Carb to manifold or manifold to carb? If its the carb side use a 2.5mm o-ring (and ID as per inner diameter of the o-ring groove)- see this post:
http://www.trialscentral.com/forums/topic/44385-tlr200-sticking-carburettor-slide/?hl=%2Btlr200+%2Bcarb+%2Bring
DO NOT USE AN O-RING THAT FILLS THE GROOVE; IT NEEDS TO BE ABLE TO COMPRESS.
The size isn't listed in the parts book as its part of a repair/service kit
If its manifold to head then the size is listed in the parts book (see cmsnl.com).
-
I have recently fitted rubber "checker plate" mat (from a popular auction site) to my van. Here are some tips, learnt the hard way:
order enough length to be able to have a flap to roll out over the back bumper i.e. keep it long and just roll out the excess when you are loading/unloading.
don't trim it to the width of the van; leave the/some excess running up the sides of the van to contain any liquid spills, mud...
remove any screwed fittings to the floor and then re-fix them on top of the mat to secure it. To make the hole in the mat (if it is thin enough) work the bolts/fixings through the mat over the hole; it will make a clean hole.
If there are already tie down points on the floor of the van it might be best to cut access holes rather than remove them and re fit them over the mat as you may not be able to tighten the fixings securely against the rubber. Radius any holes to avoid tearing; if you have any gasket cutters these are ideal, or taper/sharpen the end of a length of pipe.
if there are any seatbelt mounts in the right place for fixing tie downs get some seat belt eyebolts with a large washer/backing plate to attach the tiedowns to; some loctite on the threads will keep them in place (and the tie down itself will hinder rotation).
before fitting the mat give it a thorough wash with detergent to get rid of the plasticiser/release agent or you will have to live with an overpowering smell of rubber for a few weeks; probably not good for you either. The next time I do this I will probably stick it in a clean "wheely bin" and fill it with water/detergent for a good soak.
-
Is the TLR forward kick? Is it an ATC engine or ATC RHS cover?
|
|